I was asked if it is possible to create an application to track Microsoft 365 service-subscriptions. The requested features include:
- Add a new service for each subscription plan bought.
- Specify the billing term, pricing, and expiration date.
- Automatically count down the days until renewal.
- Review billing history and the total amount paid.
- Send a renewal reminder in mobile notifications
Using Microsoft Lists for the App
I decided to use a Microsoft List for my app and created the following columns:
- Service Name (single line of text)
- Logo (Image)
- Plan Details (multiple lines of text)
- Billing Term (Select list)
- Pricing (Currency)
- End Date (Date)
- Days To Renewal (Calculated Column –> [End Date]-Today(), display as Number)
To highlight some data, I use conditional formatting to add some red-amber-green backgrounds depending on how many days are left to cancel my subscription as follows :
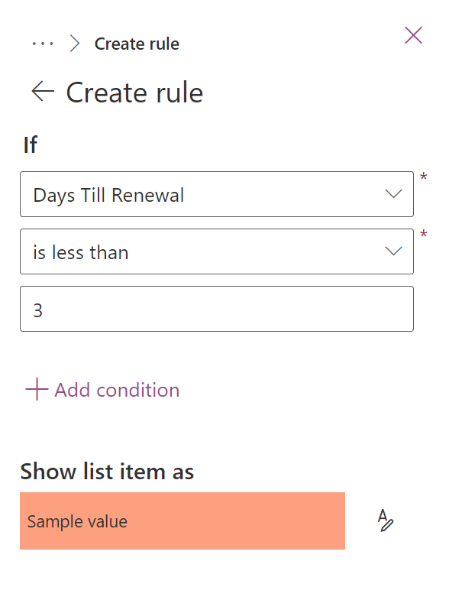
- If there are less than 3 days left to cancel the subscription, set the background to red,
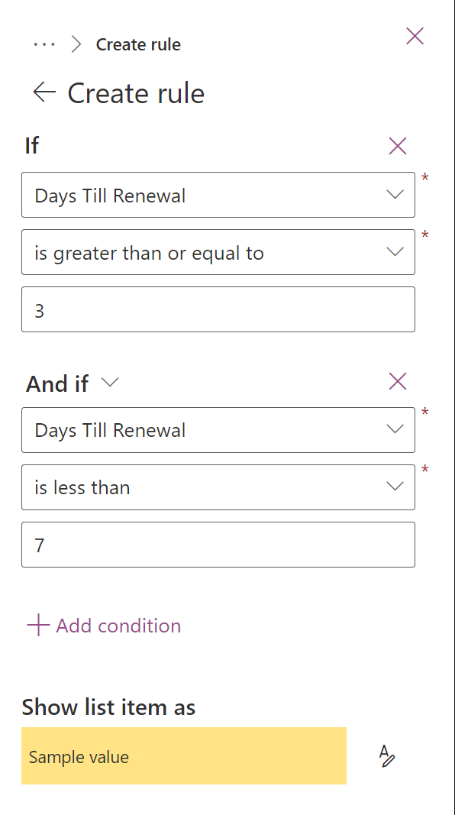
- If there are 3 or more days left but less than 7 days, set the background to amber and
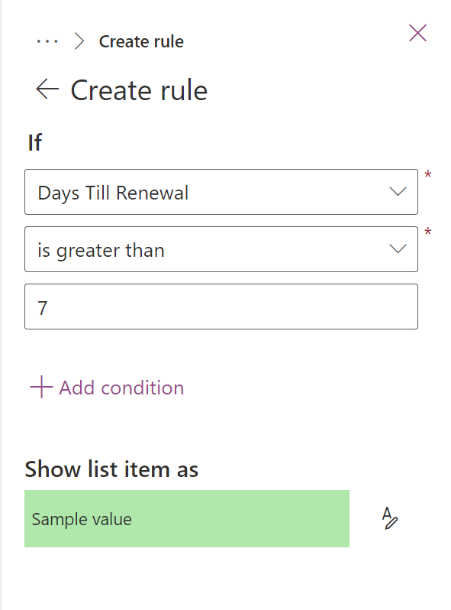
- If there are 7 or more days left, use a green background:
This is easily done by editing the settings of the relevant columns to apply conditional formatting. Select the column you want to format, open the settings, and select Format this column. Next, choose Conditional formatting and Edit rule (from the […] menu). Make sure that the correct column is selected and enter the comparison to use. In our case, we use the is less than comparison because we want to check the value of the column as less than 3 (days). Now click the pencil icon (Figure 1) to choose the color of the formatting you want to apply (red). Click Save to save the rule.
Repeat the process to create the other formatting rules. Figure 2 shows the details of the second rule.
Finally, add the third rule (Figure 3).
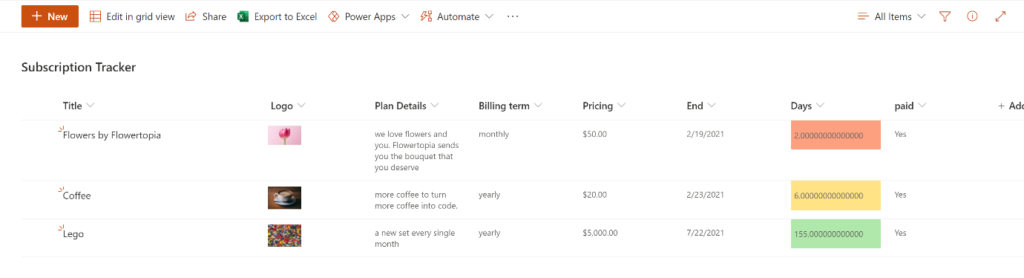
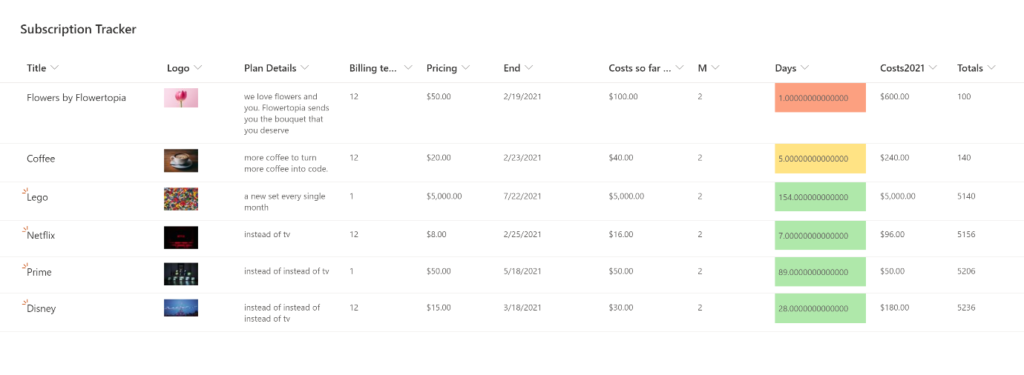
After entering the rules, our list should look like Figure 4:

Create an alert
I now want to create an alert if the days until renewal is less than 3. To do this, I use Power Automate and create the following flow:
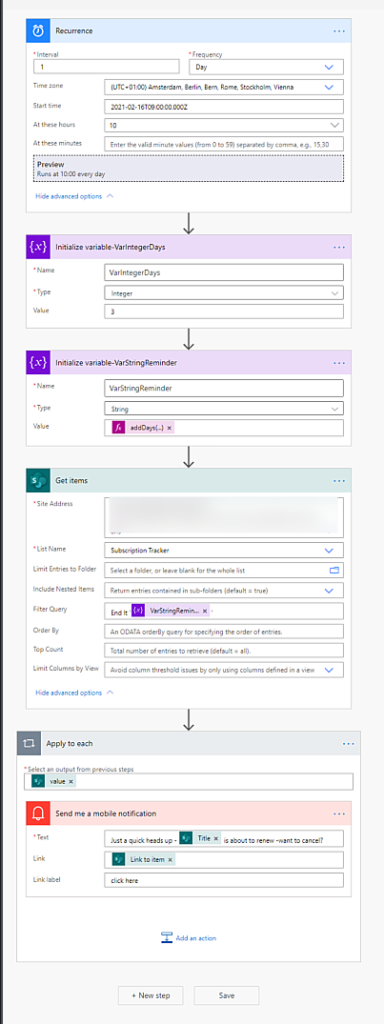
Let’s dive into the actions in detail.
trigger: recurrence: This trigger means will wake up our flow every day at 10 am (UTC+1) to execute the actions. No external event triggers the flow.
initialize variable: VarIntegerDays: To be able to adjust our reminder more easily later on (and because I like to avoid hardcoded values) I initialized a variable of type integer with a value of 3.
initialize variable: VarStringReminder: As I later want to determine if the flow should send me a reminder, I initialize a second variable of type string and use the following expression:
addDays(utcNow(), variables(‘varIntegerDays’), ‘yyyy-MM-dd’)
This means that I add the value of my first variable (3) to today and that it should return this in a date format.
Get items: SharePoint: Now we want to get the items on our list. Instead of first getting all items and then adding a condition to our flow, I find it more elegant to query our list so that we only get those items matching my query:
End lt ‘@{variables(‘VarStringReminder’)}’
Lt means ‘less than’ – which means that if the date of the end of our subscription is less than 3 days in advance, we will get a daily reminder to cancel the subscription. If you don’t want to bother yourself, you can also replace the lt with eq which means ‘equals’ so that you get this reminder only one time.
Loop and Notify
As theoretically multiple items could match our query, we want to get a notification for each subscription. Inside the loop, we can add a mobile notification, an email, a task, or whatever you like.
Review billing history – what did I pay?
To get an idea of what we already paid this year, we need to update the list to multiply the Pricing by the Billing Term and, if the billing term is monthly, multiply this by the number of months elapsed in this year.
Let’s go step-by-step:
- change the column Billing term to be a Number Column
- in this column, 12 is monthly (12 times a year), 1 is yearly.
- Create a new calculated column M, which gives you the Month of today’s date: =MONTH(Today())
- Create a new calculated column Costs so far this year, formula: =IF([Billing term]=1,Pricing,Pricing*M)
Each subscription now shows how much we paid for the current year, but we don’t have an overview of how much we paid for all subscriptions in total. Unfortunately, SharePoint does not have column totals for calculated columns, which is why we need to find another solution for that.- Power Automate to the rescue!
First, create a new column in the list called Totals

Using a Second Flow to Calculate Totals
Figure 6 shows the flow I built to calculate billing totals:
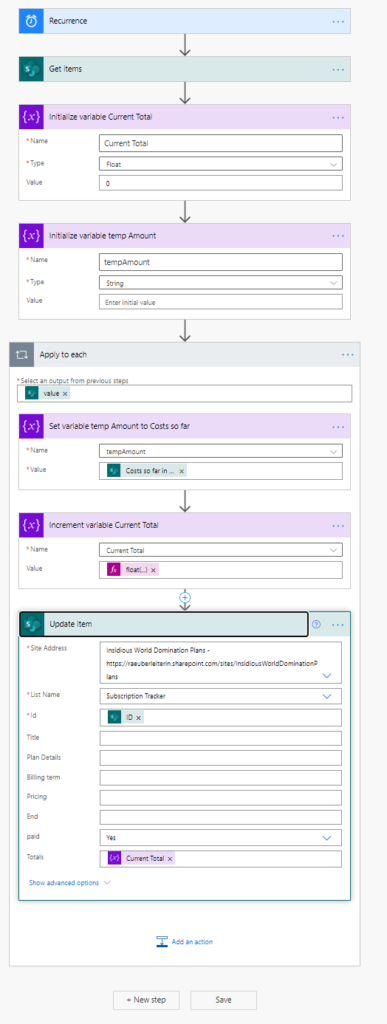
The following actions are used:
- Trigger: Recurrence: This flow is scheduled to fire daily.
- Get Items: fetches all items of our SharePoint list without any queries.
- Initialize variable Current Total: set it to type float, value needs to be 0 – we will set the value later in the flow.
In an Apply to each loop, we do:
- Set variable tempAmount: set the variable tempAmount to the value of our SharePoint column Costs so far this year.
- Increment variable Current Total: Increment the Current Total variable with this expression:
float(variables(‘tempAmount’))
- Update item: Last, update the list with the Current Total variable in the newly created column.
Figure 7 shows the result:
Conclusion
We can build powerful lists in Microsoft Lists and extend what’s available in SharePoint Online with Power Automate. Next up? How to automatically create a visual report using Power BI and SharePoint Pages.
For more information on using Microsoft Lists, check out this post: The Advantages of Microsoft Lists and How to Migrate Excel Sheets into Lists.


Thanks a lot for your explanation . Its awesome .
I was wondering can I use this flow to repeated payment . I mean I want it to repeat the reminder automatically each month without effort from my side to go to the list and modifications the date each time .
Can this be used with Sharepoint? I want to make a subscription paid-based site with SharePoint.
thanks alot of information