Data management is essential for organizations to regulate, distribute, safeguard, and maintain their data, ensuring accuracy, consistency, and availability. Good data management also supports better decision-making and operational efficiency.
In this article, I explain a method to capture and manage Microsoft Form responses: saving them into an SQL Server database and automating bulk email notifications to recipients whose details were collected from the submitted form responses. I also cover important security considerations.
Use Case: Centralized Data Management
For example, a company organizes annual conferences and uses Microsoft Forms to collect data from its attendees. The company stores this data in an SQL Server database, ensuring only authorized users can access it while tracking activity and changes for security.
SQL Server efficiently handles increasing data volumes as the conference grows, keeping records organized.
The company sends bulk emails to attendees with updates about future conferences and events. Each email includes an unsubscribe option to prevent spam.
Prerequisites
To apply this solution, you’ll need:
- A table with suitable fields created in a SQL Server database.
- A Power Automate Premium License to create the Power Automate flow. The SQL Server connector in Power Automate is a premium connector. Power Automate integrates directly with SQL Server through its SQL Server connector. While connectors for other SQL-like databases exist, their setup may vary.
- Microsoft Forms to collect personal information from participants/attendees.
Now that we’ve covered the prerequisites and use case for centralizing data from Microsoft Forms into SQL Server using Power Automate, let’s look at how the solution works and how it’s built.

Microsoft Forms
The company uses forms to gather relevant information from conference participants and attendees while ensuring the data is accurate before storing it. Here is a step-by-step guide on creating Microsoft Forms.
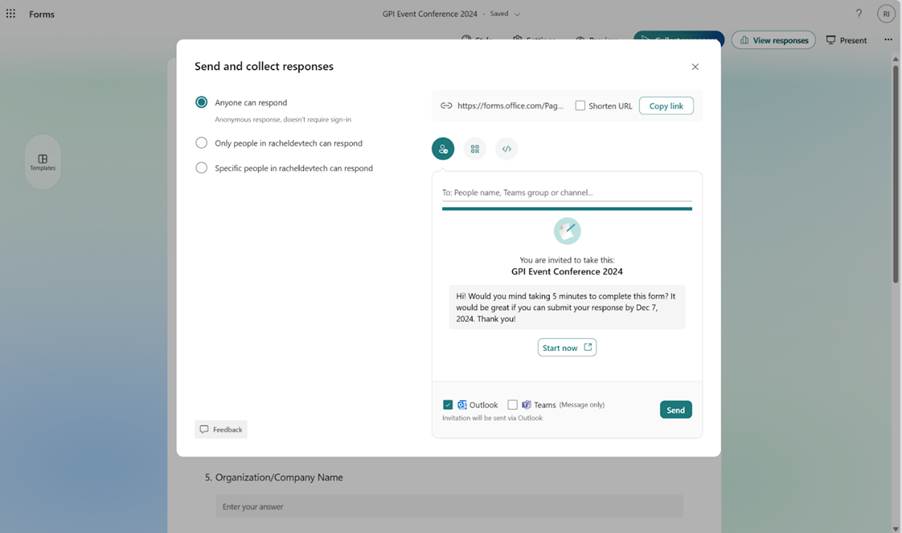
When sharing the form link on social media platforms or with individuals, ensure the link has the access permission set to “Anyone can respond” so that anyone can access and fill out the form. To generate the link, go to the form, select the “Collect responses” button at the upper right of the screen, choose the option “Anyone can respond” in the “Send and collect responses” window, and then copy the link (Figure 1).
Managing Data Duplication in Microsoft Forms
Microsoft Forms keeps a copy of all responses in an Excel file stored in OneDrive for Business, even after copying the data to the SQL Server table, which leads to duplicate data. Storing the same data in multiple places can cause inconsistencies and increase the risk of unauthorized access.
To reduce these risks, regularly archive or delete older responses in the forms once you store them in SQL Server. While Microsoft Forms doesn’t offer a built-in archiving feature, you can organize your forms using the Collections feature. This feature allows you to group and manage your forms more efficiently.
To delete form responses, navigate to the “Responses” tab of your form, select “View Results,” choose the specific response, click the three dots on the right, and select “Delete response.” This action will permanently remove the selected response from Microsoft Forms.
SQL Server Table
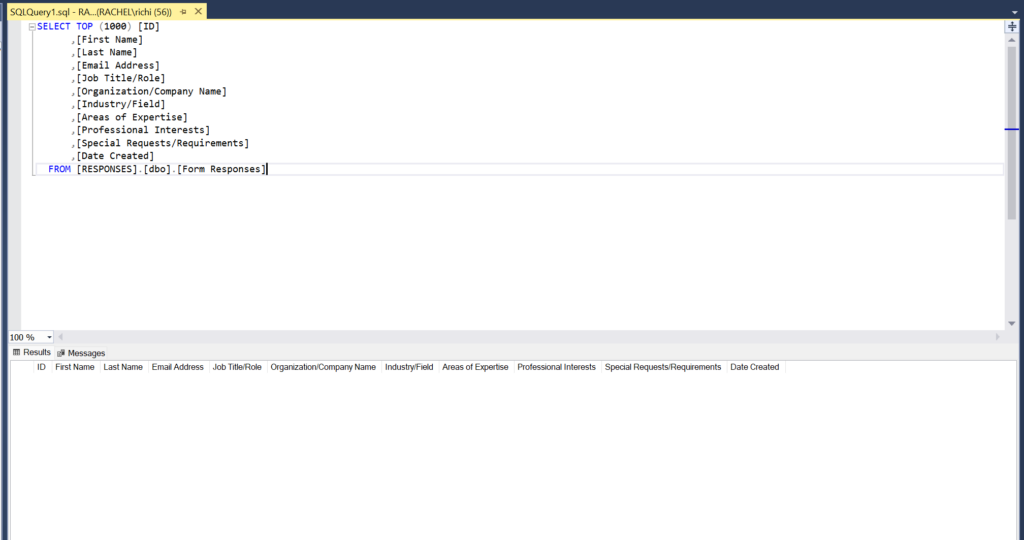
To save the form responses in SQL Server, you must create a table with columns matching the information gathered from your forms, such as first names, last names, email addresses, and job titles. This step ensures that the table is ready to receive new form responses. Power Automate then inserts these submissions into the SQL Server (Figure 2).
After creating the table and defining the columns, the next step is to automate data entry using Power Automate.

Power Automate Integration
A Power Automate flow copies new responses from Microsoft Forms to SQL Server whenever someone submits a form. The flow runs when triggered by a new submission and usually processes within a few minutes.
Another Power Automate flow handles bulk email distribution, using data from submitted form responses. The goal is to manage email communication by updating individuals in the SQL Server table and informing them about events. Ensure the flow only sends emails when necessary and includes an unsubscribe option to avoid spamming recipients.
This automation uses two Power Automate flows to accomplish the task. They are:
Flow 1: Automate form responses to SQL server management studio table.
Flow 2: Send bulk emails to SQL Server Management Studio table record.
First, determine whether a Data Gateway is needed to create the two Power Automate flows. If you’re connecting to an on-premises SQL Server, you must download and install the On-Premises data gateway from the Microsoft download site. After installation, launch the Data Gateway, sign in with the Microsoft account linked to your Power Automate account, and register the gateway by providing a name and recovery key. Ensure that the gateway is in the same region as your Power Automate environment (see Microsoft’s documentation for instructions).
A data gateway is not required if you are using Azure SQL. You can connect the flow directly to Azure SQL with Power Automate.
Select “Connections” on the right side of the Power Automate home screen. Find the SQL Server connector and enter the required connection details. After configuring the Data Gateway, you can create the Power Automate flows.
Automate Form Responses to the SQL Server Table
Next, let’s look at the first Power Automate flow, which automates saving form responses directly to an SQL Server table.
The Power Automate flow’s trigger and actions are as follows:
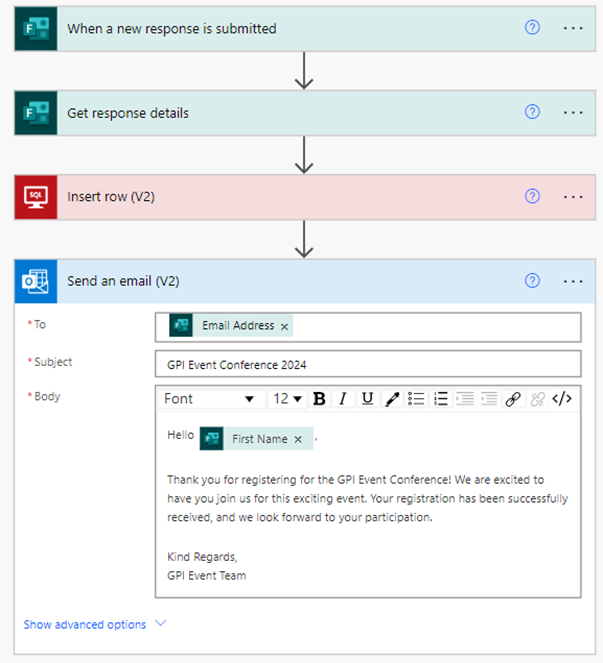
- When a new response is submitted: The Power Automate flow remains inactive until a new response in the form is detected. At this point, the flow starts and executes for each form submission.
- Get response details: Collects and retrieves every response entered in the form.
- Insert row (V2): Insert the information gathered from the form responses into the SQL Server Management Studio table.
- Send an email (V2): Send an email to the individual or participant acknowledging their submission (Figure 3).
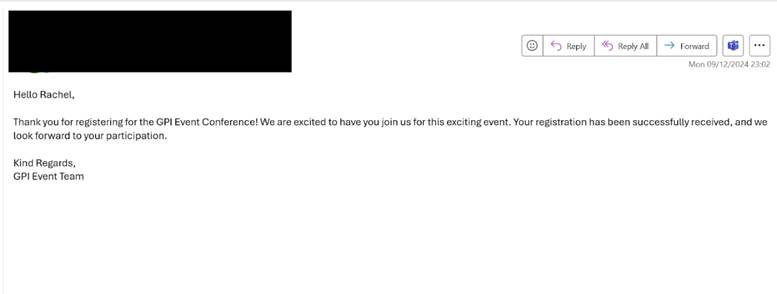
This process stores form responses generated by users in the SQL Server table and emails the attendees to confirm their submission (Figure 4).
Emailing SQL Server Management Records
This Power Automate flow is manually started by a user, meaning it does not run continuously or wait for new form responses. Instead, it starts by sending bulk emails to individuals who have submitted form responses.
The email has an unsubscribe button so recipients can opt-out. To make this work, add a column called “UnsubscribeStatus” to the SQL Server table with a BIT data type, allowing true or false values.
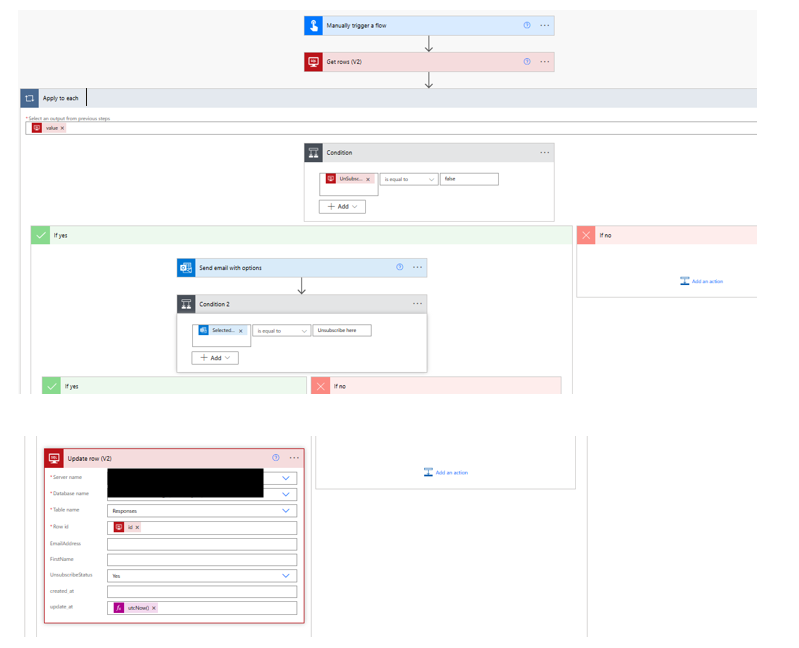
The Power Automate flow breakdown:
- Trigger: Use the “Manually trigger a flow” (an instant cloud flow) in Power Automate. This setup sends emails only when you start the flow manually, preventing automatic emails.
- Get Row Action: This action retrieves all the user’s details from the SQL Server table, including the column for the user’s name, email, and “UnsubscribeStatus” (a column that tracks whether a user has opted out).
- Condition Action: Set the condition to check if UnsubscribeStatus is false. If false, the user is still subscribed and should receive emails. If true, the user has opted out and will not receive any emails.
In the If Yes of the condition, add:
- Send an Email with Option Action: Use this action to send an email to subscribed users. The email includes an unsubscribe button, allowing recipients to opt out of future emails.
- Condition 2: Next, add the condition action after sending an email with the option action. The condition checks whether the recipient selected the unsubscribe here button in the email they received.
- If the user clicks the unsubscribe button, use the Update Row action to update the “UnsubscribeStatus” column to true for that individual (Figure 5). This action ensures they won’t receive future emails.
Another option is to add a field in the form that asks individuals if they want to receive emails and explains why they are being sent. This field lets them choose and give their consent. To store their preferences, add the “UnsubscribeStatus” column to the existing table in SQL Server.
You can also use both methods mentioned above to provide options for managing email subscriptions.
Conclusion
Integrating Microsoft Forms with SQL Server through Power Automate provides a structured way to store form submissions, centralize data management, and automate notifications or bulk email sends. This solution can reduce manual processes and scale with growing data volumes.
However, organizations must address duplicate storage by implementing data retention policies and ensuring compliance with privacy requirements. To avoid spamming recipients, they should provide an unsubscribe option and verify user consent.
While this article focuses on SQL Server, you can use the same approach with other SQL-like databases that support similar connectors.


