In this article I’m going to take a look at Azure Advanced Threat Protection, or Azure ATP for short. Microsoft has several security products in the Advanced Threat Protection (ATP) family. In previous articles I’ve looked at Office 365 ATP and Windows Defender ATP.
Azure ATP is the cloud-based version of Advanced Threat Analytics (ATA). ATA is an on-premises product. Deploying ATA involves installing an ATA server in your environment. Azure ATP is cloud-based, and requires no additional on-premises servers. You can use Azure ATP today if you have Enterprise Mobility + Security E5 licenses, or by signing up for a trial.
The Role of Azure ATP
Azure ATP is designed for hybrid environments – customers who are using Office 365, but still have on-premises Active Directory infrastructure in place. Azure ATP detects and alerts you to suspicious activity in your on-premises Active Directory environment. As a post-breach alerting system, the assumption here is that an attacker has already gained access to your environment.
Microsoft describes a concept they call the cyber-attack kill chain, based on a military model that seems to trace back to Lockheed Martin. For Azure ATP, Microsoft focuses on three phases of the cyber kill chain.
The first is reconnaissance. This is the phase where an attacker gathers information about your environment. Azure ATP detects suspicious activity on the network and against your domain controllers. Examples of suspicious activity that may be attackers performing reconnaissance includes attempts to perform zone transfers from your DNS servers, or attempts to enumerate the membership of Active Directory groups.
The next phase is the lateral movement phase. This is where an attacker tries to spread out through your network, gaining access to other hosts or other sets of login credentials.
The third phase is the persistence phase, or what Microsoft calls “domain dominance”. This is where an attacker has gathered enough information to gain control of your environment. They can give themselves access to your network for future attacks, such as by creating admin accounts or installing remote access tools on a host.
According to Microsoft, each of those phases are similar and predictable. Clever attackers can compromise a workstation or a server, completely undetected by traditional antivirus products. But their reconnaissance, lateral movement, and persistence activity can be detected due to recognizable patterns.

How Azure ATP is Installed
Azure ATP uses data from sensors, known as Azure ATP Sensors, that are installed on your domain controllers. The ATP sensors monitor the domain controller network traffic for signs of malicious activity, as well as other security risks such as connections made with weak or insecure protocols. The ATP sensor automatically monitors the event logs of the domain controllers as well, and watches for suspicious activity against sensitive accounts (any accounts that are members of high privilege groups such as Domain Admins).
If you don’t want to deploy the Azure ATP Sensor directly on your domain controllers, you can instead deploy the Azure ATP Standalone Sensor on a separate server. The standalone sensor monitors traffic that you direct to it by using port mirroring on your network switches.
You can also use RADIUS account from your VPN server, syslog information from security servers, and Windows Event Forwarding from domain controllers, so that the Azure ATP Sensor or Standalone Sensor has full visibility of your network activity.
Getting Started with Azure ATP
Azure Advanced Threat Protection can be found in the Admin centers section of the main Office 365 admin portal, or by visiting portal.atp.azure.com.
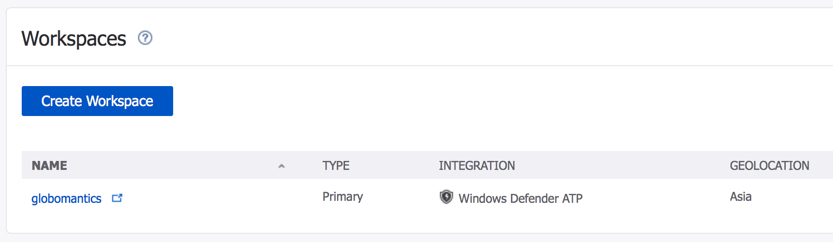
Azure ATP uses a concept of workspaces. A workspace is associated with a single on-premises Active Directory forest. Right now there is a limit of two workspaces per tenant. When you create a new workspace, it gets a name, and then you can choose whether to make it the primary workspace. The primary workspace is the one that you can integrate with Windows Defender ATP. If you have a single Azure ATP workspace then obviously you will just make that one the primary anyway. You also need to choose the geographic location for your Azure ATP data to be stored.
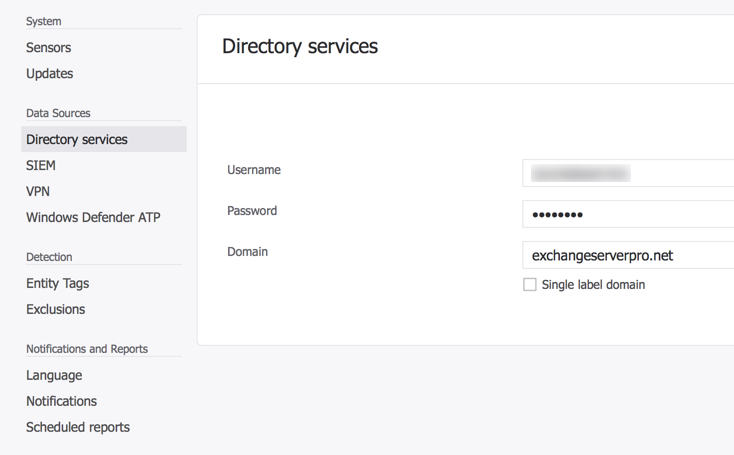
During setup of Azure ATP you must nominate a service account that can read from Active Directory. Just a regular user account is fine, no special admin rights are needed. If you’ve got your Active Directory organizational units locked down in a way that would prevent a regular user from reading them, you may need to do some delegation for this service account. It’s also recommended that the service account has read permissions to the Deleted Objects container of your Active Directory forest, so that it can detect bulk deletions.
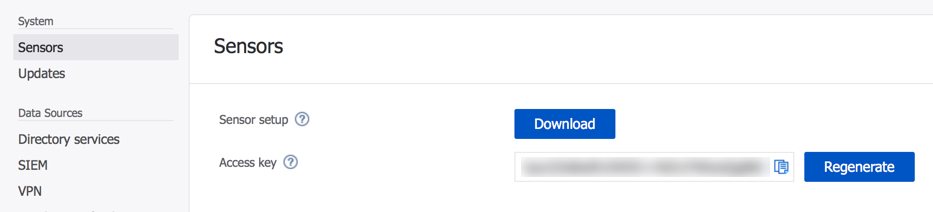
To deploy the sensors, download the install package from the Azure ATP portal. You can use a software deployment tool to roll it out to your domain controllers, or just install it manually if you only have a few DCs in your environment. The access key displayed in the portal is used for initial registration of the sensors. They will then use certificates for ongoing authentication.
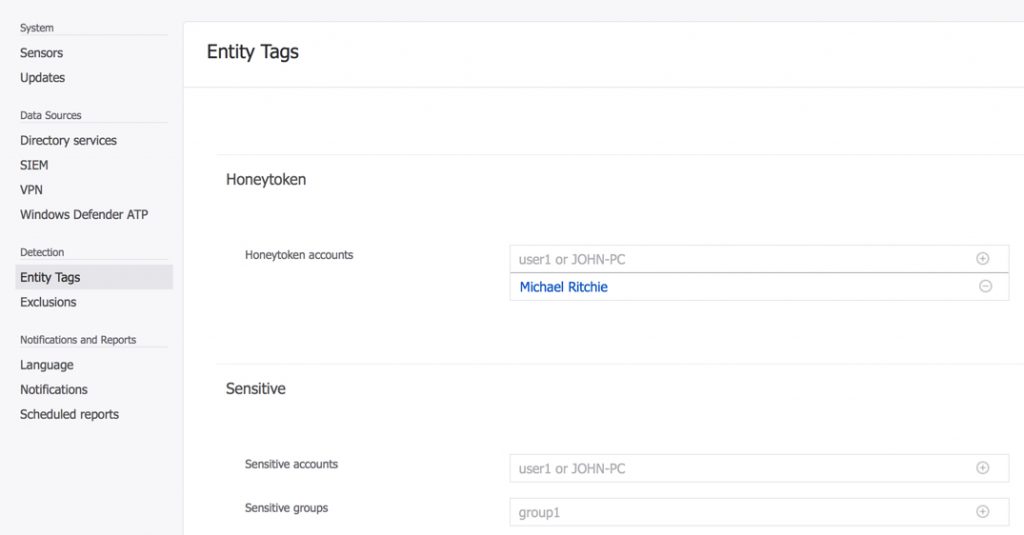
After deploying the sensors there are some further configurations that you can perform. The Windows Defender ATP integration is useful, because it allows you to correlate device threat levels (e.g. suspicious code running on a workstation) with suspicious network traffic (e.g. an attacker performing reconnaissance). Entity tags allow you to specify honeytoken accounts, which are dummy accounts that should never show any login or network activity. If Azure ATP sees activity on those accounts, it is a strong signal of a likely attack in progress. Similarly, you can specify sensitive accounts and groups, such as the CEO’s account or any other high risk individual. These are different to the sensitive accounts such as members of Domain Admins, which are already given special attention by Azure ATP.
No monitoring system is perfect, so you can also configure exclusions for any false positives that appear in your network. One of the first false positives you should see is triggered by Azure AD Connect, which performs activity that ATP considers “malicious replication of directory services”. It is recommended to add the Azure AD Connect server to the exclusions list for that type of activity. Similarly, if you have a security monitoring system that performs scans of your environment then you should exclude that system’s IP address to prevent false positives.
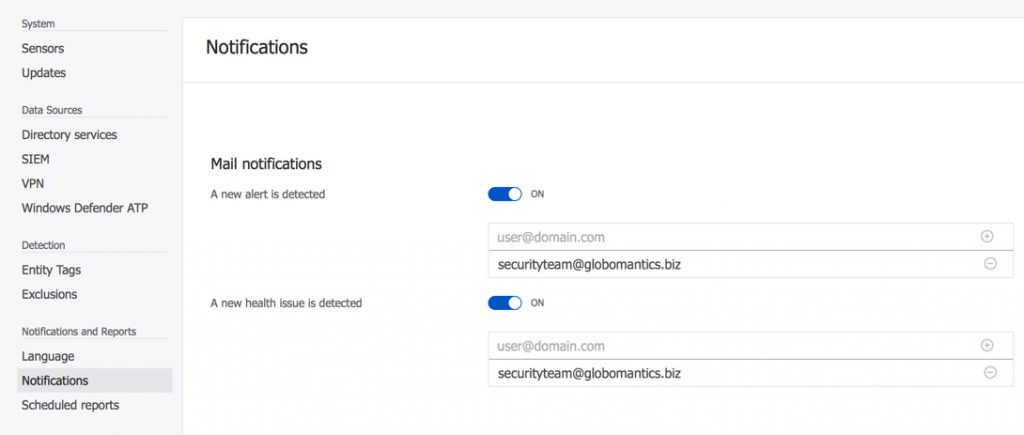
Azure Advanced Threat Protection also has email reports and notifications. The reports are useful for regular reviews, and I recommend you configure them to go to somebody who will actually look at them and take action on any issues. You can also manually run the reports as needed.
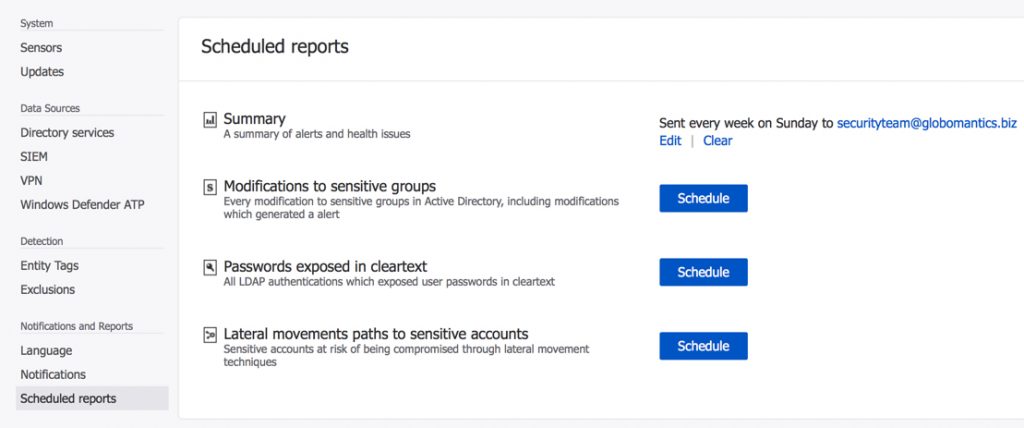
The notifications are for real-time alerting, and I recommend you send those directly to your ticketing system so that support tickets can be raised at the appropriate priority and alerts can be sent out via email, txt message, pager, etc to the individuals who need to respond.
Investigating Azure ATP Alerts
Azure Advanced Threat Protection will display a timeline of events prioritized according to the level of risk that they represent. In the screenshot below you can see an example of the false positive triggered by Azure AD Connect sync activity, as well as two reconnaissance alerts.
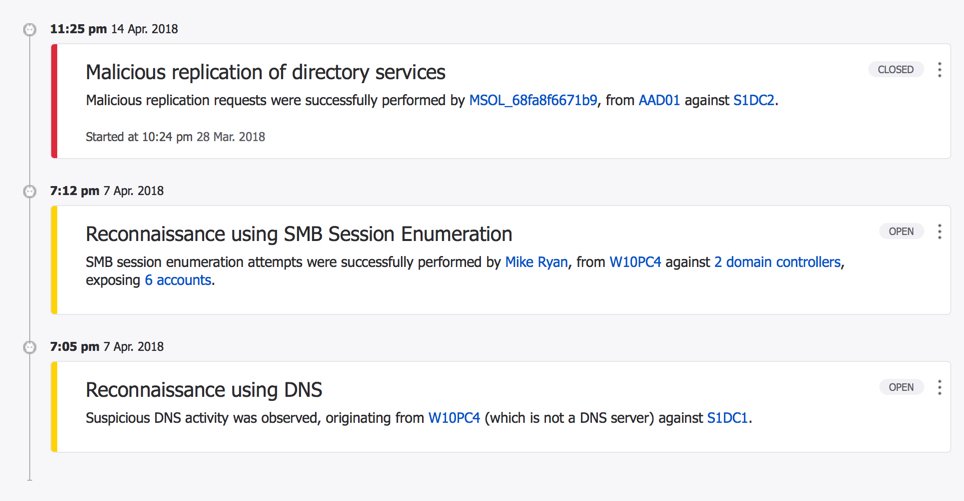
Looking closer at the DNS reconnaissance alert, we can see the details of the machine involved, which sensor detected the suspicious activity, and also a link to more information about what this type of activity might represent.

We can then drill down to the machine itself, which is W10PC4 in this example, and see a complete timeline of authentication and network activity that the ATP sensors have recorded as originating from this computer. In the screenshot below we can see an attempt to login with a non-exist “localadmin” account, and two reconnaissance events. There are also two attempts to enumerate users and groups in the domain (these would normally be alerts, but ATP was still in learning mode at this point), and then an admin account used to connect to a domain controller over RDP.
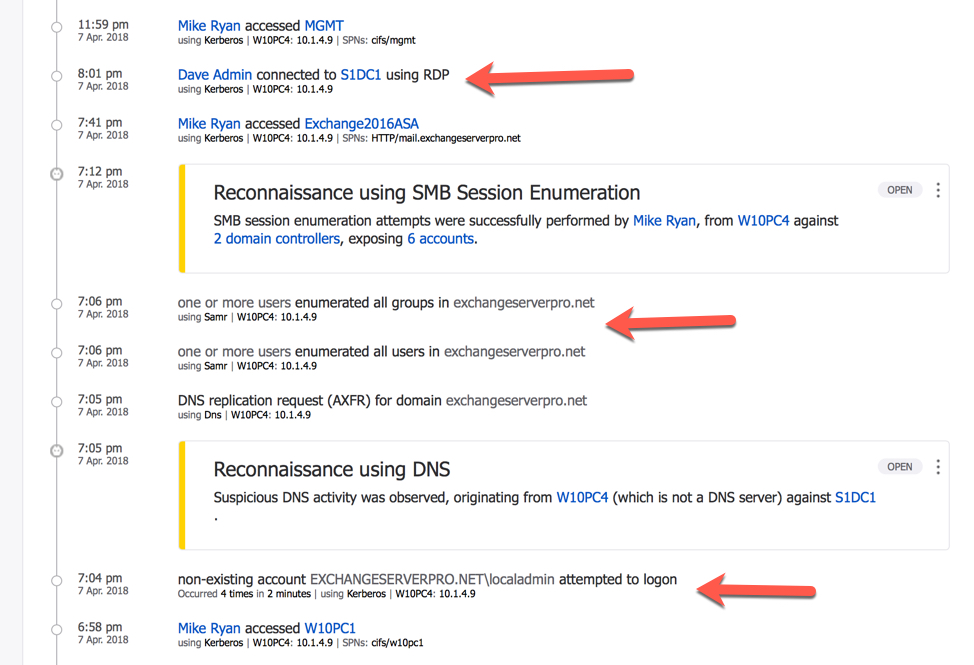
As you look at the above screenshot keep in mind that none of that activity would be detected by typical antivirus software. Without Azure ATP in this environment, an attacker would be free to perform reconnaissance, attempt credential elevation, and basically spend as much time as they need to gain control of the environment. But with Azure ATP in place, the very first stages of the attack are immediately detected and alerted.
The activity shown above was created by me during Azure ATP testing, following Microsoft’s ATA Suspicious Activity Playbook, which walks you through a complete attack scenario. When you deploy Azure ATP to a production environment, it’s quite possible that you’ll see other alerts for things like passwords in clear text, weak protocols, and other security risks. All of this intelligence that you gather from Azure ATP will help you to strengthen the security of your environment, and provide you with better monitoring in the future.

Summary
Azure Advanced Threat Protection provides monitoring and alerting for suspicious activity in your on-premises Active Directory environment. As a cloud-hosted service with a minimal on-premises in the form of sensors, deploying Azure ATP is fast and simple. In a small to mid-size environment, you can be up and running in just a few hours, with the bulk of the work being the sensor deployment to your DCs. If you’re already licensed for Azure ATP, I recommend you deploy it in your environment. If you’re not already licensed, sign up for an EM+S E5 trial and give Azure ATP a test run.
[adrotate banner=”50″]


