Part Two
Welcome to part two on how to enhance IP address management using Microsoft’s Power Platform. In part one, I demonstrated a step-by-step guide on the frontend and backend steps when creating an IP address management solution. In this post, I will be delving deeper into the steps needed to create a workflow.
Workflow
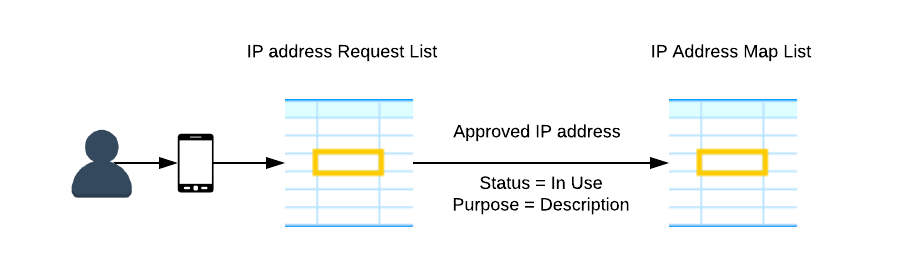
When the user submits the request via the app, the network administrator should receive an email with approval request. If Network administrator approves request, the requester will receive an email, and IPaddressMap list gets updated. Otherwise, the requester will receive reject email and requested Item in the RequestIPList will be updated to “Rejected”
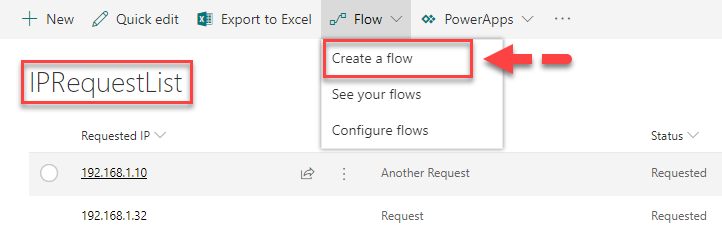
To start building the workflow, navigate to IPRequestList SharePoint list, in the ribbon click on Flow, and Create Flow.
From the
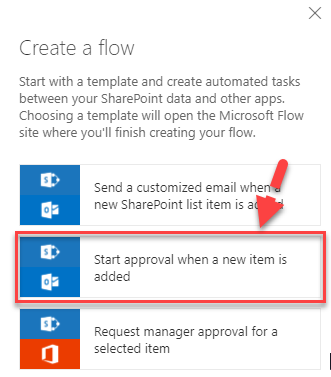
Go through the setup process by specifying few setting values. Assign To must be Network Administrator’s name (email address) who has rights to modify IPaddressMap SharePoint list.
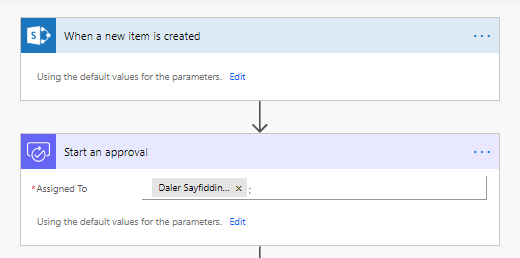
Next, we will have to configure approval outcomes. There are two outcomes: Approved (Yes) or Rejected (No)
The screenshot below demonstrates the end result of the workflow:
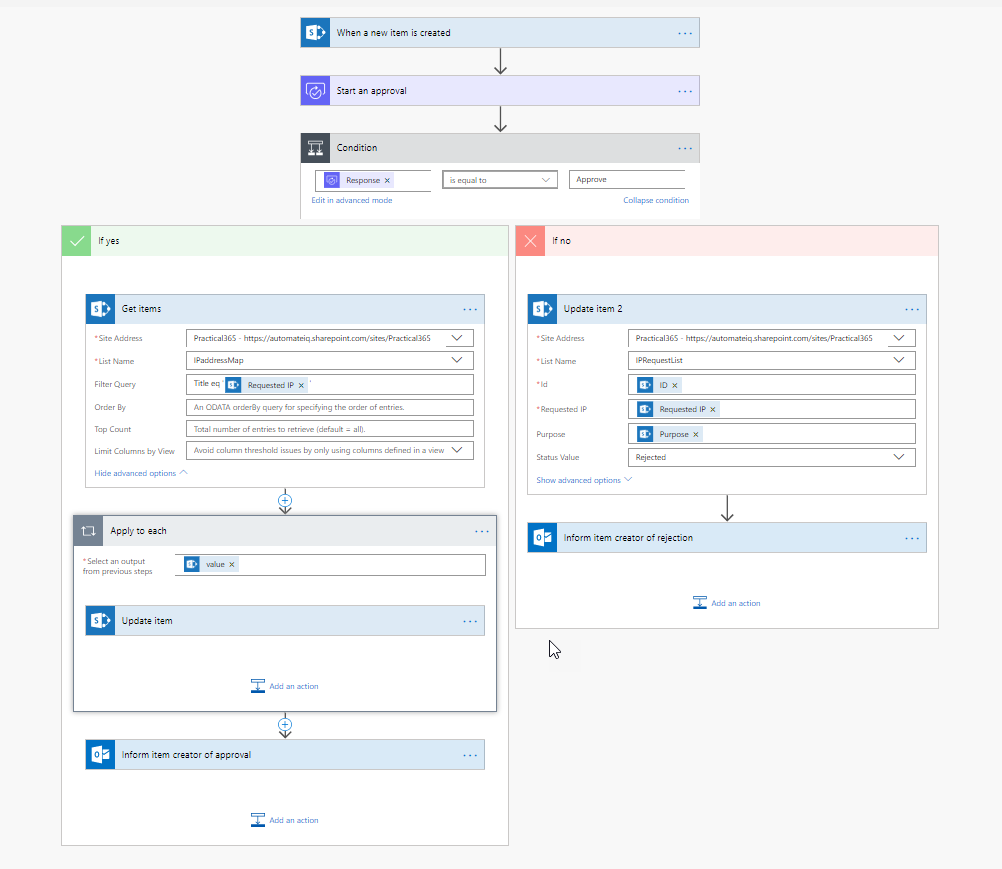
Now, we will break it down to stages. We are going to be adding actions to both Approved and Rejected branches.
If the outcome is Approved, we will need to:
- Update the master IPaddressMap SharePoint list with the information
- Change the Status to “Approved” in the RequestIPList
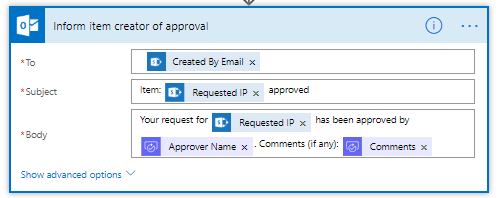
- Notify requester that the request was approved
Let’s start with the action of updating IPaddressMap SharePoint list item. First, we will have to find the record where IP address matches the requested one. We will use
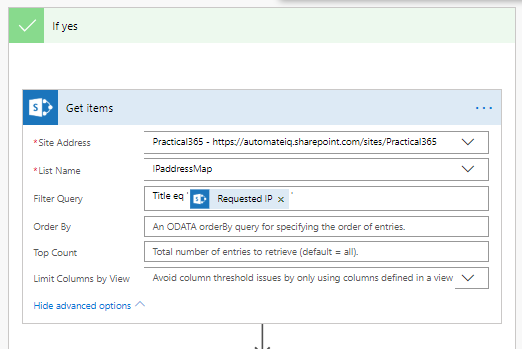
Note: The right side of the filter formula should be in the single quotation mark.
The action above will find the record. Next, we will have to update Status of that record to “In use” and Description to “Purpose” submitted by the user in the request form. It is like mapping fields.
I am going to use Update Item SharePoint action. In action, you will have to specify SharePoint site address and appropriate list.
Note: For Microsoft Flow to identify which Item is going to be updated we will use the outcome of the previous action (Get Items).
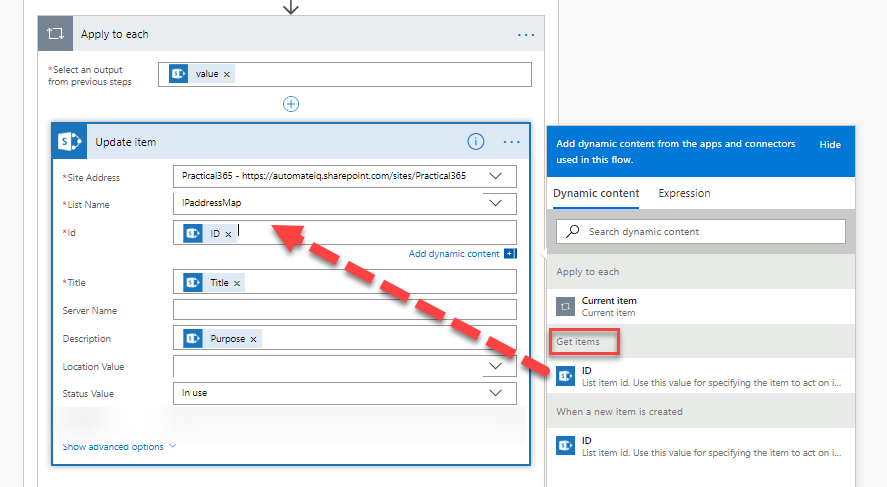
We will also have to update IPRequestList item to set request status to Approved. I am going to use Update Item SharePoint action. It is very important to use the correct ID of the item. In the dynamic
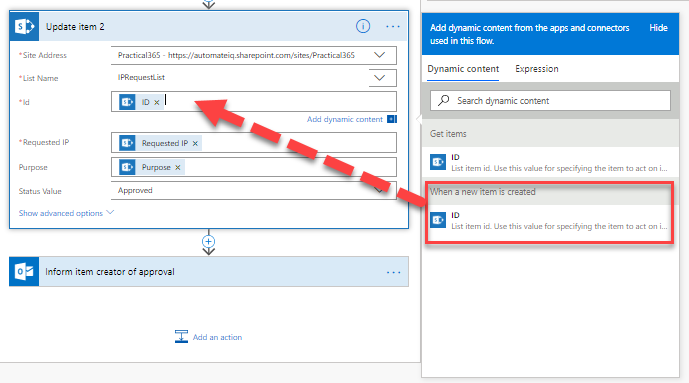
To inform user action is already pre-built for you by Flow.
Next, we will add an action for Rejected (No) outcome. We will need to update IPaddressList Item Status to“Rejected”.
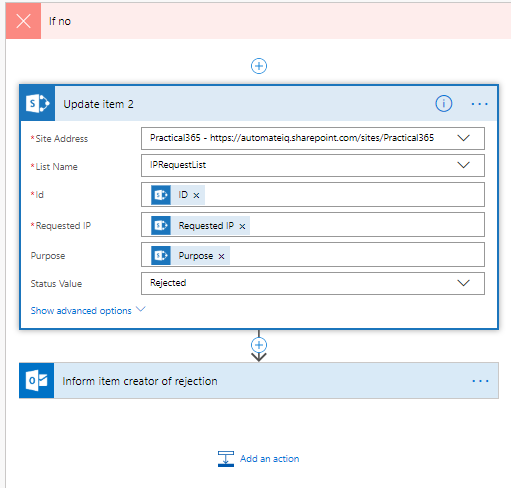
Look at the screenshot below and make sure that your workflow looks the same to achieve minimum requirements:

This was the last component of our solution. To summarize, we built a data store using SharePoint online lists, designed user interface to interact with data using PowerApps and automated the process using Microsoft Flow.
Let’s take a look at the app in action:
Conclusion
If you’ve followed the steps within this article, you should have a complete IP address management solution built upon the Microsoft Power Platform, using functionality from SharePoint Online, Microsoft Flow and PowerApps.


Quality posts is the key to invite the people to pay a visit the website, that’s what this site is providing.
Brilliant! Thanks for writing this up.
Pingback: How to enhance IP address management using Microsoft’s Power Platform - Part One