
In this article, I’ll demonstrate how to configure a custom domain for Office 365. If you’ve recently registered for Microsoft 365, then you will want to register your company’s domain name with the service.
This will allow you to create login identities that use your company domain name, like Steve.Goodman@practical365.com rather than the default Steve.Goodman@your-tenant.onmicrosoft.com format.
As well as making sure your company is on-brand when communicating with others, it’s also a key pre-requisite if you are planning to synchronise your local Active Directory and to migrate email.
If you currently host your email service elsewhere, this is a process that should be considered carefully, as you will not usually want to migrate your MX (mail exchanger) DNS records to Office 365 until you’ve migrated email across, or configured Exchange Hybrid.
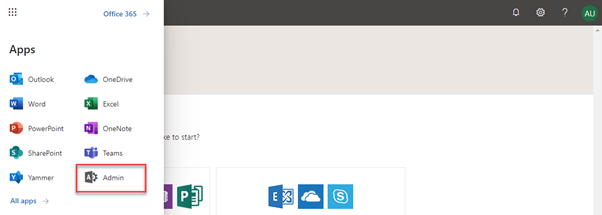
To configure a custom domain, navigate to the Microsoft 365 admin center after logging into the service as an administrator. You’ll find the link in the waffle menu in the top left as Admin:
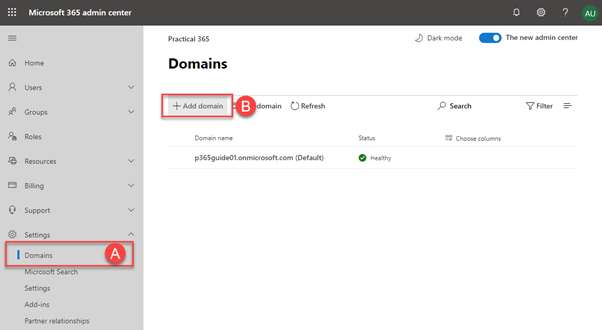
Next, expand the left-hand menu under Settings and choose Domains (A). You will see the default domain listed. Choose Add Domain (B):
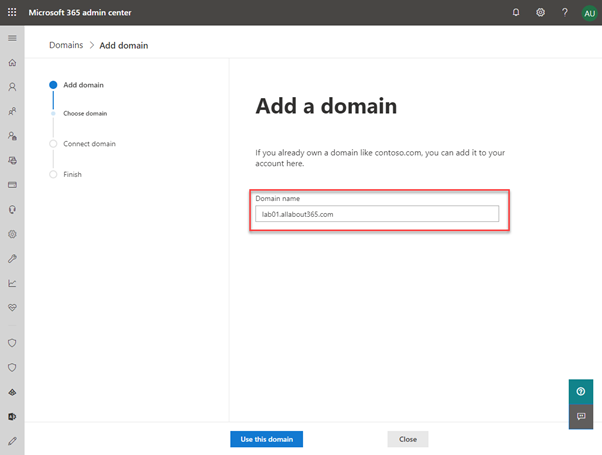
In the add domain wizard, enter your company’s domain name, then choose Use this domain.
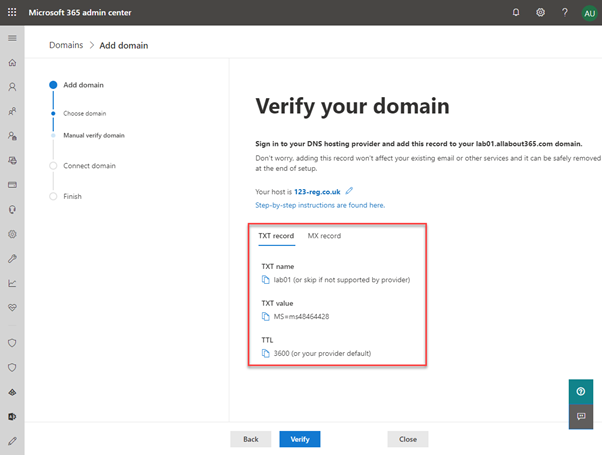
Before your domain is confirmed within Microsoft 365, you’ll need to verify you own the domain. The easiest way is to use a DNS TXT (text) record. This will be added into your DNS control panel in addition to any other existing TXT records and is in the format MS=ms123456789.
If you aren’t sure how to add this to your DNS provider, choose the Step-by-step instructions link which will provide a Microsoft guide specific to your DNS provider.
After this step is complete, your domain is verified with Microsoft 365. You can choose to close the wizard at this point.
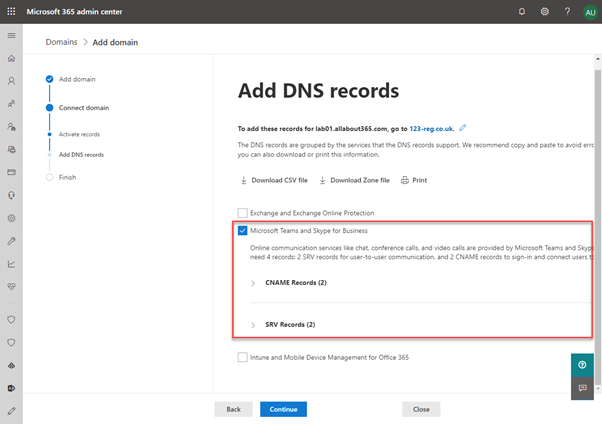
If you want to add additional records, such as those to allow Microsoft Teams chats with external people – or if you don’t have an existing email provider and want to receive mail at Microsoft 365 now, then you will want to choose Continue to activate relevant DNS records.
Below we’ll choose Continue with a plan to add Microsoft Teams-specific records:

On the Add DNS records page, we’ll select Microsoft Teams and Skype for Business. This will show the specific DNS records we need to add. Much like if you have an email server you will not add MX records, the same applies here if you run Skype for Business Server or Lync Server on-premises – only consider adding the records if none exist.
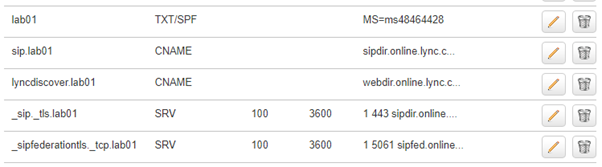
In our example DNS control panel the records added look similar to below, with records to support the communication with Skype for Business Online federated users (known as external users in Microsoft Teams):
When these DNS records have been successfully added, we’ll choose Continue. This will take us to the last page of the wizard.

After choosing Done, the custom domain will be added to your Office 365 tenant. If it’s the first custom domain, it will be set as your default domain.


Hello is there a way to associate a custom domain to a particular sharepoint site?