
In the first part of this series, we looked at how we’d automate an existing manual process using Office 365.
The example scenario we’re solving is one where a manual process using paper-based or forms emailed from a PC are sent into a manager in the facilities management department by email and then assigned to people in the team to complete. We’ve decided to use Planner to manage the reported incidents, Teams to provide group chat, and use a PowerApp, SharePoint List and Flow to provide a better way to report incidents from the wider company.
In part one, we decided upon the high-level process we’ll use to automate the process, and then created a Microsoft Team with an Incident Reports channel, an associated Plan and set up a SharePoint list with a number of simple columns.
We’re now ready to create our PowerApp, then automate the processing of entered data into Planner using Flow. We’ll do that, then check out what this looks like in action.
Create a new PowerApp
Building a PowerApp from scratch is very straightforward, however for this application, we won’t start from nothing and instead, we’ll leverage built-in functionality to automatically create a PowerApp based upon the SharePoint list. Not only is this really simple, but it’s also a great way to understand what components you need when building your own similar PowerApp.
To do this, we’ll navigate to our SharePoint List and from the PowerApps tab, choose Create an app:
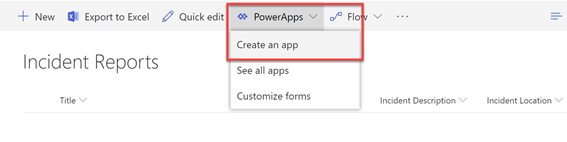
From the Create an app wizard, we’ll then choose a name for our app – to keep things consistent, we’ll choose Incident Reports:

After choosing Create, a new web browser tab will open. This will launch PowerApps, and immediately begin building the app:

After the app has been created, we’ll have a PowerApp with three core screens. These will be the Browse screen, which is used to browse the SharePoint List, and a Detail and Edit screen. The Detail screen will show list information for read-only viewing; and the Edit screen will be used to add new list items or update them.
We won’t make big changes to the screens, but we will update the fields that are displayed in the Edit screen. First though, we’ll take a look at the screens the wizard created.
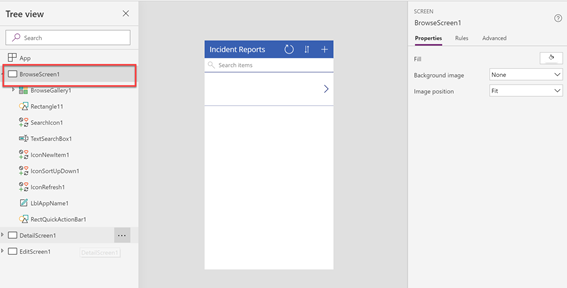
First, select the BrowseScreen1 first and examine its structure. This is the screen that will show when the app launches.
On the left-hand side, as highlighted we’ll see the screen within the Tree View with components within it for the icons, search box and lit browser:
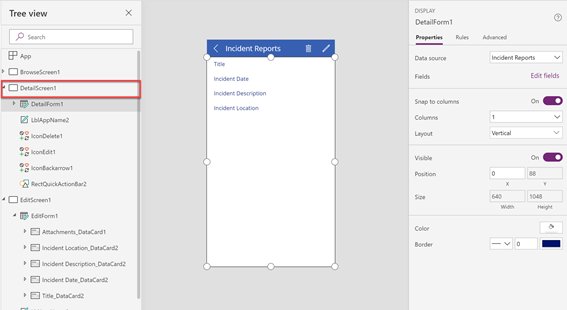
Next, we’ll look at the DetailScreen1. This has a form within it used to show a read-only view of the information in the list item:
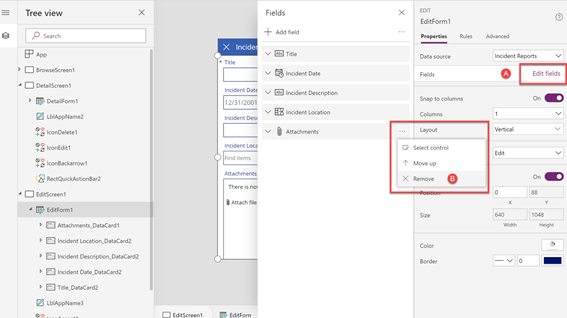
Finally, we’ll look at EditScreen1 and select EditForm1. This has our screen for adding new information within the app:
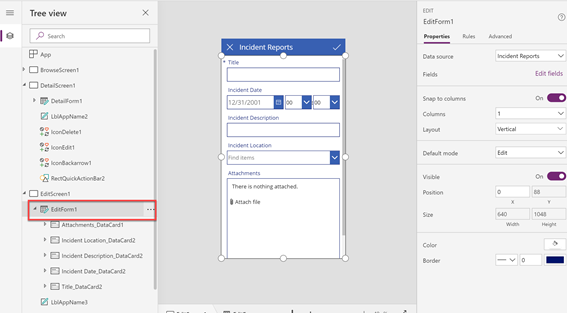
We’ll need to change this form, because we don’t need the Attachments field. To do this we’ll select Edit Fields, as shown in A. This will show the list of fields, from which we’ll select and remove the relevant field, as shown in B:
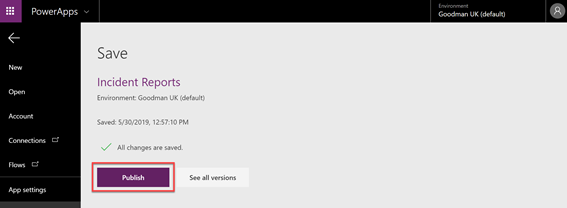
After making our small change to the auto-generated PowerApp, we’ll need to save and publish the application. This will allow us to access it, and then share it with a wider audience. After choosing Save from the PowerApps menu, choose Publish to make it available to the user account we’ve created the PowerApp with:
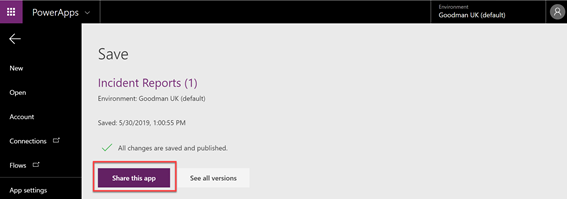
Next, we’ll choose to Share this app to assign permissions to a wider group:
From the Share screen we’ll initially choose just the members of our Team, to match the permissions configured for the SharePoint List:
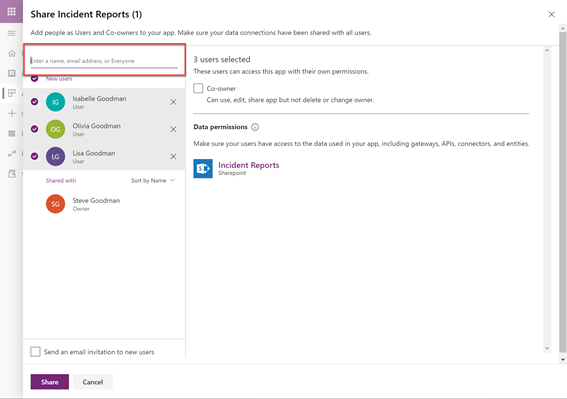
If you want to grant wider access later on, remember to return to this screen alongside the SharePoint List permissions dialogue we examined in the previous part of the series.
Create a Flow
We now have a Team, a Plan a SharePoint List and a PowerApp. We’ll now use Microsoft Flow as the glue that ties the items created in SharePoint by PowerApps, to Planner and Teams.
Our Flow will perform the following:
- Trigger when a new SharePoint List item is added to the Incident Reports SharePoint List
- Get the new item from the SharePoint List
- Create a Planner item in the Incident Reports Plan using the list item content
- Post a message to the Incident Reports Teams Channel
- Delete the new item from the SharePoint List (seeing as it’s now in Planner..)
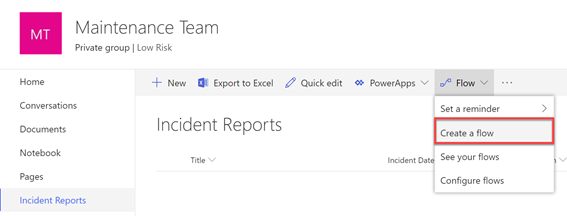
A common theme in this article has been to try and make things as easy as possible, so whilst we could start by logging into Microsoft Flow, and manually creating a new Flow, finding the right type of trigger and attaching it to the list, we’ll make things a little easier. We’ll start by navigating back to the SharePoint List and choosing Flow>Create a flow:
The Create a flow dialogue will show on the right-hand side. Scroll down and from the list of templates, choose When a new item is added in SharePoint, complete a custom action:

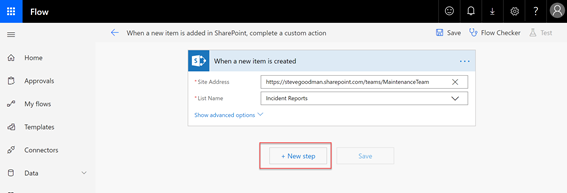
A new browser tab will display with Microsoft Flow. A new Flow will have been created with a trigger attached to our Incident Reports list (saving us a couple of minutes).
We’ll now need to add our custom actions. Choose New Step to add the first action:
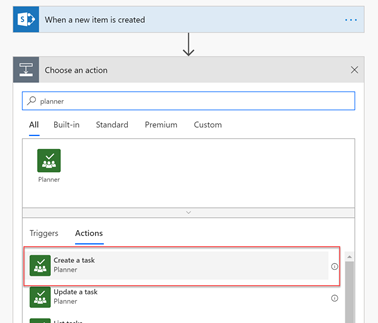
From Choose an action, we’ll search for Planner, then choose Create a task:
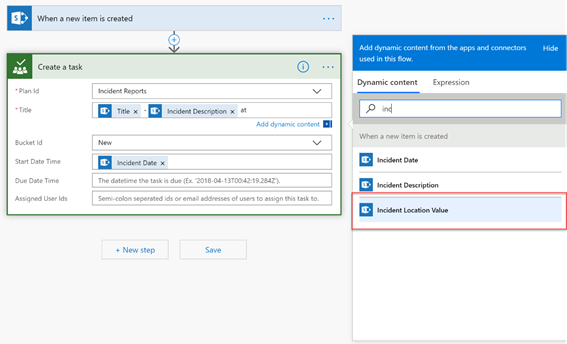
We’ll now have a step ready to create a new Planner task. From Plan Id, we’ll select the Incident Reports Plan we created in the first part of this series, and then choose the New Bucket.
We’ll then use Add Dynamic Content to add information from SharePoint List item.
This is retrieved for us automatically in the When a new item is created trigger step. In the Title and Start Date Time field we’ll add dynamic content from the right-hand section. When we select a dynamic entry, it will then be added at the caret location in the Create a task step:
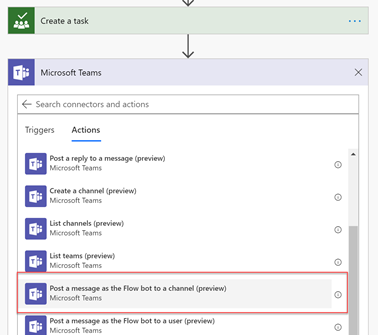
After creating our new Planner task, we’ll choose New Step to add a notification into the Incident Reports Microsoft Teams channel. We’ll search for Teams and then from the list of Actions choose to Post a message a s the Flow bot to a channel:
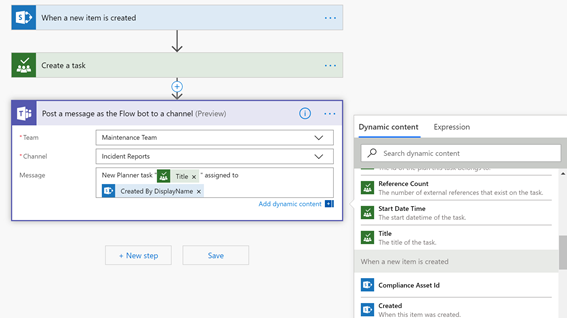
We’ll then select the Team and Channel and in the Message field, we’ll use Add Dynamic Content again. This time, as well as our SharePoint List item data, we’ll be able to add dynamic content that includes the new Planner item:
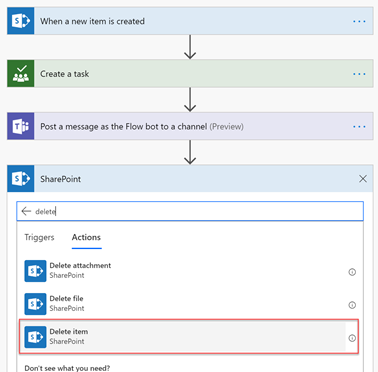
Finally, we’ll choose New Step to create our final step. We’ve chosen that once the new Planner item is created we’ll remove the SharePoint List item. Of course, that’s not essential – but it helps to keep the SharePoint List that we’re using as temporary storage tidy. In the below case we’ll search for SharePointand then select the Delete Item action:
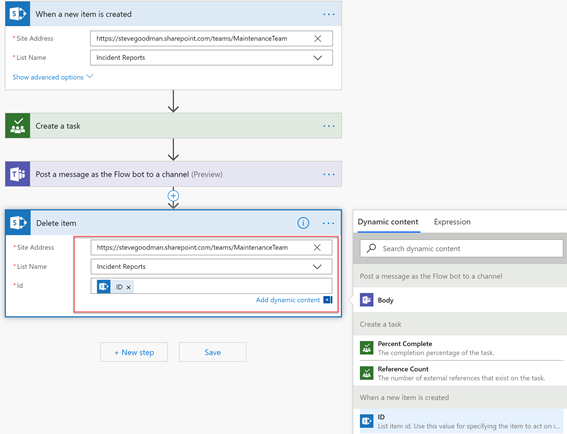
We’ll then ensure that we use the same Site Address and List Name as used in the trigger step, and then use dynamic content to populate the Id field:
Finally, we’ll name and save the new Microsoft Flow.
Putting it into action
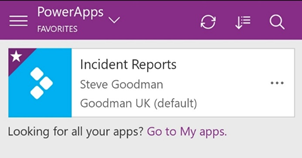
We’ll need the PowerApps app from the App store on Android or iOS to access the app. Once installed, we’ll log in with our normal Azure AD / Office 365 credentials.
We’ll see our Incident Reports app listed, which we can launch by selecting it, or pin it to the phone home screen:
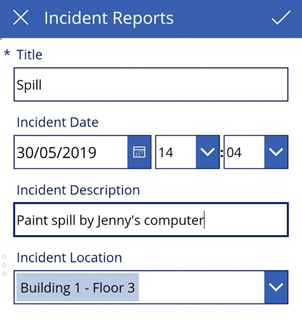
After launching our Incident Reports app, we’ll choose to add a new report:
After adding the new report, we’ll see it listed within the app itself.
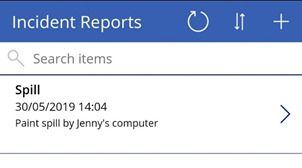
Behind the scenes, this has simply added a new SharePoint List item. What we’ll expect is that the Flow will trigger behind the scenes.
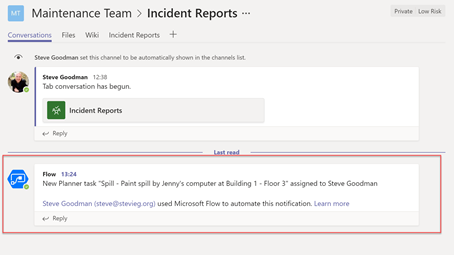
We’ll know it’s worked when we check the Incident Reports channel. We’ll see our message posted from the Flow Bot:
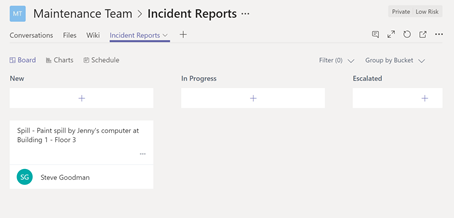
Over in our Planner tab, we’ll see the new Planner task added with the new incident report task:
Provide wider access
Although when creating our app and testing the process we’ve only allowed access to the Team members, we’ll want to provide wider access. We called out in part one how to add Permissions to the SharePoint List. We can break inheritance to the List and add permissions to a wider group to contribute list items. And we can grant the same wider access to the PowerApp itself.
Summary
Pretty simple, really? And that’s exactly what it’s meant to be. We’ve intentionally only used a few fields in our SharePoint List – we could have added more, and of course we could have customized our PowerApp even further, by adding company colours, custom icons or fields for taking a photo of the incident, automating adding the current date and so on. We could have also spent a little more time and created an adaptive card in the Team – or added a round-robin to automatically assign the task or much more.
But what we wanted to demonstrate is how simple it is to look at an existing process and then use the tools in Office 365 to reach 95% of the functionality we need with very little effort at all.


Found Part 2 !!! Thank you very much! Very informative.
Question: Is there a way to add the attachment from the powerapps to the Planner task?
Maybe a part 3? lol thank you !!!
Hi Steve, Is there a way I can create a new task in Planner in a predefined bucket based on the selection of a drop down list in PowerApps?
Hi Steve, in the “Create a task” section in the flow I am being asked for the “Group Id”. In the dropdown it states “could not retrieve values”. Any help appreciated.
This was a very helpful example. I haven’t used PowerApps yet, but this shows how easy it is to use the basics of it. Thanks.
Thanks Jordan – I hoped an easy introduction showing that it’s easier than most people think to get started would be useful. This is how I got going with PowerApps as it helped me understand how data and forms work by examining the app generated – it’s surprisingly easy!
Steve