Remove Exchange Online PowerShell to Reduce Attack Surface
Unless they belong to administrators, user mailboxes don’t need access to Exchange Online PowerShell. When Exchange 2007 originally introduced PowerShell support, an aspiration existed that end users would run PowerShell for their own automation purposes. Although possible, I never met an end user who ran Get-Mailbox to check their mailbox settings or Get-MailboxStatistics to check their mailbox size.
The arrival of role-based access control (RBAC) in Exchange 2010 clamped down on what people could do by limiting the set of available cmdlets and parameters based on the roles held by a user’s account. This made PowerShell for end users an even less attractive prospect, but the ability to run PowerShell remains the default for both Exchange Online and Exchange Server. And that’s a problem.

Locked Down Exchange Online PowerShell
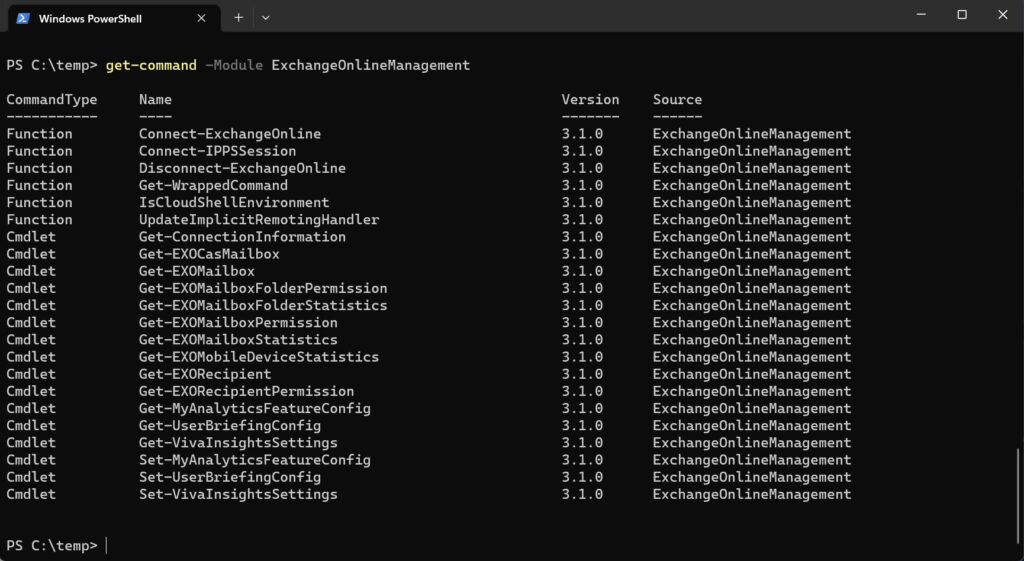
The issue is simple. Even though Microsoft has locked down the Exchange Online management module for users who don’t hold an administrator role so that they cannot run many cmdlets (Figure 1), it’s still a good idea to remove access to features that people don’t need to use just in case an attacker compromises an account and figures out a weakness to exploit.
Microsoft’s documentation covering how to disable PowerShell for end users is a tad outdated. For instance, it suggests using client access rules to block PowerShell access despite the fact that Microsoft will disable most client access rules in September 2023. The suggestions on how to run the Set-User cmdlet to block PowerShell are accurate but limited. We can do better.
Sketching Out the Solution
The characteristics of a workable solution for production use might include:
- Allow PowerShell access for any account holding the Global administrator or Exchange administrator role.
- Remove PowerShell access for any other user account.
- Run on a scheduled basis to disable access for newly-created mailboxes.
Turning these points into PowerShell code is reasonably simple:
- Find the members of the Global administrator and Exchange administrator role groups.
- Exclude service principals that might be in the Exchange administrator role group to allow apps to act as Exchange administrators. For example, the service principals for Azure Automation accounts that run Exchange scripts must be added to the Exchange administrator role group (see the example in this article).
- Find user mailboxes with Get-ExoMailbox.
- For each mailbox, check if the mailbox is owned by an administrator. If not, disable PowerShell access and note the fact in a custom attribute (because there’s no need to access the information through Entra ID, an Exchange custom extension attribute could also be used).
Using an attribute to record if a mailbox can use PowerShell allows Get-ExoMailbox to use a server-side filter to restrict the set of mailboxes to those that have not yet been processed. After the first run where every user mailbox must be processed, the filter speeds processing up and makes it viable even in very large organizations.
Here’s some code that does the job using cmdlets from the Microsoft Graph PowerShell SDK and Exchange Online management module:
Connect-MgGraph -Scopes Directory.Read.All
Select-MgProfile Beta
Connect-ExchangeOnline

# Get set of accounts holding the Exchange Online Administrator role
$ExoAdminRoleId = Get-MgDirectoryRole | Where-Object {$_.displayName -eq "Exchange administrator"} | Select-Object -ExpandProperty Id
[array]$ExoAdmins = (Get-MgDirectoryRoleMember -DirectoryRoleId $ExoAdminRoleId) | Select-Object -ExpandProperty AdditionalProperties
# Remove any service principals from the set
$ExoAdmins = $ExoAdmins | Where-Object {$_.'@odata.type' -eq '#microsoft.graph.user'}
# Now get the set of accounts holding the Global Administrator role
$GlobalAdminRoleId = Get-MgDirectoryRole | Where-Object {$_.displayName -eq "Global administrator"} | Select-Object -ExpandProperty Id
[array]$GlobalAdmins = (Get-MgDirectoryRoleMember -DirectoryRoleId $GlobalAdminRoleId) | Select-Object -ExpandProperty AdditionalProperties
# Create an array holding the user principal names of the two sets of administrator accounts
[array]$AdminAccounts = $GlobalAdmins.userPrincipalName + $ExoAdmins.userPrincipalName | Sort-Object -Unique

# Find Exchange user mailboxes that need to be processed
[array]$ExoMailboxes = Get-ExoMailbox -Filter {CustomAttribute5 -eq $Null} -ResultSize Unlimited -RecipientTypeDetails UserMailbox -Properties CustomAttribute5

ForEach ($Mbx in $ExoMailboxes) {
   # If not an admin holder, go ahead and block PowerShell
   If ($Mbx.userPrincipalName -notin $AdminAccounts) {
     Write-Output ("Blocking PowerShell access for mailbox {0}..." -f $Mbx.displayName)
     Try {
         Set-User -Identity $Mbx.userPrincipalName -EXOModuleEnabled $False -Confirm:$False
         $MessageText = "PowerShell disabled on " + (Get-Date -format s)
         Set-Mailbox -Identity $Mbx.userPrincipalName -CustomAttribute5 $MessageText
     }
     Catch {
         Write-Output ("Error disabling PowerShell for mailbox {0}" -f $Mbx.userPrincipalNane )
     }
   } Else {
     Set-Mailbox -Identity $Mbx.userPrincipalName -CustomAttribute5 "PowerShell Enabled"
   }

} # End ForEach
On a side note, the old parameter for disabling PowerShell access was RemotePowerShellEnabled. The new parameter that you should use is EXOModuleEnabled. Microsoft is removing remote PowerShell from Exchange Online but the EXOModuleEnabled parameter continues to govern user access to Exchange PowerShell.
Automating a Process for New Mailboxes
The script works on a one-off basis but to be more effective it should run on an automatic schedule. The best and most secure way I know of doing this is to use Azure Automation. Because it doesn’t require an Azure subscription, Windows Scheduler is a cheaper option. The downside is that you must schedule the script to run on a specific workstation and must arrange for secure authentication for the account used to run the script. I like the better security and automation offered by Azure Automation managed identities, which are what I use.
Making the code shown above execute in an Azure Automation runbook is straightforward. The requirements are:
- Use an Azure Automation account assigned the necessary permission (Directory.Read.All) to read role information from the directory.
- The Azure Automation account must also hold the Manage Exchange as Application role.
- Create a runbook with much the same code. The difference is in connection and authentication. Here’s how the runbook gets an access token to sign into the Graph and connect to Exchange Online. The rest of the code remains the same.
Connect-AzAccount -Identity
$AccessToken = Get-AzAccessToken -ResourceUrl "https://graph.microsoft.com"
Connect-MgGraph -AccessToken $AccessToken.Token
# Connect to Exchange Online
Connect-ExchangeOnline -ManagedIdentity -Organization office365itpros.onmicrosoft.com
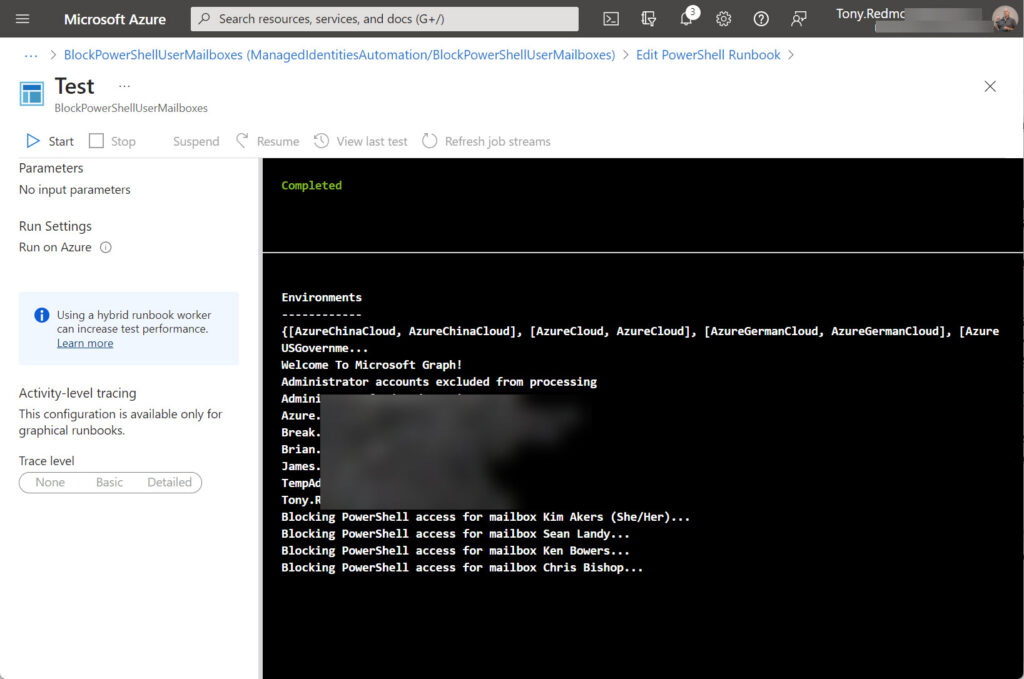
Testing the runbook with these requirements in place the expected results. In Figure 2, we see the set of administrator accounts (obscured) and the four mailboxes that now cannot use PowerShell.
The script used here doesn’t include logging. It would be simple to add logging of the action performed for each mailbox and to send the log to administrators afterwards by email or by posting to a Teams channel.

Scheduling Runbooks
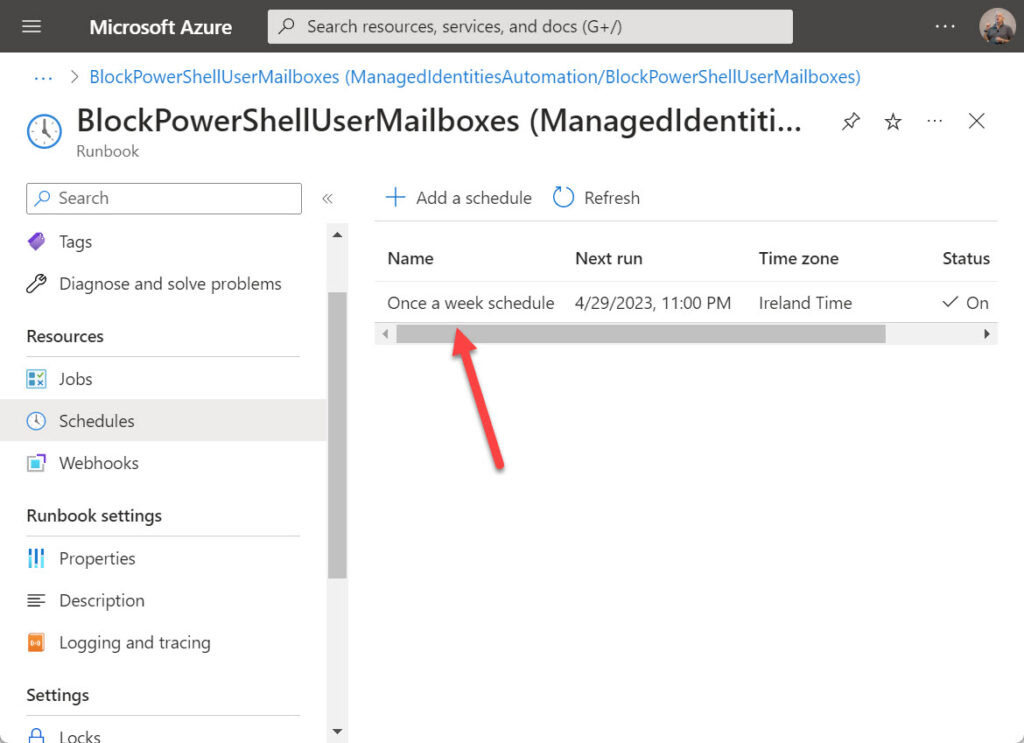
Once you tweak the runbook to make it execute successfully, you can publish it and link the runbook to an automation schedule. A schedule is a resource belonging to an automation account that dictates when Azure Automation executes jobs. A schedule can be one-off or recurring. In this instance, a weekly check is probably sufficient to block PowerShell for new mailboxes. Figure 3 shows that the runbook is linked to a schedule.
No administrator intervention is necessary to make sure that jobs run. Azure Automation has a robust scheduling and execution engine that you can depend on. However, it is wise to verify that the jobs generate the expected results. This code checks that PowerShell is blocked for all non-administrator mailboxes (use the code from above to build the $AdminAccounts array).
$Report =  [System.Collections.Generic.List[Object]]::new()
[array]$ExoMailboxes = Get-ExoMailbox -Filter {CustomAttribute5 -ne $Null} -ResultSize Unlimited -RecipientTypeDetails UserMailbox -Properties CustomAttribute5

ForEach ($Mbx in $ExoMailboxes) {
   # If not an admin holder, go ahead and block PowerShell
   If ($Mbx.userPrincipalName -notin $AdminAccounts) {
      $Status = (Get-User -Identity $Mbx.userPrincipalName).EXOModuleEnabled
      $UserData = [PSCustomObject][Ordered]@{
         User   = $Mbx.userPrincipalName
         Name   = $Mbx.displayName
         PS     = $Status
         Status = $Mbx.CustomAttribute5}
      $Report.Add($UserData) }
}
$Report | Out-GridView
Wrapping Up
We’ve explored several concepts in this article from blocking Exchange Online PowerShell for user mailboxes to using Azure Automation with managed identities and running jobs on schedule. The point is that there’s nothing difficult in what I describe here. It’s all very possible and easy to implement.
Update: I describe another approach for blocking user access to Microsoft 365 PowerShell modules here.
On Demand Migration
Migrate all your workloads and Active Directory with one comprehensive Office 365 tenant-to-tenant migration solution.


After further testing I found out that this script has no use for us. It checks only for the Active members in roles and not the eligible ones. (what is the best practice)
Well, that’s a pity… we write PowerShell scripts as examples to explain principles rather than as full-fledged solutions. Feel free to develop your own script!
Yeah I found an way to make it work with an small adjustment regarding the groups, not fool proof since the groups can change:
Adding:
#Get Users from PIM groups
ForEach ($Group in $PIMGroups)
{
[array]$Admins += Get-MgGroupMember -GroupId (Get-MgGroup -Filter “DisplayName eq ‘$Group'”).Id | Select-Object -ExpandProperty AdditionalProperties
}
Adjusting:
[array]$AdminAccounts = $GlobalAdmins.userPrincipalName + $ExoAdmins.userPrincipalName + $Admins.userPrincipalName | Sort-Object -Unique
There are some cmdlets in the Azure AD module that deal with PIM role assignments. They haven’t been moved to the Microsoft Graph PowerShell SDK yet. When they do, I will update the code to deal with assignments, but your workaround is as good as any for now.
What about this for getting PIM-eligible users and also expanding the PIM-eligible groups using Graph cmdlets?
# Now get the list of users and groups ELIGIBLE for the Exchange and Global Admin roles
$EligibleAssignments = Get-MgRoleManagementDirectoryRoleEligibilityScheduleInstance -ExpandProperty “*” -All
foreach ($Role in $EligibleAssignments) {
If ($Role.RoleDefinition.DisplayName -eq “Exchange Administrator” -or $Role.RoleDefinition.DisplayName -eq “Global Administrator”){
If ($Role.Principal.AdditionalProperties.’@odata.type’ -eq “#microsoft.graph.user”) {
$AdminUsers += $Role.Principal.AdditionalProperties.userPrincipalName
}
elseif ($Role.Principal.AdditionalProperties.’@odata.type’ -eq “#microsoft.graph.group”) {
$AdminUsers += Get-AzureADGroupMember -ObjectId (Get-AzureADGroup -filter “Displayname eq ‘$($Role.Principal.AdditionalProperties.displayName)'”).ObjectId | %{$_.userPrincipalName}
}
}
}
Very nice. For SDK V2, you’ll need to use Get-MgBetaRoleManagementDirectoryRoleEligibilityScheduleInstance (has anyone said that they hate the SDK cmdlet names?)
Also, you can use Get-MgGroupMember to get the group members if you want to eliminate the Azure AD module as much as possible.
I came up with another solution for PIM assignments in https://office365itpros.com/2023/07/12/privileged-identity-management-ps/. Now I guess I can add eligible assignments to the set.
Set-User is an command that is both used on-prem and in the cloud.
How do I make sure it is executed in the cloud and not on-prem?
Never mind I think I found an way, make sure the on-prem Exchange PS session is not loaded/connected.
I am adjusting this script so it works in an Hybrid environment.
Normally, I use Get-Module to create an array of the loaded modules and then check if the Exchange Online module is loaded:
[array]$Modules = Get-Module | Select-Object -ExpandProperty Name
If (“ExchangeOnlineManagement” -notin $Modules) { Write-Host “Exchange Online not connected” }
For the record, it had nothing do with modules but with the session some commands are the same in Exchange Online and on-prem on the Hybrid server.
But I found an good way to avoid it with “Import-PSSession $Session -Prefix Hybrid”
Then Set-User is for Exchange Online and Set-HybridUser is for on-prem.
Connect-ExchangeOnline -ManagedIdentity not works
Ahem. It does. But you need to configure the Azure Automation account that the managed identity belongs to for Exchange Online first.