To save my time, and reduce effort for my teammates, I always save PowerShell scripts or one-liner for future reference and easy sharing. This is nothing new or revolutionary, plenty of individuals or teams try to come up with an efficient and easy way to store PowerShell scripts and one-liners. Some IT folks save them in a shared drive or shared OneNote notebook, but this system is not ideal, and there is a better way.
In this blog post, I am going to help you to build an efficient and modern way to document and share your PowerShell scripts and one-liners.
Requirements: Any Office 365 subscription which includes SharePoint and PowerApps.
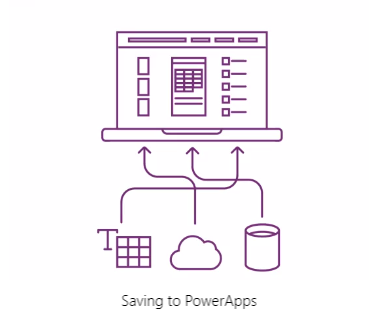
Let’s take a look at the architecture of the PowerShell gallery app we’re creating:
- A SharePoint list will play the role of a database where we are going to store PowerShell one-liners and scripts.
- PowerApps is going to be the front-end app to access PowerShell content via mobile device or tablet.

Now let’s take a look at the process:
We will have an administrator who is going to be the owner of internal PowerShell gallery, and then multiple senior admins who will contribute to the gallery (if business requirements allow). PowerShell scripts and one-liners will be accessible via the SharePoint Team site or a Mobile device for those who work remotely at client sites.
Ok, now that the housekeeping items are out of our way, we can start building our app.
First, we will need to create a Sharepoint list to store data. For more details on creating SharePoint lists visit Microsoft’s support page. If you’re wondering why I am using a SharePoint list instead of the document library, this is because I can store both one-liners and scripts (as an attachment in list item) in one place.
This is the schema of the backend SharePoint list called PSAssistant:
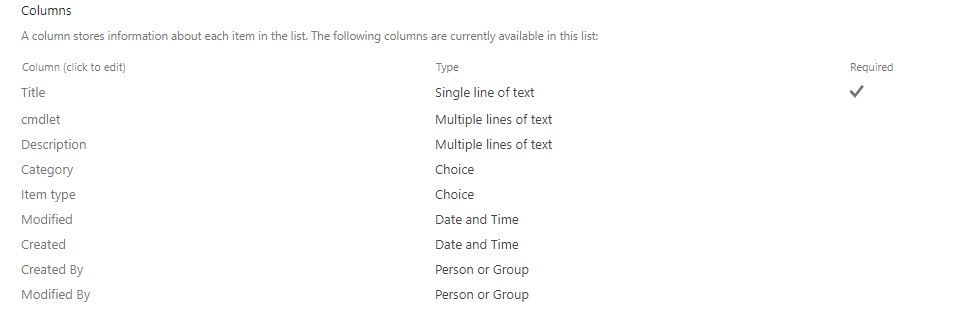
Fields that I created:
Cmdlet – Multiline text filed
Description – Multiline text filed
Category – Choice (in this example I have three options: Active Directory, Exchange, Azure)
Item Type – Choice (Script, One-liner). To differentiate between scripts and one-liners
You can enhance this list to make it more relevant for your needs. You will have to decide who should have rights to Create Items in this list and the rest of the users should have View only permissions. For more details visit this page to learn more about creating a SharePoint list and libraries permissions.
For this example, I entered a few one-liners and a couple of scripts to the SharePoint list:
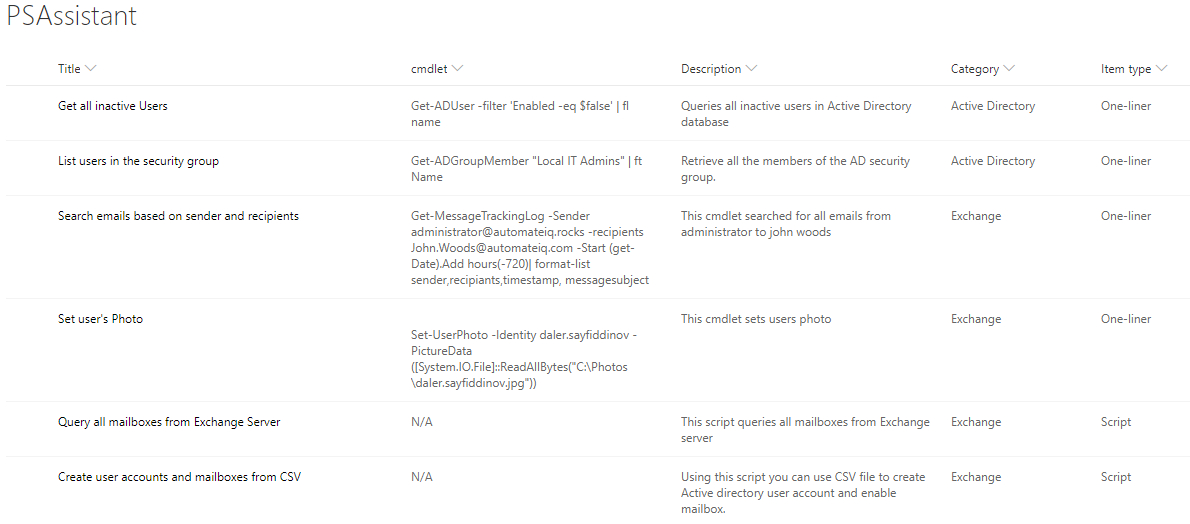
Note: I would recommend having some data in the list before you start building your app.
Great, now the backend is ready! Let’s create an amazing user interface using PowerApps.
Right from your SharePoint list click on PowerApps and select Create an app. You will be prompted to name your app.

PowerApps will kick in and does most of the work for you.
What happens in the background? PowerApps will create a new mobile-oriented app with three screens:
- A gallery screen with all the items in the list
- A details screen which will show the full details of an Item
- An edit screen (used in editing a selected item or creating a new one)
When PowerApps finishes all the background magic, we will have to do some prep work to make our low-code/no-code development process easier.
- Rename screens (Right click on the screen and rename)
- Rename key objects on the screen such as gallery and controls (Right click on the object and rename)
- Change app theme (your preference)
For simplicity, I renamed the first screen from BrowsGalleryScreen1 to LostOfPS and all objects on that screen. If you want to follow this blog post, also rename BrowsGallery1 to ListOfPSGallery and TextSearchBox1 to GallerySearchBox on that screen.

As you can see in the screenshot above, all line items that were added to the SharePoint list are appearing in the gallery. If you remember when I created a SharePoint list, I added a Category column with options: Active Directory, Exchange, and Azure. I am going to use this column to filter list items (Scripts and One-liners)
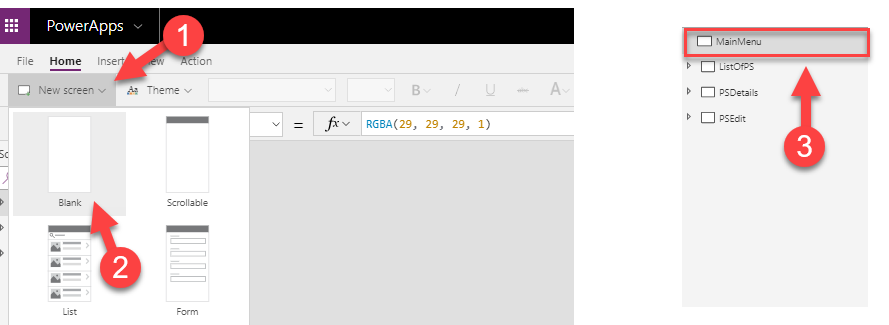
To get a better user experience, let’s create a navigation menu with a list of categories of available items. To accomplish this task, I am going add a new screen, move that screen to the top of the list and rename it to “MainMenu.”
Next, we will have to create a navigation menu which will show a list of all available script categories (Active Directory, Exchange and Azure) and with a simple click, we will be redirected to a screen with items filtered by the selected category. To achieve this requirement, we will create a PowerApps Collection in the memory of the app which will store category options for the navigation menu. But before we do this, let’s upload some images to PowerApps gallery to make it visually appealing.
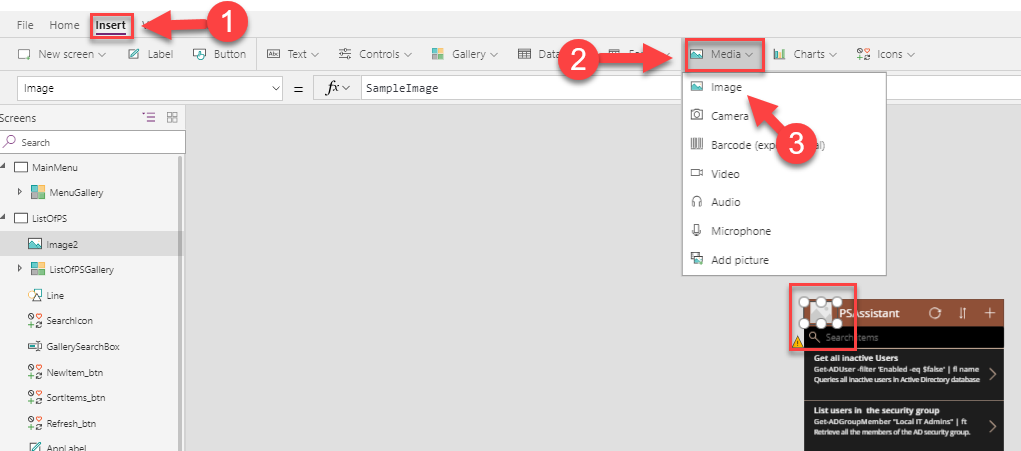
First, I downloaded Windows, Exchange and Azure logos in .png format. Now I have to upload them to the PowerApps gallery, to make them available for me to use.
Click File, Media and then Browse locally to find those images to upload.

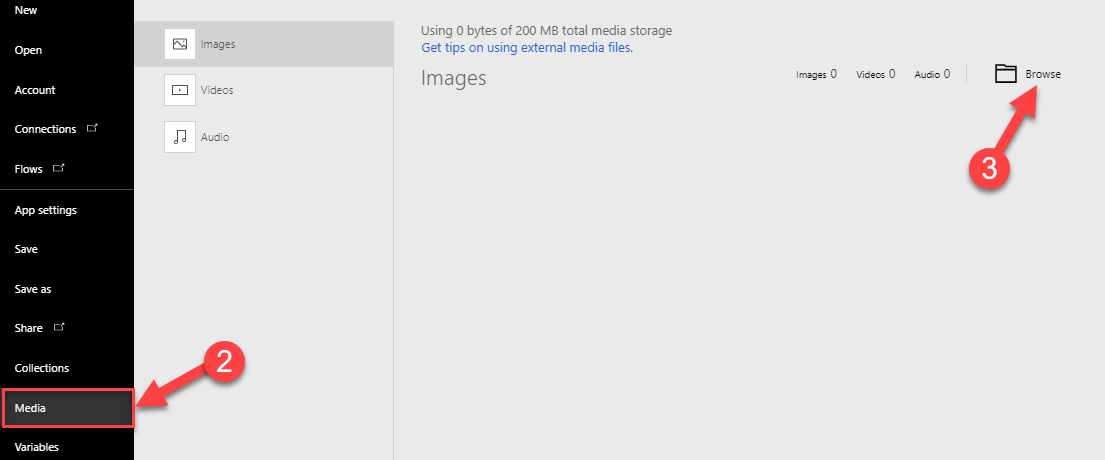
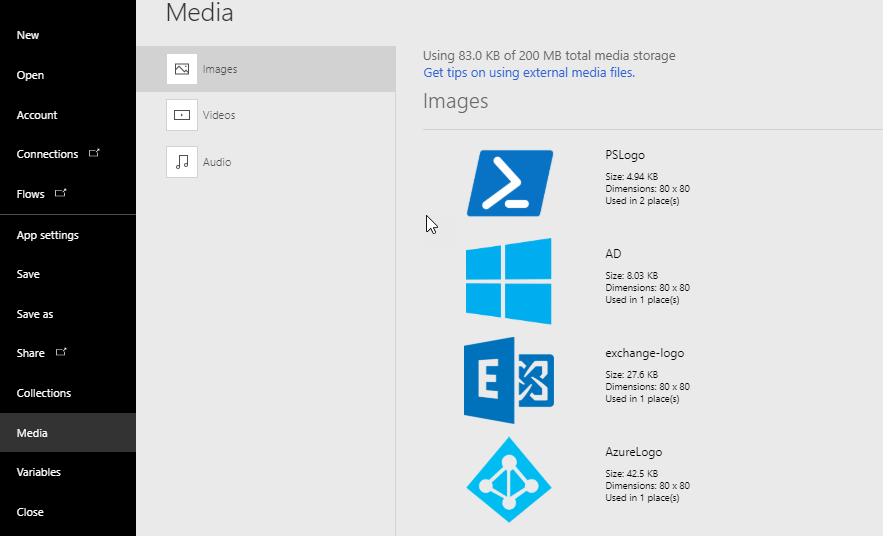
After images are uploaded, you should see them available in your App’s media gallery.
Now we will build the Menu collection. While the MainMenu screen is selected, from the property drop-down, select onStart event and paste the code below to the value field:
ClearCollect(Menu,{Title:"Active Directory",Icon:AD,Screen:ListOfPS,Filter:"Active Directory"},{Title:"Exchange",Icon:'exchange-
logo',Screen:ListOfPS,Filter:"Exchange"},{Title:"Azure",Icon:AzureLogo,Screen:ListOfPS,Filter:"Azure"})
This code will run in the background when app starts.
Note: if the onStart option is not available for this screen, save and reload your app but first make sure that this app is saved.

The screenshot above demonstrates steps that you need to perform, as well as the table that is created in the memory of the app.
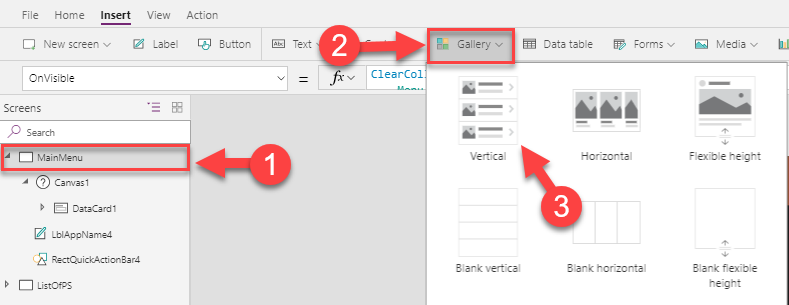
Next, we will have to present this table in a user-friendly way on the app screen. To accomplish this task, we are going to use the PowerApps gallery. While the screen is selected, navigate to the top menu, click on Insert and select the vertical gallery.
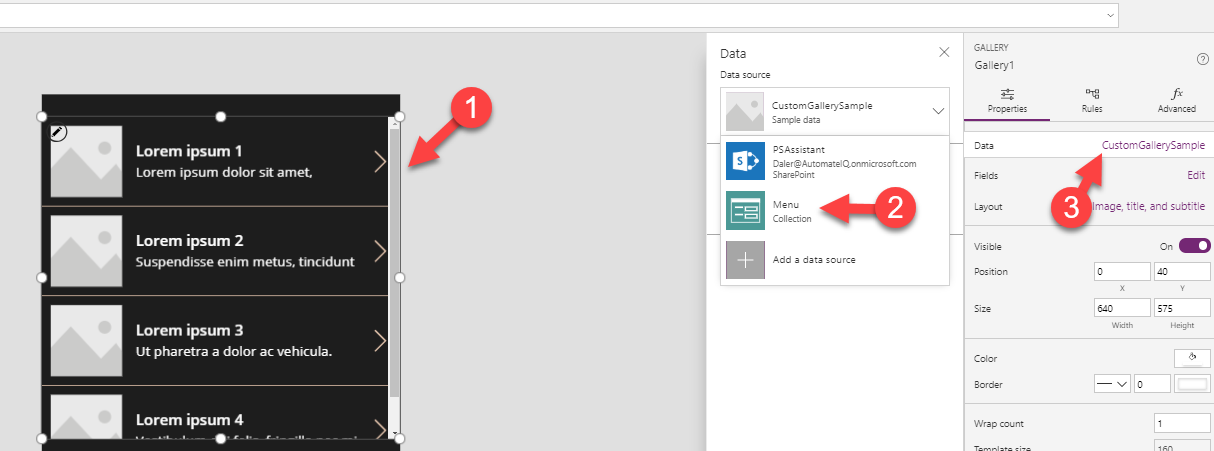
Now we have to associate this vertical gallery with a data source ( which is a collection named Menu that gets created in the memory).
Select the Gallery, click on CustomGallerySample and from the dropdown select Menu collection
If you don’t see what I’m showing on the screenshots here, I would recommend to saving your work here and reloading the app.
Once you’re finished here, you should have something that looks like the below image. Pretty cool right?

Again, if you are following this post word for word, rename newly created galley to MenuGallery.
As you can see, the gallery is rendering the data that is stored in the collection, which is in the app’s memory. The next step is to configure filtering. For example, when a user clicks on Active Directory, the user should be redirected to the ListOfPS screen and scripts filtered to show Active Directory Only. ListOfPS screen contains another gallery but connected to the SharePoint list (a PSAssitant list that we created earlier)
Note: The first item in the gallery is the only place where you can apply changes to the entire gallery. For example, if you want to change the font size of the text in the gallery, you will have to change it on the first item and then the change will be replicated to all items in the gallery.
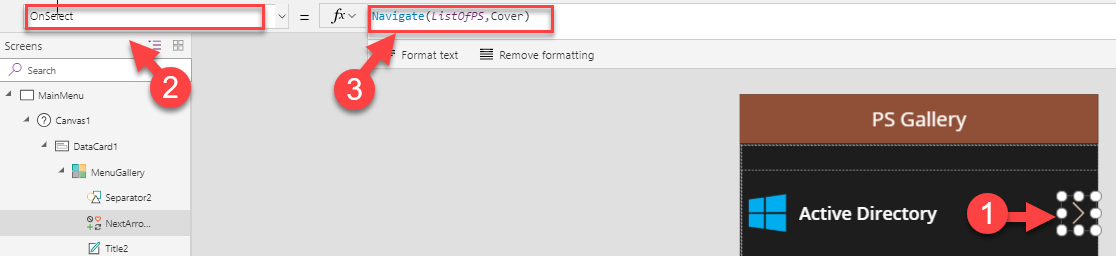
Ok, let’s configure this action. Click on the arrow of the first item and change the property to OnSelect. Paste code below to the value filed of onSelect property
Navigate(ListOfPS,ScreenTransition.Cover)
This action takes the user to ListOfPS screen with transition type Cover.
Before I design the last step, I am going to set a special variable which will be initialized when the ListOfPS screen loads. Select the ListOfPS screen and change the property to OnVisible and paste this code:
UpdateContext({PSFilter:MenuGallery.Selected.Filter})

What I am doing in the step above is creating a variable called PSFilter and storing the filtering value from the selected Item in the previous screen’s gallery. Remember, each item in that collection has four columns: Title, Icon, Screen, and Filter. By calling MenuGallery.Selected.COLUMN_NAME, we can get the property of the item that was selected.

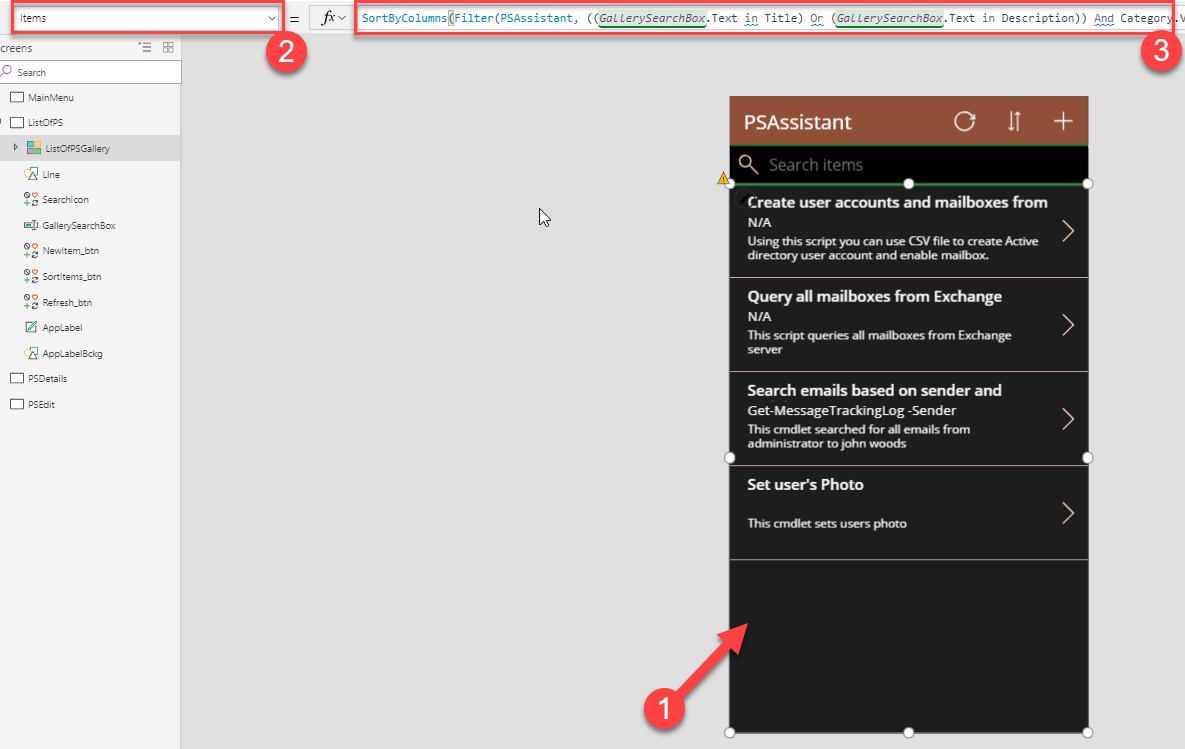
Now in the last step, we will filter the ListOfPSGallery (which is on ListOfPS screen) based on the user’s selection. Highlight the ListOfPSGallery on the screen called ListOfPS, in the properties drop-down select Items and replace existing code with the code below:
SortByColumns(Filter(PSassistant,((GallerySearchBox.Text in Title) Or (GallerySearchBox.Text in Description)) And Category.Value=PSFilter),"Title",If(SortDescending1,Descending,Ascending))
Note: As I mentioned earlier in the blog post, make sure that TextSearchBox1 is renamed to GallerySearchBox and BrowsGallery1 is renamed to ListOfPSGallery
Let’s break the formula down into parts, so that you can better understand the purpose of each statement:
I am using two functions: Sort Items by Title and Filter based on user’s selection in the previous screen.

We will explore the formula from inside out:
The PowerApps Filter function takes two parameters, the data source and formula or formulas by which data source will be filtered. Filter (Table, Formula)

((GallerySearchBox.Text in Title) Or (GallerySearchBox.Text in Description)) And (Category.Value = PSFilter)
I am filtering the PSAssistant SharePoint list based on the selection in the previous screen as well as user’s input to GallerySearchBox.
One more little detail, we will need to place a back button on ListOfPS to navigate back to MainMenu screen. You can use any icon that is available in PowerApps, but I am going to use custom image that I uploaded earlier.

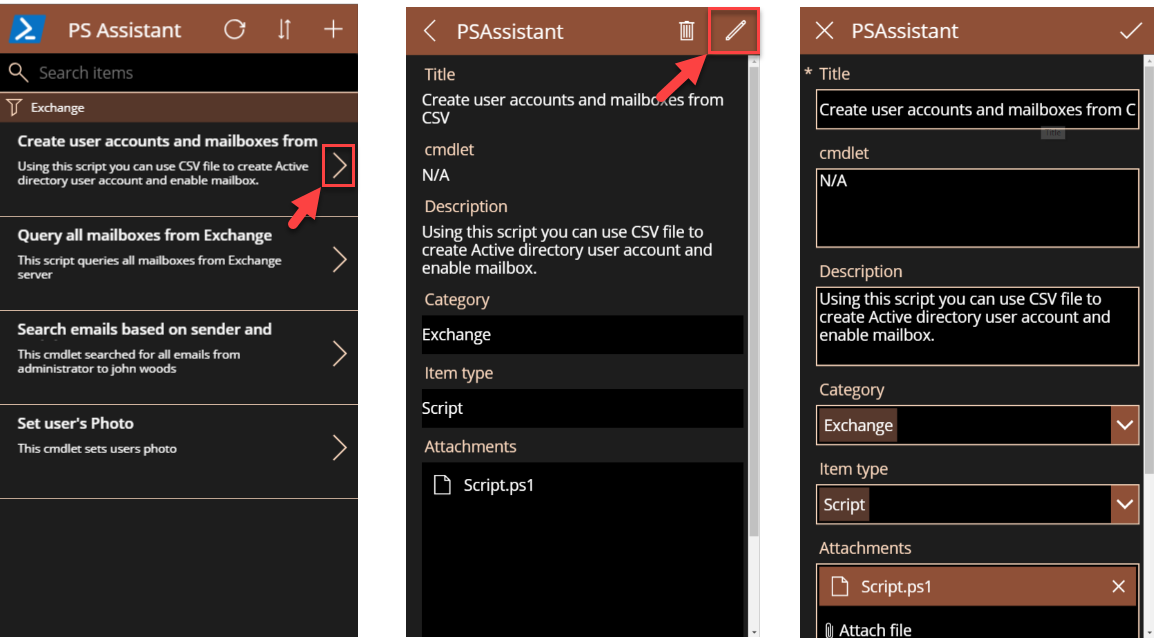
Your app is already configured out of the box with an ability to add New items
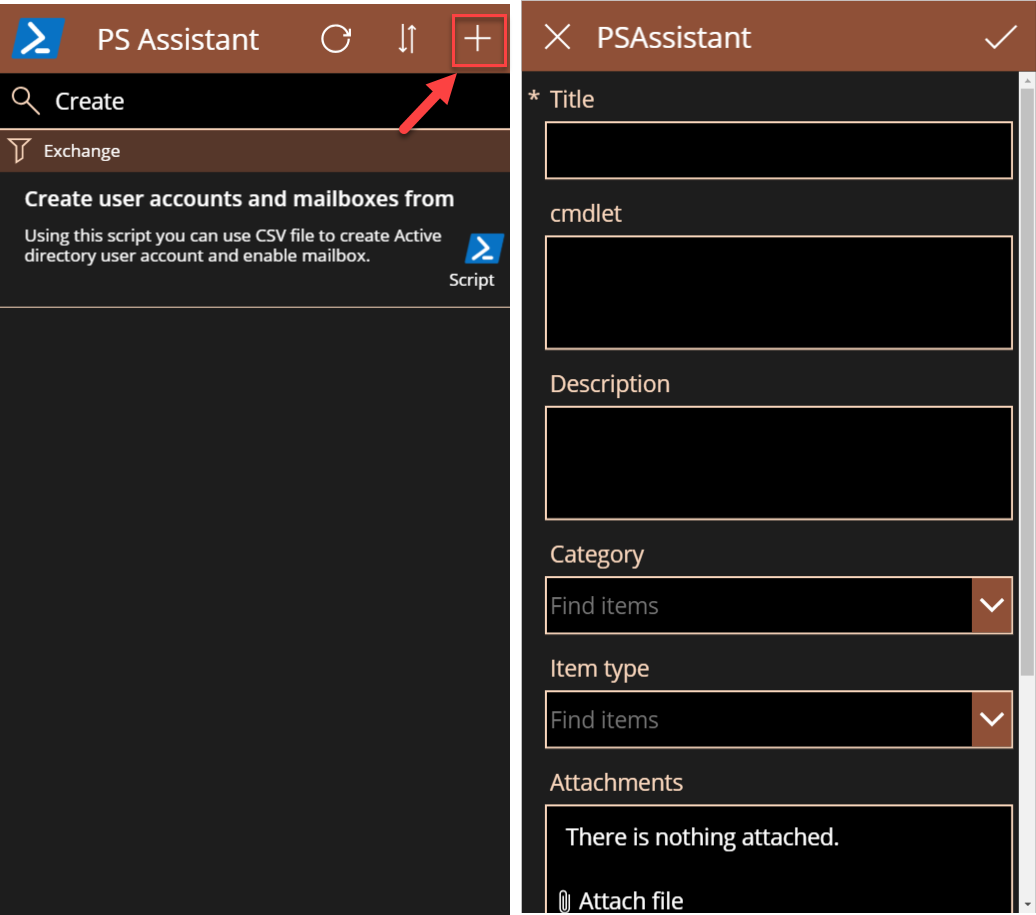
And Edit existing Items from the app.
Your app is ready! What is very attractive about using PowerApps is that you don’t have to deal with different platforms such as iOS or Android, and you don’t have to publish it to App Store or Google Play. The ability to publish and share this app with your tenant users is available right from the PowerApps platform.
In conclusion, I would like to say that Microsoft’s PowerApps Platform opens a lot of opportunities for non-developers to create a line of business applications without writing complex code. If you haven’t used PowerApps before, or you’re unsure about what it can do, I would recommend exploring the service further!


I note that the explanation of filtering via “script” or “one-liner” sort of dropped off as a “I’m going to explain this” and then nothing further.
How did you go about adding this filtering?
Great article – all we need now is a ‘run’ button to enable no-code users to execute the Cmdlets
Great post
google.com
Pingback: How to build your own internal PowerShell Gallery app | AutomateIQ - Business processes automation website
Great idea. Good article!!!
Pingback: ICYMI: PowerShell Week of 2-November-2018 | PowerShell.org
This is a great idea – love it! I will say, though… that is a surprising amount of custom code required for a “no-code” application set.
Not saying it’s a bad thing – just that there’s definitely more understanding of the backend code required if you want to build a decent PowerApp.