
Over the past few years, the Microsoft 365 ecosystem has rapidly grown in both the number of first-party products and services offered by Microsoft and third-party apps that integrate with Azure AD. Yet, we’ve seen little to no improvement in the way apps are presented to end users.
The app launcher (waffle menu) has gone over a few iterations but still isn’t universally supported across all apps. Even the app icons are displayed differently across different M365 endpoints, resulting in a very fragmented experience. On the other hand, simple feature requests, such as the ability to centrally add an entry to the app launcher on behalf of the end user has been ignored for years. Now, we’re finally seeing Microsoft address some of the most common pains.
Pinning applications to the app launcher
Admins will finally be able to “pin” apps to the app launcher, meaning the app will be displayed on the initial view, without users having to go through the All apps page and manually “pin” it first. Amazing stuff, I know. But given how much time it has taken for Microsoft to develop this basic functionality, we should cherish it. Now, this hasn’t all been released yet, but you can take a glimpse of how the feature is supposed to work in the recording of the BRK2061 session. The corresponding controls can be found in the Azure AD blade under Enterprise apps -> User settings, but only after you’ve added the “?feature.officepromotedapps=true” string to the URL to access the preview. This last part will not be needed once the feature is released officially.
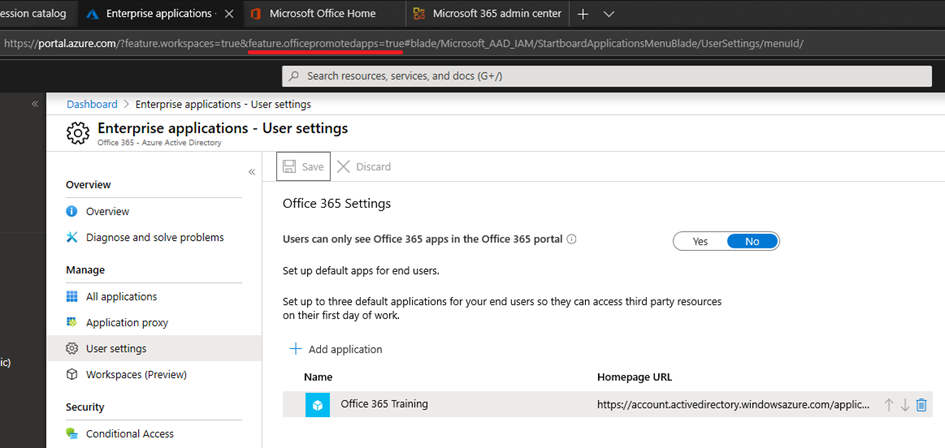
As seen on the screenshot above, up to three different apps can be added here, and you can also arrange the order in which they will appear on the app launcher. The office.com landing page will also display them as part of the apps section, once the feature is released that is. The process of adding an app is simple – press the Add application button and browse the list of first- and third-party apps registered in your tenant. We are still limited in seeing the first 50 apps in the picker and search enforces a “begins with” condition, but improvements are coming on that front as well.
Introducing Workspaces
While the app launcher “pin” feature described above is certainly a step in the right direction, there is some doubt it will be useful for anything but the smallest organizations in its current form. At the very least, an option to configure different apps for different sets of users is needed, and this is where the Azure AD Workspaces feature comes in. Workspaces allow you to configure a custom “view” or “filter” so that the given user is presented with just a subset of the applications available in the tenant which are most relevant to them. They will be surfaced to them as a separate tab on the new “My apps” page, alongside the full list of applications, in the office.com page or other app-related experiences.
Before we start playing with the feature, we need to take care of some prerequisites. First and foremost, the feature is still in preview so all the relevant parts might not be available to both admins and end users.
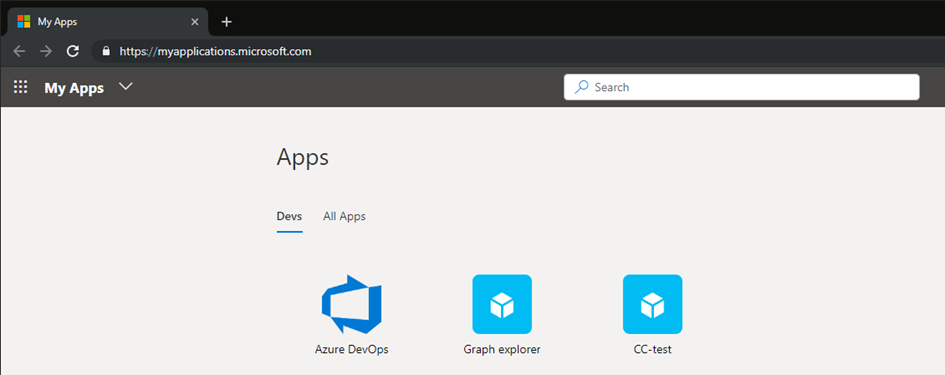
Start by navigating to the Azure AD blade -> User settings -> User feature previews and toggle the Users can use preview features for My Apps setting to either All users or Selected. This will enable the new My apps experience for your selected users, and can be accessed directly via https://myapplications.microsoft.com/. I’ve demonstrated how this should look in the screenshot above.
The actual Workspaces feature should be available in public preview for all tenants, but in case you don’t see it in yours, add the “?feature.workspaces=true” string to the URL. The last requirement is you need to assign the Azure AD Premium P1 or P2 license to the user creating the workspace. Microsoft hasn’t clarified yet whether the same license requirements will apply to the users under the scope of workspaces, or if they will only be needed for the user performing the management tasks. Once the feature is officially released, we should know some more information about that.
Lastly, you need to make sure you have the required permissions to create a workspace. Currently, only users holding the Global administrator, Application administrator or the Cloud application administrator roles qualify, but that will probably change in the future.
Configuring Workspaces
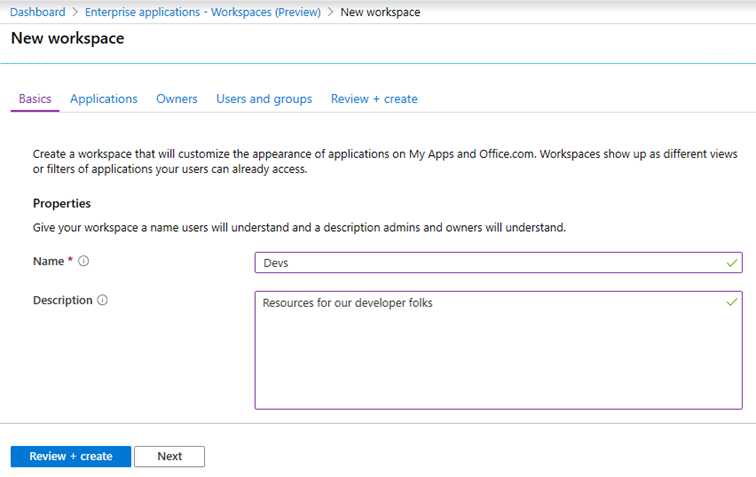
Provided all the prerequisites we’ve discussed are met, you can head to the Azure AD blade -> Enterprise applications page to start working with Workspaces. First, let’s click the New workspace button to create our first custom group of applications. The process is fairly simple – we start by providing a Name and optional Description or the workspace. Since you can have multiple workspaces in the company and even multiple workspaces assigned to the same subset of users, it’s a good idea to keep things organized and diligently fill in the details on this page. Note that the name does not need to be unique and the UI will not warn you or stop you from creating a “duplicate” one.
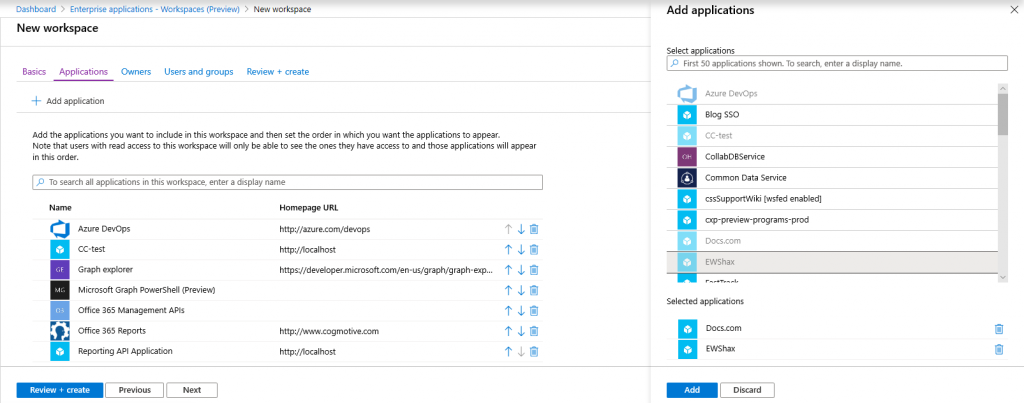
On the next page, you’ll assign the applications. To do so, click the Add application button and select your desired apps from the picker, this can be anything from one up. The usual annoyances will have to be dealt with – the limited number of apps displayed and search capability that leaves a lot to be desired, but as mentioned above improvements are coming in this area as well. Applications that you have already added to the workspace will appear grayed out in the picker. You can also rearrange the apps in the order you want them to appear by using the relevant buttons or even drag and drop the entries. Please note, that users will only be able to see applications they have already been granted access to, adding an application to a workspace assigned to a given user doesn’t grant the user permissions to use the app.
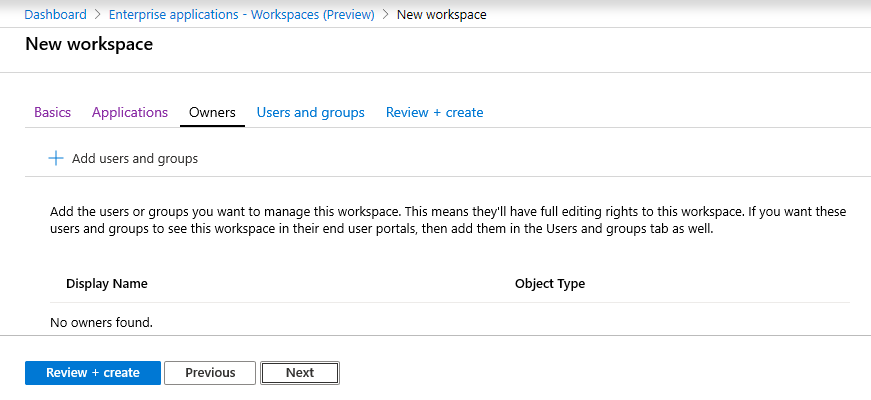
Once you’re done with the application selection, continue to the next page where you can configure Owners of the workspace. This is an optional functionality, allowing you to delegate management to this specific workspace. The idea is simple – in most cases people within the actual teams or departments will know better the set of tools used by their own members, so the IT staff can leave the process of configuring this workspace to them. In fact, it’s feasible that all you will have to do is create “empty” workspaces and just set their owners to the corresponding managers or Team leads, which will then configure all the other settings as needed. Or, you can skip the Owner configuration completely and maintain total control of the feature.
Please note that Owners won’t actually see the workspace in their My apps portal or other platforms unless you assign it to them in the next step.
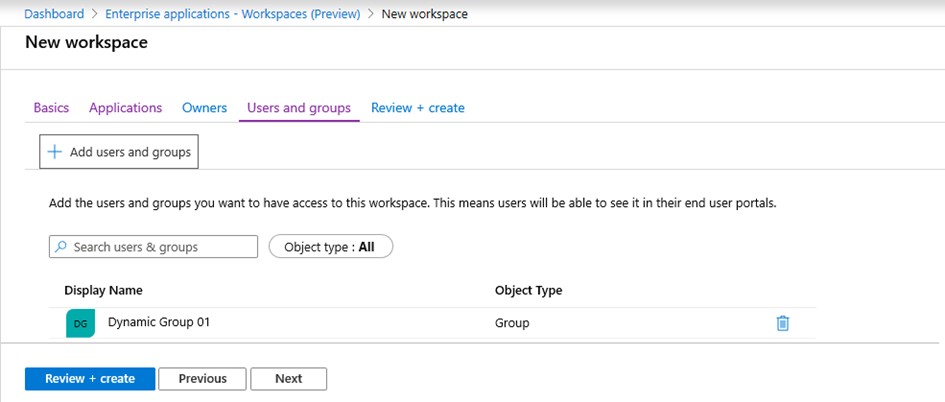
The Users and groups page is where you will assign the given workspace to end users. This step is also optional, as you might simply be creating an empty workspace to be managed by the respective owner. In our case, we will add the users in our Dev department. Note that you can select any Security or Office 365 group, including those with dynamic membership, as well as distribution groups (but only those with preset membership). Alternatively, you can assign users directly. And yes, you can also include Guest users, which can even be configured as Owners of a workspace.
On the last page, you can review the settings and if everything seems in order, press the Create button to complete the process. It takes a minute or so for the changes to propagate throughout the system, and then the newly created workspace will be available for the selected users. Currently, only the (preview) My apps will display the workspaces, but in the future, they’ll be featured on the office.com apps page as well as on the app launcher/waffle menu.
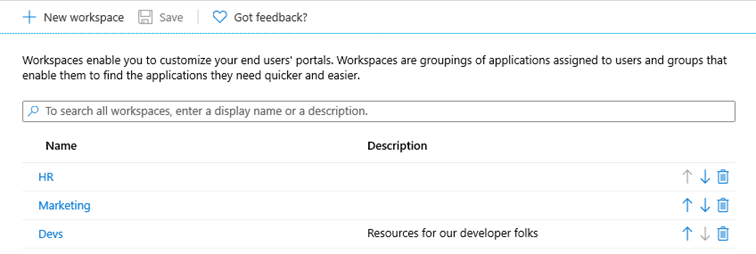
One last thing you might want to configure after creating a new workspace is its place relative to other workspaces. This will affect the order in which any relevant workspaces are displayed to end users, and can be controlled by the small arrow buttons in the list of workspaces:
Summary and additional notes
In summary, we reviewed the new Workspaces feature, which allows you to create custom “views” or “filters” for Azure AD integrated applications, relevant to a group of users. You’ll be able to select a subset of the applications and sort them in a particular fashion, and they will appear across the different app-related platforms. Multiple workspaces can be assigned to users and arranged accordingly, and you’ll also be able to delegate the management of the feature to a Team lead or manager of the corresponding department. Overall, the feature gives you a quick and easy way to publish a list of resources to a group of users.
In this initial release of the feature, only admins can create workspaces. Microsoft plans to expand this functionality in the future though, allowing even end users to create their own workspaces, or modify the apps assigned to them via a workspace. For example, users will be able to remove an application they no longer need/use, in which case the application will no longer be featured in a given workspace (but will remain available under All apps). The feature, however, cannot be used to actually grant access to a given application, you have to do that beforehand. Such functionality, and much, much more, is made available by the Entitlement management feature, which we will review in the coming weeks.


