
In Part Two of this four-part Account Breaches series, I delve deeper into investigating Account Breaches using Cloud App security. This option is only available to those who have a tenant-based or E5 license assigned to their users, so this may not be available to all Admins. As an alternative, in this article, I will be looking at the free option, the ‘Hawk PowerShell Module’. This is still an efficient way to collect forensic data so you can review your breaches in more closely.
Hawk PowerShell Module
Hawk PowerShell Module was created by an Engineer at Microsoft. I was first informed of this tool by Microsoft when working on an incident a few months ago. It’s the best module I’ve seen with data export of audit logs and information around your tenant. You can find out more about the Hawk PowerShell Module information here. This tool is free and great for capturing data around your tenant and users that have been breached.
Installing the Hawk PowerShell Module
1. Launch a PowerShell window in administrator mode
2. Type the following: Install-module -name hawk and press enter

3. You will be prompted about installing the module from an untrusted repository. Type Y and press enter. You will see the hawk tool install at this time
4. You can verify the installation by browsing to C:\Program Files\WindowsPowerShell\Modules and Hawk folder will now be listed
5. Browse to your C:\temp directory and create a folder called Hawk as we will need a location for the data extracts.
There are two commands to run with the Hawk Module regarding a breached account. The first is a tenant investigation, which I recommend to conduct first. The second is user specific and investigates the compromised account in finer detail. We’re going to get started with the Tenant commands and data review. In the same PowerShell window, we’ll need to connect to Exchange Online and MSOL Service. If you need assistance connecting to these services, please follow our PowerShell service connection article. Now that you’ve connected to Exchange Online and MSOL Service, you can start running the Tenant investigation commands.
Hawk Tenant Investigation
- Type start-hawktenantinvestigation and press enter

- Read the Disclaimer and Press Y and Enter
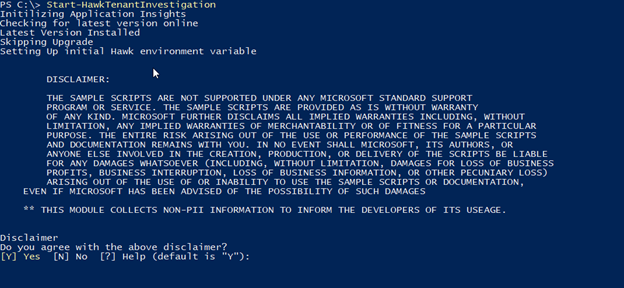
- You will then be asked to provide an output directory. Type c:\temp\hawk and press enter
- You will then be asked how far back in the past should we search? Type 30 and press enter

- The Script will now run and collect information relating to your tenant configuration, this is the data we’ll need to review
Browse to the C:\temp\Hawk directory, you will see a new folder named after the date and time you ran the command. Inside your directory might be a file named _Investigate.txt. If you have this file name, then look at this first as a priority. This doesn’t necessarily mean that there’s anything wrong, it’s just good practice to investigate this.
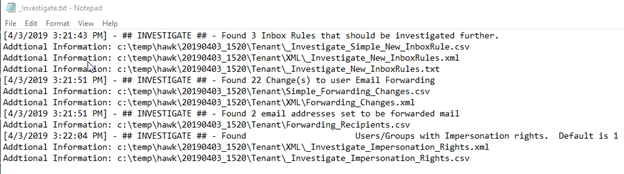
You’re now ready to investigate the _Investigate.txt file. Here, you can see ## INVESTIGATE ## and then an instruction of what you need to review further. In this example, we have been informed to explore the following items:
- Found 3 Inbox Rules that should be investigated further
- Found 22 Change(s) to user Email Forwarding
- Found 2 email addresses set to be forwarded mail
Now we know which items need inquiring into, close the _Investigate.txt file and open the Tenant folder to review the contents. The tenant command has pulled through the following information from the last 30 days:
- Admin Audit Log Config
- eDiscovery Role Assignments
- eDiscovery Roles
- Forwarding Recipients
- Impersonation Rights
- Impersonation Roles
- Org Config
- Remote Domain
- Simple Forwarding Changes
- Simple Mailbox Permission
- Simple New Inbox Rules
- Transport Config
- Transport Rules
To check for any anomalies, you need to start by reviewing these csv files. This is a good baseline to have as a backup for your tenant files. Hawk Tenant investigation is the first step for going over changes to your environment for each of these categories of data.
Hawk User Investigation
We’ve collected the Tenant data, so now we need to look at the data of the user who has been compromised.
Type Start-HawkUserInvestigation -userprincipalname user@domain.local and press enter.

After you’ve run this script, the data will be gathered for that specific user. This may take some time as the module is now searching the last 30 days of the unified audit logs for the user and converting it to readable formats. Once the conversion is finished you will have a folder in the name of user@domain.local format. Open this directory and prioritize reviewing any files that start with _Investigate.
The following files should be listed in your folder contents:
- CAS Mailbox info
- Converted Authentication Logs
- Exchange Audit Logs
- Forwarding Report
- Inbox Rules
- Mailbox Folder Statistics
- Mailbox Info
- Mailbox Statistics
Start your investigation with the Forwarding Report to see if any SMTP forwarders were put in place on the compromised account. The reason why it’s important to check this is because attackers will often log in to Webmail and change the forwarding settings on their account without the user’s knowledge.
You can see below in Column D an example of what a compromised user looks like ForwardingSMTPAddress:

If you see the forwarding address configured to a suspicious address, you’ll need to fix this promptly. We’ll cover this remediation process in Part 4. Next, we need to review the Inbox Rules file by looking at the names of the rules and the statements of the rule set. The inbox rules the hacker created here were setting a delete action if matching fromaddresscontainswords.

We can also see in the example that the attacker did, in fact, create a new inbox rule and these inbox rules need to be deleted as part of your remediation work we will cover in Part 4 of this blog series. The converted authentication logs will give you all the Azure logins with city, country, type of device, IP address, etc. There are several columns to review here, so in your investigation, you should be looking to determine countries external to your organization that may be the source of the breach.
Exporting the CSV will save you time in the long run when inputting filters to the Office 365 audit search portal. In the CSV format, you can set multiple data filters and search the document based on actions or IP address etc. Since you would have found the country and IP address in the authentication logs, you can use that data to search and filter in the audit log csv file. We will use this information in Part 4 of this blog series to put in IP blocks in our Office 365 tenants which will prevent those IP addresses from logging into our tenant in the future.
Conclusion
As standard practice when investigating account breaches, you should gather as much information about the incident as possible. This will come in handy if you are audited and for checking the severity of the breach. If your tenant has purchased Cloud App Security, I suggest using this as your primary source for incident response. However, if you don’t have access to Cloud App Security, then the free Hawk PowerShell Module is also a perfectly adequate way for conducting a thorough investigation. Stay tuned for Part 4 of this series, where I will demonstrate the best courses of action for remediation and cleaning up a compromised account.


set-executionpolicy unrestricted
Where is part 4?
Rerun the install-module hawk -allowclobber
this will overwrite installed dependency’s with supported versions.
Have you seen this:
Start-HawkTenantInvestigation : The ‘Start-HawkTenantInvestigation’ command was found in the module ‘HAWK’, but the module could not be loaded. For more information, run ‘Import-Module HAWK’.
If I run Import-Module, I end up with an error about MSonline, but the module is install as I can see it in file explorer.
Thanks.