If you use Office 365 then you’ll know it is a productivity suite – intended to make you and the organization more productive in your day to day jobs. Just using the tools in Office 365 by itself can be helpful, for example by removing the need to send emails and use tools like Teams for quick chats.
However, you can get more value from Office 365 by using solutions like Microsoft Flow to automate routine tasks. In this article we’ll use Microsoft Flow as the glue that holds everything together, re-imagining an existing process and using built-in functionality to create simple PowerApps, and using productivity tools like Planner. We’ll keep things simple so you can try it out for yourself and build-upon it or create your own scenario.
Our example scenario and solution
In our example scenario, our facilities management department at the company have a team dedicated to maintenance. They currently receive incident reports that are either sent via internal mail or emailed across as a filled-in word document, which is received by the manager who then forwards it to one of the team to deal with.
There are currently a number of flaws with this process:
- Reports are not timely, because they need to be filled in and sent via a PC.
- The manager then needs to spend time reading the request, potentially scanning and typing it in before then assigning it to the team.
- Then once sending it to the team, there isn’t a way to track progress.
We can improve this in several ways in Office 365:
- Firstly, we can create a mobile-friendly app to capture information. We’ll use a SharePoint list to capture that information, with a PowerApp as the front-end.
- We can also create a Team in Microsoft Teams, with an attached Planner to manage the incidents reported.
- Finally, we can automate the process to convert the data collected via the app into Planner tasks and use Teams to post a message to the Team.
The best thing about all of this is it doesn’t require any coding experience. And, it doesn’t even require any experience with PowerApps to create the basic application – we’ll start with an auto-created PowerApp. The steps we’ll need to take will be as follows:
- Create a Microsoft Team. This will form the basis of where our application data is held.
- Add Microsoft Planner to the Team. Planner will be attached for management of the tasks, once they are received. Microsoft Flow can be attached to the Team, and of course we can use a Teams channel for chats about the incidents.
- Create a new SharePoint List. The SharePoint List will be used to collect data from the PowerApp (and potentially be opened up for wider access permissions).
- Create a new PowerApp. The PowerApp will be the front-end that people will use to report incidents.
- Create a new Flow. Our flow will trigger when new items are added to the list and take the newly reported incident and create and assign Planner tasks, post messages into Teams and remove the SharePoint list item once it’s been processed.
In the first part of this post we’ll begin by setting up the new Team, Planner and List – the foundations for our app. In the second part of the series, we’ll create the PowerApp and Flow and put it into action.
Create a new Team
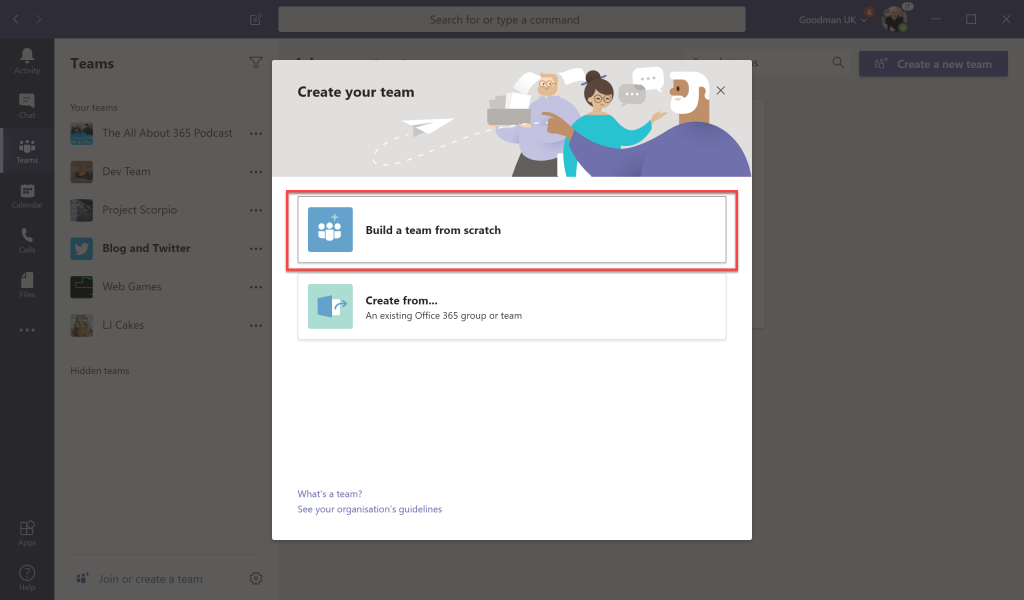
First, we’ll create a new Team. Naturally, if the group of people working together already have a Team established, this might not be necessary – but for completeness, we’ll create a Team here and use it as the foundation for the process we’re building. To do this, we’ll choose Join or create a Team in the Teams UI, then choose the Build a Team from scratch:
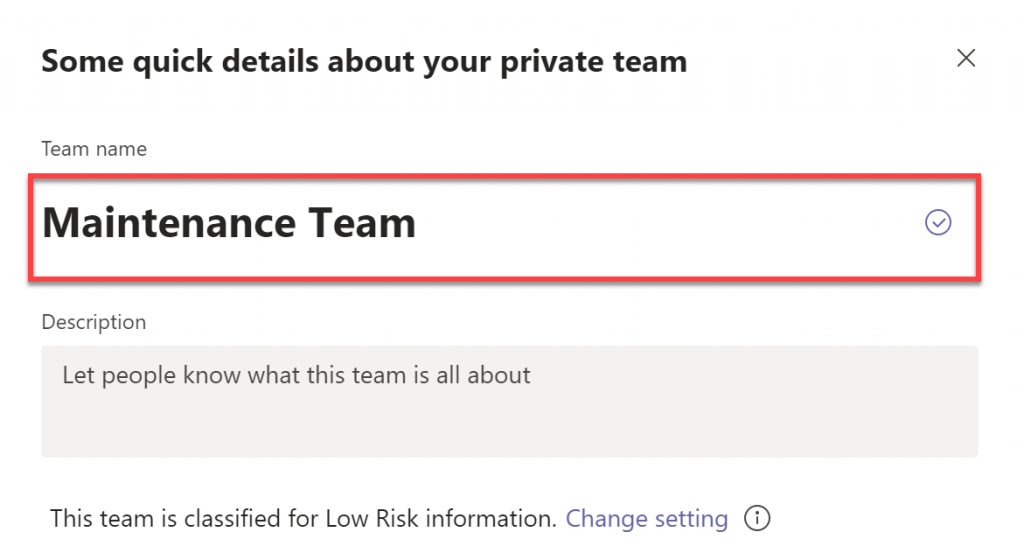
Next, we’ll give the team some details. We’ll create a Team for the team not the specific task we’re automating. So, this team will not be called “Incident Reports” – but “Maintenance Team”:
This way, we can use it as the basis for lots of different tasks the team does. For example, we might later enable it for Shifts.
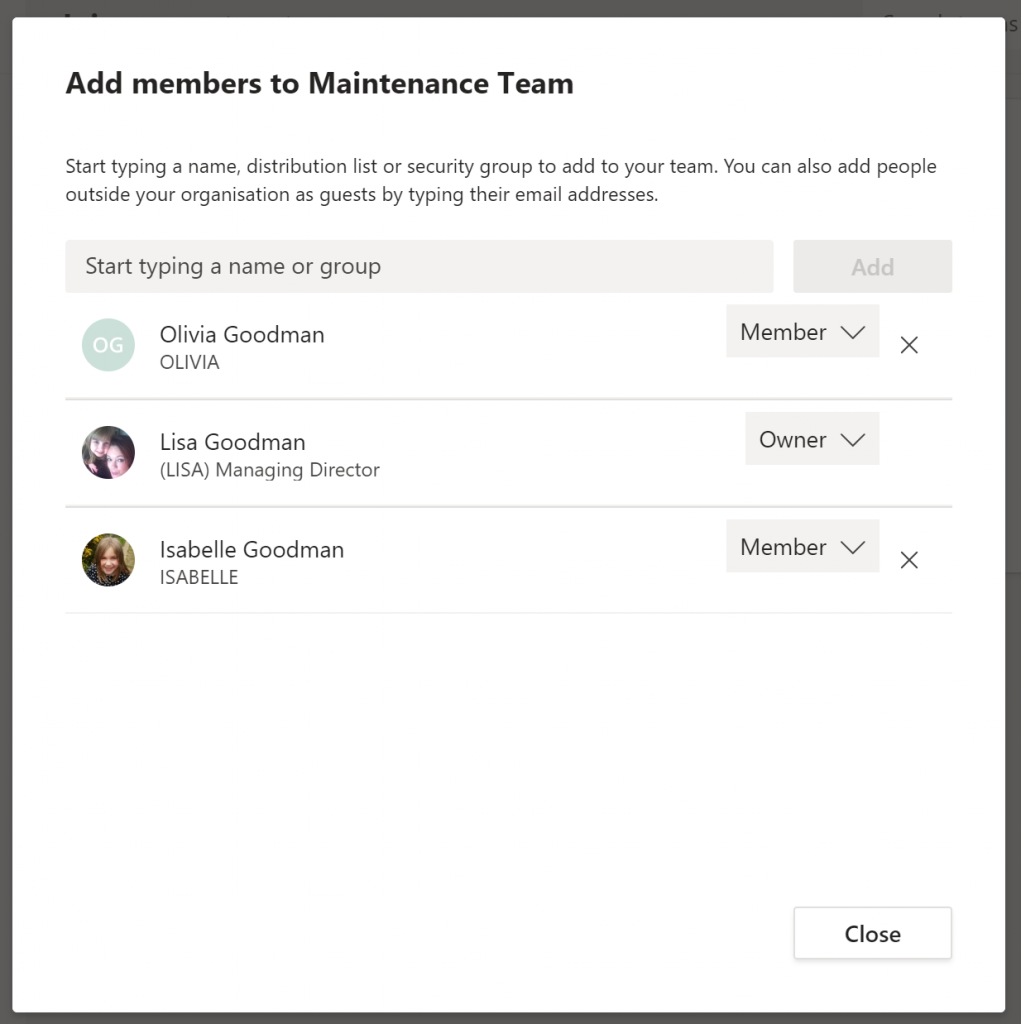
Then we’ll add the members to the Team. In the example below, I’ve added a co-owner to the Team, and two members. These will become Owners and Members respectively for the underlying Office 365 group.
Add a Channel for Incident Reports
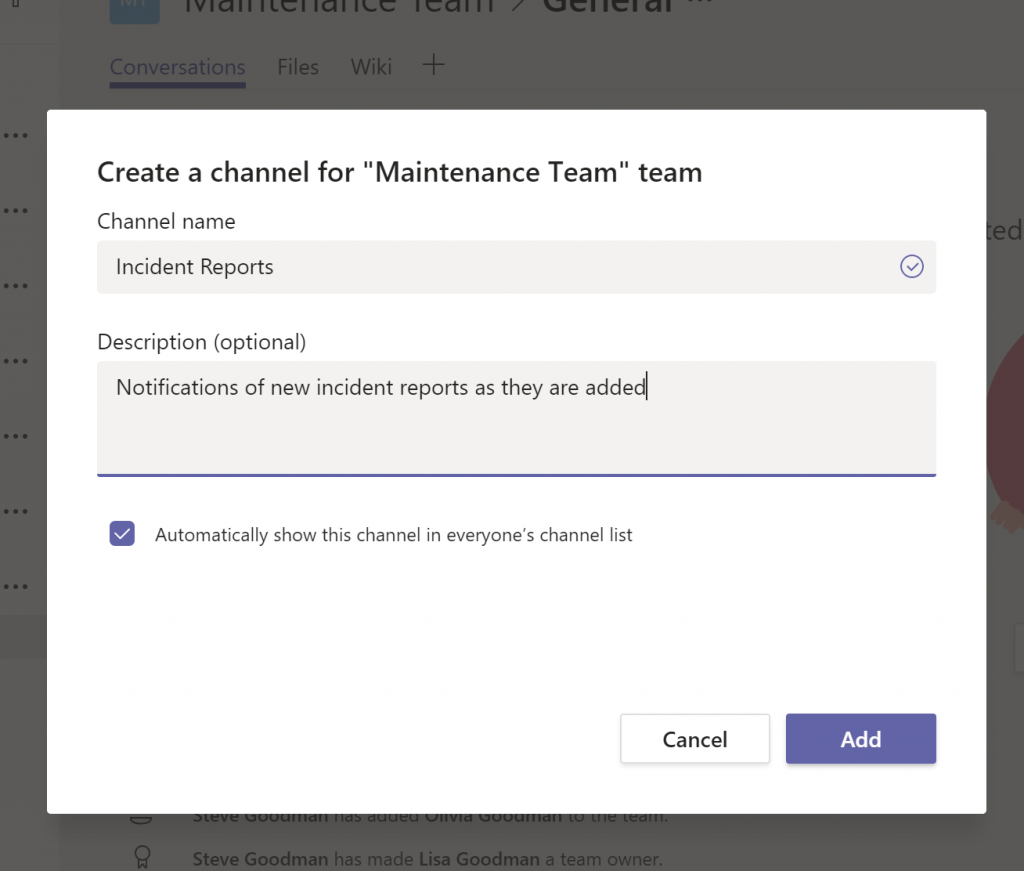
As we’ll use the Teams channel to post notifications, we’ll create a channel within the team for Incident Reports. This channel within the team will allow us to separate conversations about incident reports from the normal team chat.
Add Planner to the Team
Because we’ll automate adding tasks to Planner we’ll add a Plan to the Team itself. By adding Planner to an existing Team, rather than creating a separate Planner (and underlying Office 365 group) we can ensure the membership list for the Planner tasks stays in sync with the team.
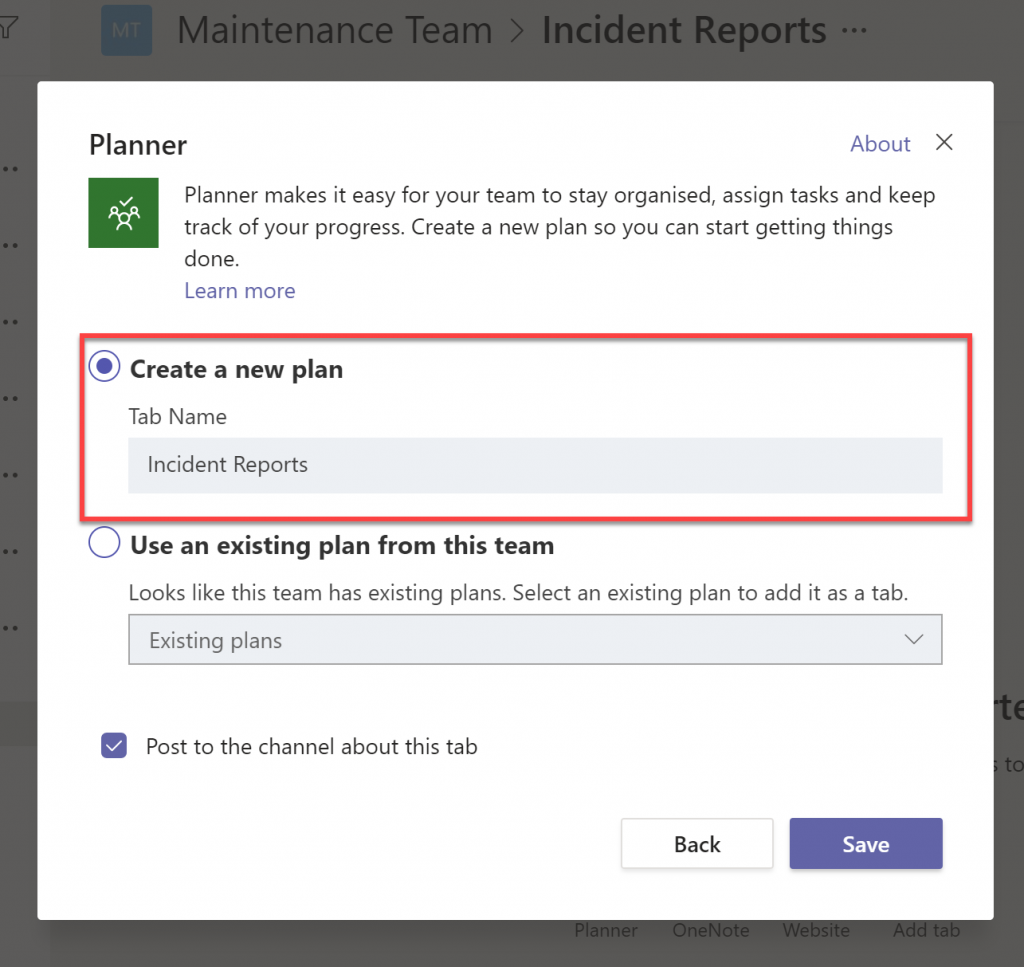
We’ll do this by navigating to the Tabs in the Incident Reports channel, then choosing Add, then choosing Planner.
We’ll then choose to Create a new plan. We’ll give it the name Incident Reports:
After creating the new Plan, we’ll see the new Planner tab within Teams. We won’t have any tasks yet – which is obviously expected. However, we will create two new buckets within the Plan, as shown below.
The buckets are used to group tasks together, and tasks will be dragged and dropped between buckets. They allow users of the plan to logically organize the types of tasks, either to make it easy to manage and progress, or simply to categorise.

Create a new SharePoint List
A SharePoint List is, at it’s simplest a set of columns with rows, stored in SharePoint – similar to a Database Table or even an Excel Worksheet.
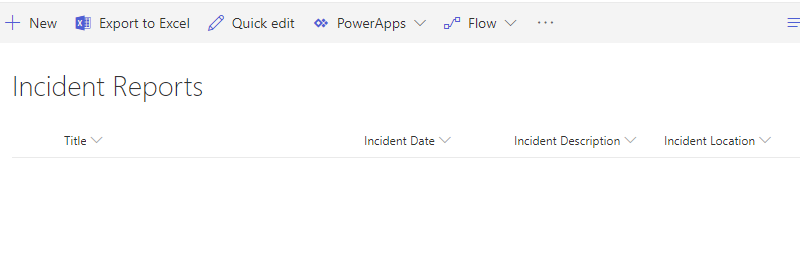
We’ll use a SharePoint list as the place to store new incident reports as they are entered. It will, by default have a Title, which we’ll use, and we’ll also add some additional columns:
- Incident Date
- Incident Description
- Incident Location (as a drop down-list)
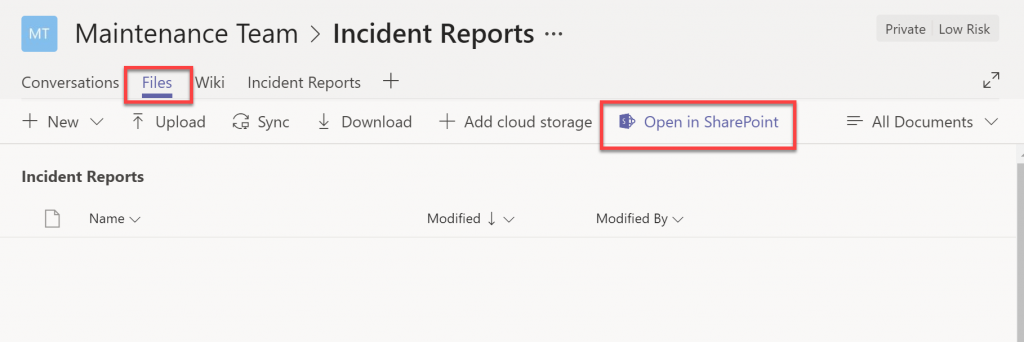
To quickly get from Teams into the right place in SharePoint, we’ll navigate to the Files tab and then choose Open in SharePoint:
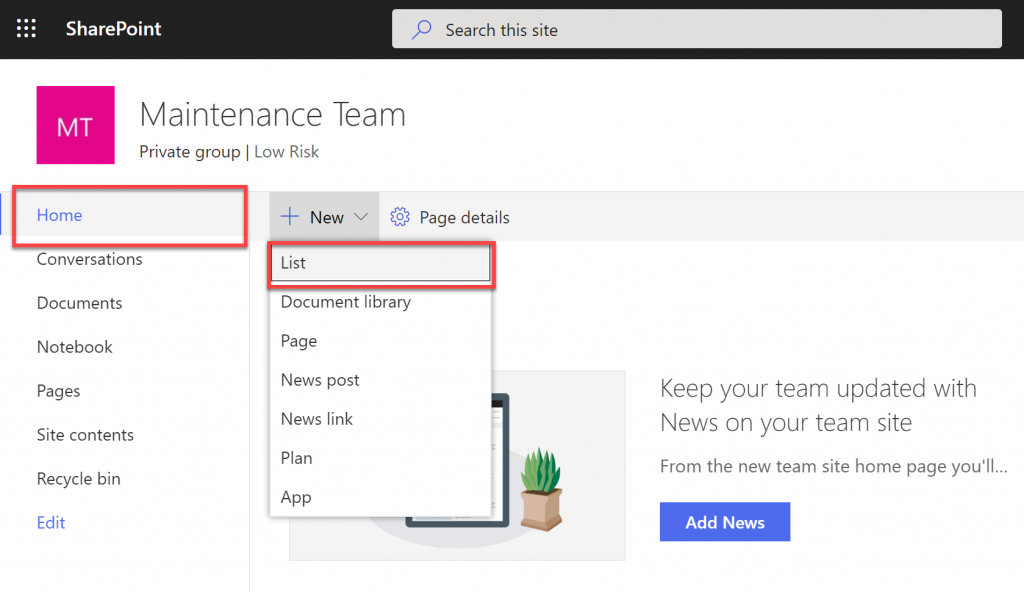
Then within the SharePoint Site associated with the Team, we’ll choose Home, then choose New>List:
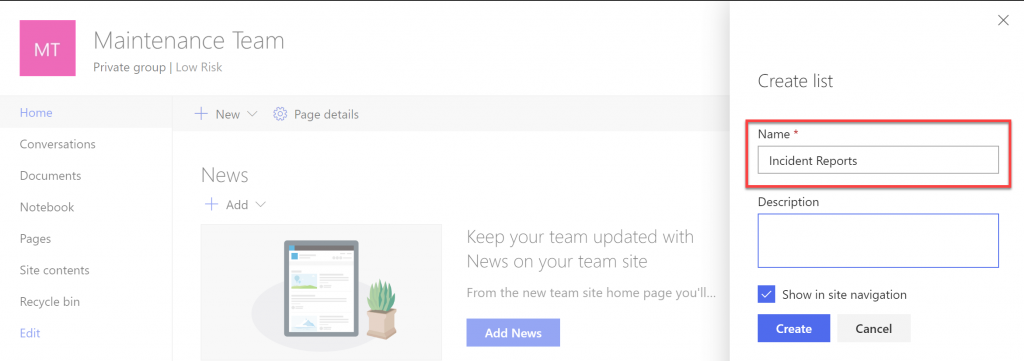
From the Create List dialogue, we’ll create a list with the name Incident Reports, and choose to show in the Site Navigation, then select Create:
We can then add the columns to the list. From the list choose Add Column, then choose an appropriate data type.
For example, for Incident Date, we’ll choose Date and Time, for Incident Description, we’ll choose Multiple Lines of Text, and for Incident Location, we’ll choose a type of Choice, with a list of locations pre-populated – as shown below:

We’ll very quickly have a List created with the columns we need:
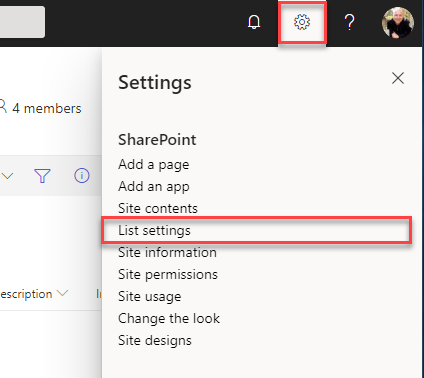
Before continuing, we’ll also take a moment to familiarise ourselves with the settings and detailed configuration for the list. These are available via choosing the Settings icon, then List Settings:
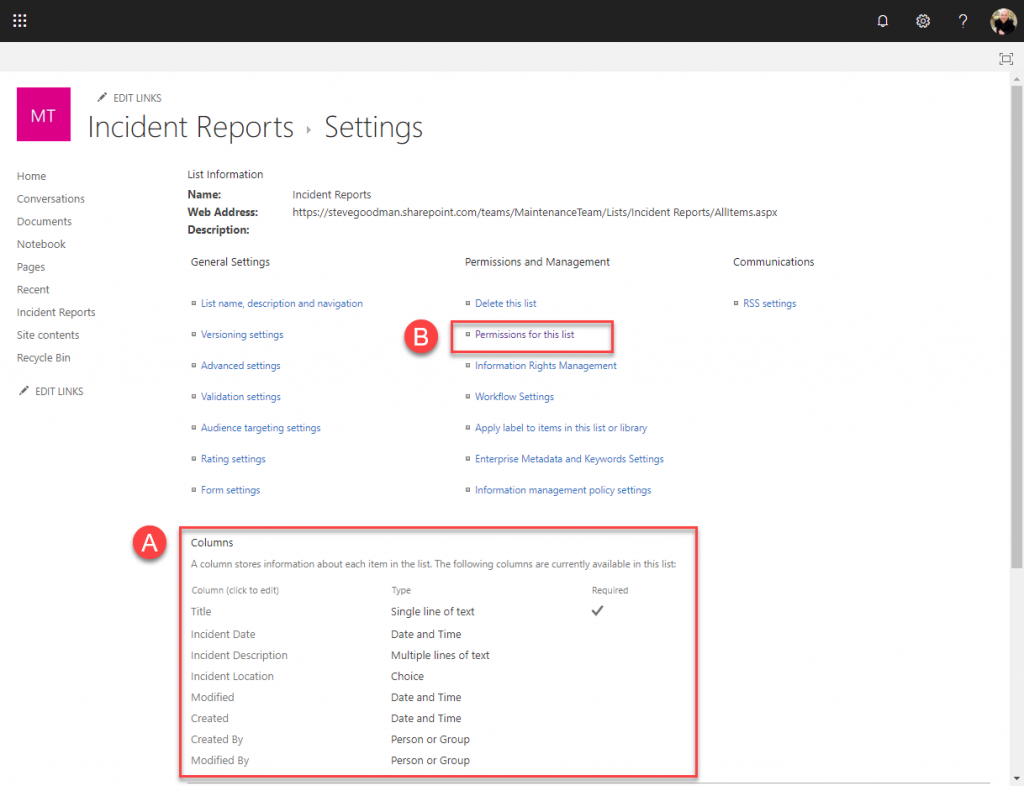
We’ll quickly be able to examine more detailed information about each column, and provide and change configuration in the Columns section, as highlighted below as A.
Later on, as we’ll mention at the end of part two of this article, we’ll also want to revisit the Permissions for this list section, highlighted as B, to allow people outside of our Microsoft Team (and Office 365 Group) to add new incidents.
Summary
In part one of this series we’ve looked at the core problem we’re trying to solve and considered how to use Office 365 to create a solution, then outlined what parts we’ll use in the service as part of the workflow. Then we’ve created our foundation for the application – the Team, Planner and a SharePoint List. In part two, we’ll create our PowerApp and use Flow to glue the process together.


So i now have a good looking Team channel, a lean Planner board and a beautiful Sharepoint list… and then ……
I spend about an hour following the instruction and got to this… where is part 2 lol…. ?
Part 2 is here:
https://www.practical365.com/collaboration/teams/create-a-powerapp-for-mobile-data-capture-with-teams-flow-and-planner-integration-part-2/
Where is part 2?
Did part 2 ever get published?
Part 2 is here:
https://www.practical365.com/collaboration/teams/create-a-powerapp-for-mobile-data-capture-with-teams-flow-and-planner-integration-part-2/
It’s here, and has been on the site for some time
https://www.practical365.com/collaboration/teams/create-a-powerapp-for-mobile-data-capture-with-teams-flow-and-planner-integration-part-2/
Thanks for this amazing article!
I think it is better to post complete guide instead of one part at a time.
Don’t worry – you won’t have to wait long, as the next part should be online tomorrow.
Longer articles are spilt to make things easier to digest.
Steve