It’s Time to Remove Access
Recently, I had to let go of a team member. It’s sad, but sometimes we must do what we must do to keep the team going. Why we do that is not the focus of this article, instead, I want to share what I learned about the necessary steps to remove access for a departing team member.
What exactly do we need to do when terminating an employee? Because a termination can be abrupt (except for those who decide who to let go), it’s a good idea to have a checklist listing the actions to take when the request to remove someone’s access to Microsoft 365 is received. Let’s get into the checklist that I used.

Standard Checklist
This checklist applies to a tenant with no need for premium services, which we will discuss later.
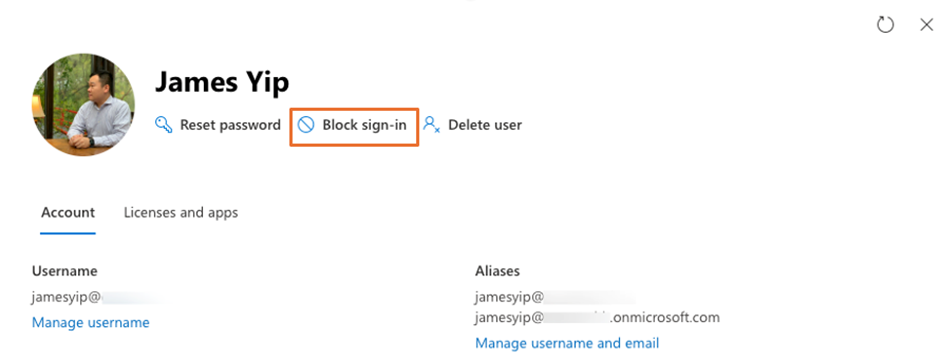
- Block Sign-in – This is the most important step to disable the account as shown in Figure 1. Note that doing this will only block new sign-ins but users can still access the system for up to 60 minutes from the time you invoke“Block Sign-in.” To force logout of all sessions immediately, consider using the Revoke-MgUserSignInSession Microsoft Graph PowerShell cmdlet with the user’s object ID. A sample script is shown below:
Import-Module Microsoft.Graph.Users.Actions
Revoke-MgUserSignInSession -UserId "user@domain.com"
- Disable the On-premises AD Account – I do this next because the Block Sign-in will not sync from Entra ID to your on-premises AD via Entra Connect (aka AAD Connect). Naturally, if the organization doesn’t use Active Directory, you don’t need to take this step.
- Reset the User’s Password – I usually update the account with a random password to make sure that the terminated employee really has no way to access the tenant.
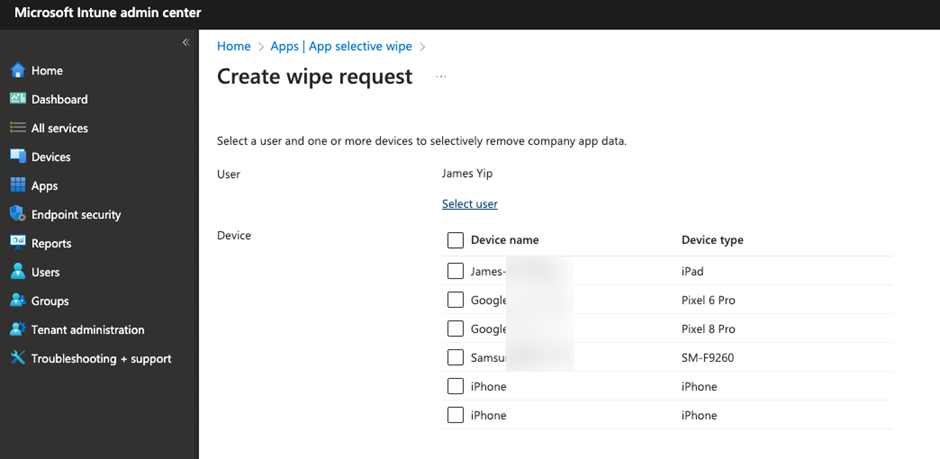
- Submit App Selective Wipe/Device Wipe Request (If Intune is deployed)– This ensures no data is left on the mobile devices and/or corporate-assigned devices. When you submit the app selective wipe request (Figure 2), ensure you select all enrolled devices. Of course, you need to have Intune MAM configured beforehand. You can refer to this blog for help on setting up the MAM in your environment.
- Submit ActiveSync Wipe Request (If Intune is not deployed or the end-user is using non-Microsoft apps) – There are chances that users are using apps that leverage ActiveSync to retrieve mailbox content. We should also submit a wipe request to wipe the content. I always perform this task regardless of the type of devices they have to play safe. We can use Exchange Admin Center or PowerShell, like the script below, to submit the request:
Clear-MobileDevice -AccountOnly -Identity User1 -NotificationEmailAddresses "admin@domain.com"
- Disable User’s Devices – This step is to ensure any computer account-based authentication (mobile and Windows/macOS endpoint) is invalidated and could be excluded from conditional access policies. Usually, I will do that via Microsoft Graph PowerShell SDK cmdlets as a user could have many registered devices. The following is an example script:
$Device = Get-MgUserRegisteredDevice -UserId "user@domain.com"
Update-MgDevice -DeviceId $Device.Id -AccountEnabled:$false
- Enable Delegation on OneDrive for Business—Enable delegation to an authorized user (usually the employee’s direct manager but could be another user) to have access to the employee’s OneDrive for Business. This action allows the nominated user to recover files required by the business. There are some other things we need to be aware of when handling OneDrive, which we describe later.
- Retain User’s Mailbox – This is not a must-do action, but it depends on your company’s practice. There are a few ways to do that. One is to convert the user’s mailbox to a shared Mailbox, make sure you convert the mailbox to a Shared Mailbox before you remove the license from the employee as the mailbox must be licensed when you do the conversion. Another way is to leverage retention holds to retain the mailbox as an inactive mailbox. However, using retention policies only allows the compliance team access to the mailbox content, whereas the Shared Mailbox approach allows other employees access to mailbox content just like a normal mailbox to pick up the leftover work if they are allowed to do so. Regulations may play a role here, which could force you to do additional tasks. There may be some sensitive information in the ex-employee’s mailbox. This may cause some issues if the employee reviewing the content of the OneDrive account is not supposed to have access to the information. You can consider implementing sensitivity labels with access restrictions or encryptions to provide additional protection per item level. You can learn more about implementing sensitivity labels here.
- Remove User’s license – This is to reduce the license spend as there is no point in paying for employees who are no longer working for the organization.
- Remove User account – Usually, this happens after a grace period (like 14 or 30 days). If you use Entra Connect to synchronize on-premises AD to Entra ID, you must remove the account in AD and wait for the next Entra Connect synchronization cycle to complete. Once you see that the user’s account is a cloud-only account with no license assigned, you can remove it from the system. However, if you converted the user’s mailbox to a Shared Mailbox, you cannot delete the user account in Entra ID, as an anchor account is required for a Shared Mailbox to work.
This checklist covers the basic steps for Microsoft 365 tenants. But if you have some advanced services, like Defender for Cloud Apps, you should include some additional steps. For example, adding the users to the Defender for Cloud Apps policies to monitor unexplained large downloads of files from Teams/SharePoint.
Delegation of OneDrive for Business
One of the issues in handling terminated employees is the files they store in different places, which could be in OneDrive for Business or SharePoint. SharePoint sites are not usually a problem because they are meant to be a shared space where other users can access the files. However, be aware that removing a user may cause a team or a site to enter a “no owner” state, which means no one except the tenant administrator has administrative rights to the group and hence, no one has rights to update permissions of the group. The best way to do this is to identify such groups and check with the business team to reassign new owners. You can reassign new owners through the SharePoint Admin Portal or by running a PowerShell cmdlet.
Delegation in OneDrive for Business is used in the user deletion process, which allows a nominated user (usually the user’s manager) access to their files. You can assign additional user access to OneDrive at the time of deleting the account or remove the license from the user account.
Speaking of the OneDrive Deletion process, refer here for the default deletion timeline.
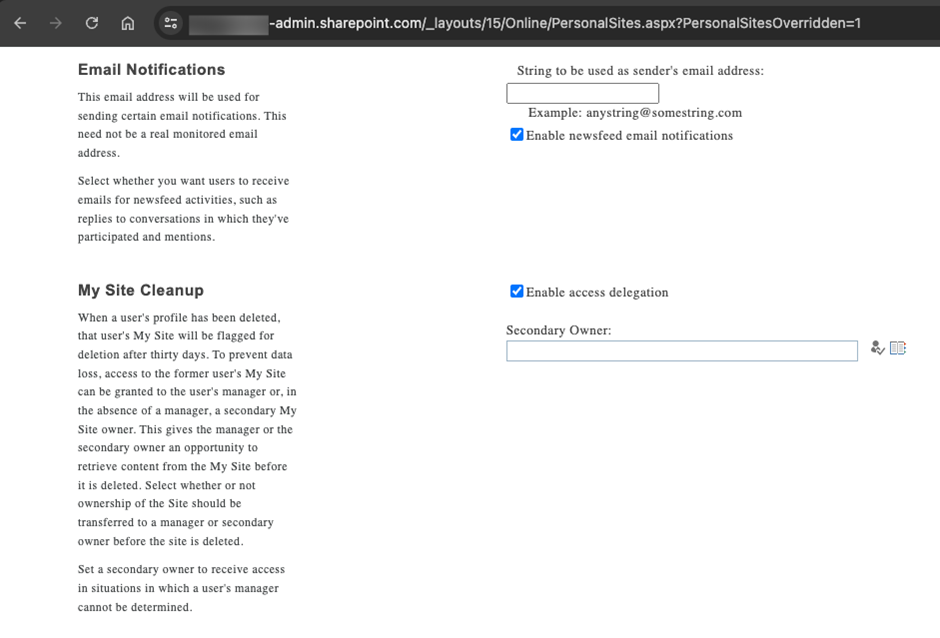
Microsoft sends notifications during the OneDrive deletion process to provide a link for the designated users to access the OneDrive content and remind them that deletion will happen. However, if the user account does not have a manager or no one was assigned access to the OneDrive account during the account deletion process. No one will receive notifications from Microsoft during the deletion process, which may cause the content in OneDrive for Business to be deleted without anyone’s notice. You can only assign one user via the selection tool or type the UPN in the textbox, as shown in Figure 3, to access deleted users’ OneDrive for Business as a Secondary Owner. The Secondly Owner assigned will not just receive notifications but will also receive access rights to OneDrive if no manager can be found by the OneDrive deletion process.
If you need to delegate to IT, compliance, or HR team members to allow access to the files, you may need to assign secondary owners to the user’s OneDrive account in the SharePoint Admin Center, as shown in Figure 4.
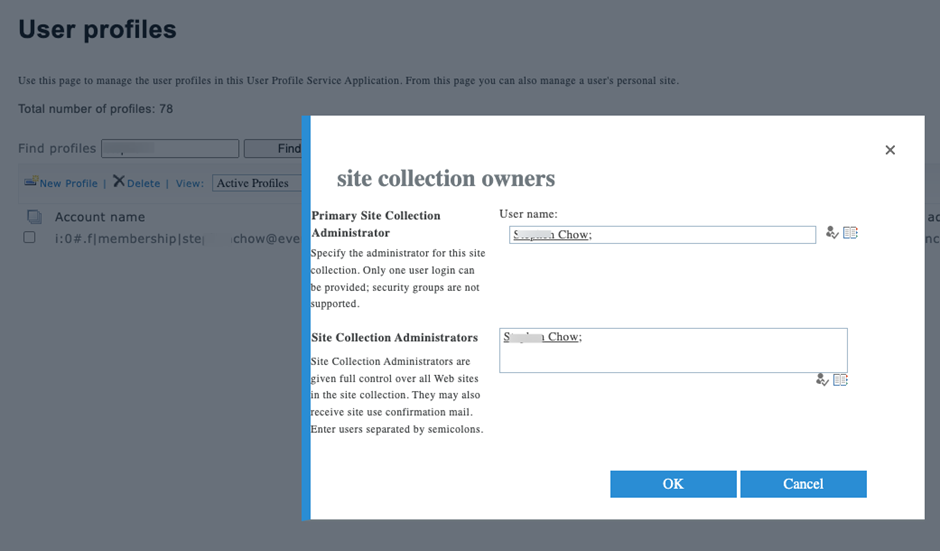
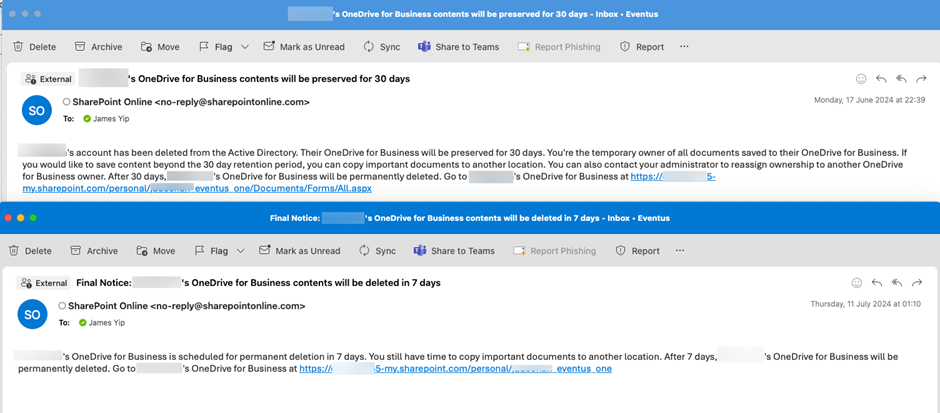
Figure 5 shows some example notifications Microsoft 365 sends to assigned managers and users who have delegated access to OneDrive for Business.
Retention Policy and User Deletion
One of the things you need to understand is the impact of retention policies on the user deletion process. A retention policy defines how long (maximum and minimum) the data must be kept in the tenant. In case of user deletion, if the user’s mailbox and OneDrive for Business have retention policies applied and are still within the configured minimum retention period, the mailbox and OneDrive for Business’s content will not be permanently removed. The repositories are hidden, but the compliance team can access the content using eDiscovery.

Impact to Encrypted Items
With the wider adoption of sensitivity labels, other issues may arise for items (such as emails or documents) stored in Microsoft 365. One of the functions of sensitivity labels is to apply access restrictions and/or encryption to these items. What if the labels restrict access so that only one user is the owner of a document, and that user is the one being let go? There is no easy way to identify which documents or items are impacted by the removal of the target user account. I usually take a more reactive approach, meaning I only help users modify permissions when they realize they cannot access or modify an item. You might wonder how I can access documents when no one has owner rights. There is a configuration called Super User in Azure Rights Management Service (RMS), which is the technology used by sensitivity labels to apply encryption and/or access control.
The Super User is a special administrative account that has owner rights to any items protected by Azure RMS. You can learn more about configuring the Super User by visiting here. I always use this account with caution, as it can access highly sensitive data. I recommend using a dedicated Super User account that is heavily guarded, controlled, and not used on a daily basis.
Other Items to be Aware of
As more services are deployed to Microsoft 365, we accumulate more data in the tenant. This may trigger us to add to the checklist or tasks when we need to terminate an employee. There are additional considerations to address when removing user accounts. Let me specify a few here:
- Meeting Recordings – If the meeting is organized by the target user, the recording is actually stored in their OneDrive. You may want to consider moving the files after the user account is disabled.
- Team Chat Messages – All messages are stored on Microsoft Teams’ servers. However, you may want to have a copy for whoever is taking over the target user’s work. Currently, the best solution is to use eDiscovery search to export a copy of the relevant messages for reference.
Conclusion
For the most part, Microsoft 365 administrators need to respond to requests to remove accounts for terminated users. However, those who use some advanced services, like Defender for Cloud Apps’ mass download detection policy, need to be prepared before termination happens. I encourage you to set some notification workflow in your organizations, so your team is notified when actions are needed. I know this could be sensitive, so you can consider automating the process using PowerAutomate cloud flow. This may be a way out, as HR or senior management may not want too many people to know the situation when that happens.


Some other items that admins need to be aware of:
If you use Bookings or Booking with Me, they need to be cancelled by Owners, or another co-owner should be assigned as the owner to cancel as needed. We have had instances where Bookings meetings were NOT cancelled unless this was manually done.
Cancel meetings using PS does work. We do this in our org after a manager has had time to manually perform this task.
Question:
Our org follows most of these steps. Has anyone come across instances where a user had scheduled emails, meetings, Teams Posts, and Viva Engage posts. All steps were followed aside from Power Automate flows. Could that be it? Thanks
If a mailbox has been converted to a shared mailbox and the license has been removed from the user, why do you say you need to create an anchor account? The mailbox has already been migrated and there is no need for the anchor. Little confused on this one as we have not fully moved to Intune.
A gotcha we encounter is what to do with recurring or group meetings in Outlook when the account is removed. Each individual invitee has to delete on their calendar.
Maybe you can use this cmdlet to remove meetings: https://office365itpros.com/2023/06/09/remove-calendarevents/
You need to add a checklist item to ensure that Power Automate Flows are visible and known to managers and supervisors to ensure Flow continuity.
Great article – have you experienced any issues with the Clear-MobileData and BYOD? We have heard that it is unreliable if not using Intune, and we would rather be cautious in a BYOD state. Would love to discuss further anyone’s experiences
https://learn.microsoft.com/en-us/exchange/clients-and-mobile-in-exchange-online/exchange-activesync/remote-wipe-on-mobile-phone#what-do-you-need-to-know-before-you-begin
Good article, thanks
Also consider removing / forwarding Teams DIDs.
Very usefull and easy content thanks
Worth stating that come January the OneDrive will need an archive license or be deleted (I suspect the same is coming for EXO)
Great List! Thank you for sharing