
In the second part of this three-part guide, we’re creating our PowerApp, customizing it and once it is complete we’ll create our Microsoft Flow that will power the underlying business process.
A quick recap
We’re taking a fairly common scenario that occurs in most businesses that work with customers – creating a sales or project proposal. We want to automate this process.
Our solution will be to provide a form to users to provide information, allow a manager to review the information entered, and then automatically create a Microsoft Word document based on a company template.
We’ll use Microsoft Teams, Microsoft Word, SharePoint Online List, and Document Libraries, Microsoft Flow and a Microsoft PowerApp to make this happen.
In part one we created an underlying Team Contoso Proposals to provision a SharePoint site and to use as the place to access the form and for approval management.
Next, we created our Word template and added the relevant fields to it, then finally we created a new SharePoint List to store the information that will need approval and populate the Word Document.
Next we need to create the PowerApp Form.
Creating our PowerApp Form
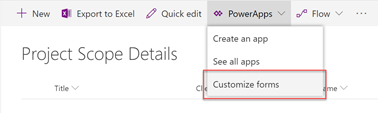
We begin part two within the SharePoint List we created at the end of part one of this guide. Within the SharePoint List, we’ll select the PowerApps tab and from the drop-down menu, select Customize Forms:
PowerApps will now open. PowerApps is an IDE for creating applications within the Microsoft PowerPlatform and available to subscribers of Office 365.
We can use it to create applications from scratch and connect to a variety of data sources, including traditional databases, Azure data sources, CRM systems and Office 365. We can create canvas-style applications suitable for tablets and mobile devices, or even customer-facing websites.
In this context though, we’re using it to create a form that will be used against the SharePoint List. In the view we see a Tree View showing the components of our application, including the Form Screen and the SharePoint Form; we see the screen of the form itself; and on the right hand side we see the properties and attributes for each object within the canvas.
The IDE has a menu bar, with tabs offering options for rich customization, including creating additional screens, formatting text, inserting fields, images and connecting data sources and much more.
Our first action will be to adjust the screen size for the form so it is better suited to Microsoft Teams.
To do this, choose File from the menu:
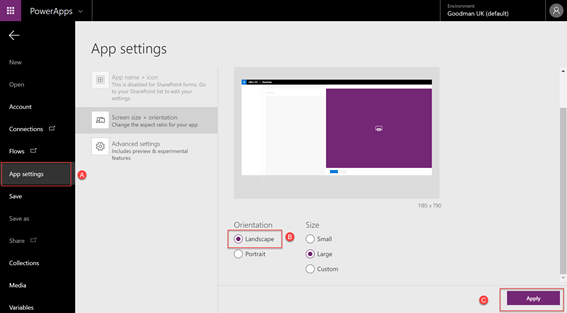
From the backstage view, select App Settings (A) and then from Screen size + orientation, select Landscape (B) and Large, and then choose Apply (C):
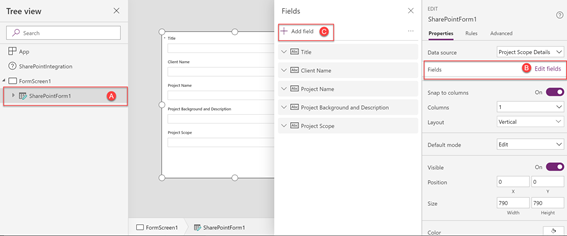
Back within the editor, we’ll now adjust the fields shown on the form and the format they show as. To do this, select SharePointForm1 (A) and then select Edit Fields (B). Then select Add Field (C):
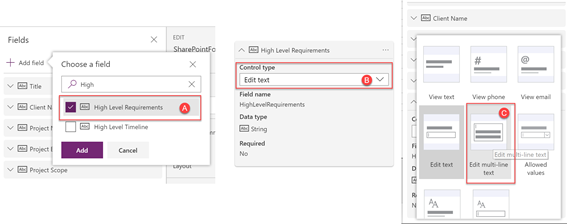
From the Add Field drop-down, select the fields you wish to add. In the example below, we’ve added a missing field for High Level Requirements (A).
This will then be added to the list of fields. Select the new field and from the Control Type drop down (B) select an appropriate control type to match the SharePoint List column such as Edit multi line text (C):

Repeat this procedure for all fields within the form. As a quick aside, after changing the size and orientation of the application screen, additional fields were formatted differently to the original fields. To solve that issue we simply removed each field and re-added them using the procedure above.
Adding finishing touches
After adding the fields we want on the form in the correct order, we can choose to save and publish the PowerApp Form.
However, as it will be user-facing, we will customize the form to ensure it is more intuitive to use by adding a title and description along with a simple icon.
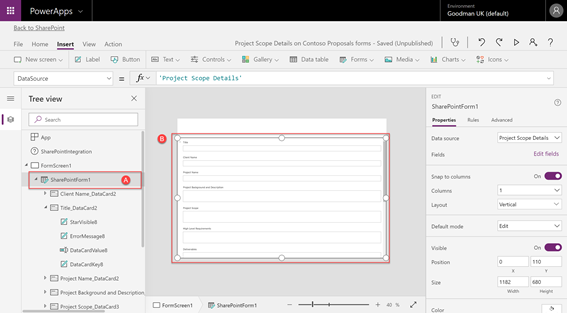
To do this, we’ll first select SharePointForm1 from the tree view (A) and then adjust the size of the form on the screen (B). We can do this by dragging the top of the form down, or adjusting the Position and Size Y values in the properties:
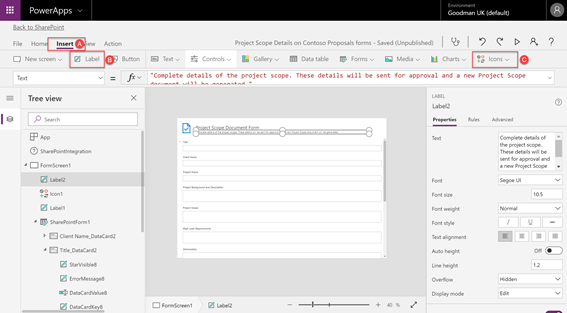
We’ll add the title, description and icon by selecting the Insert tab on the ribbon. Use Label to add text for the title and description, using the Text, Font and Font Size controls to edit the text for each label as necessary. Use the Icons drop-down to select an appropriate icon:
Of course – you can customize as needed. Do not feel you need to be limited by the example above – feel free to add images, such as your company logo, change background colours as you wish.
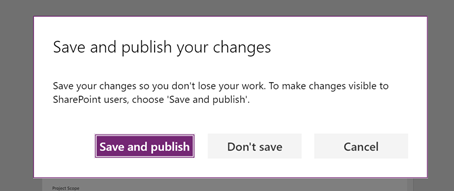
After you’ve completed your customizations, choose Back to SharePoint and then from the dialogue choose Save and publish.
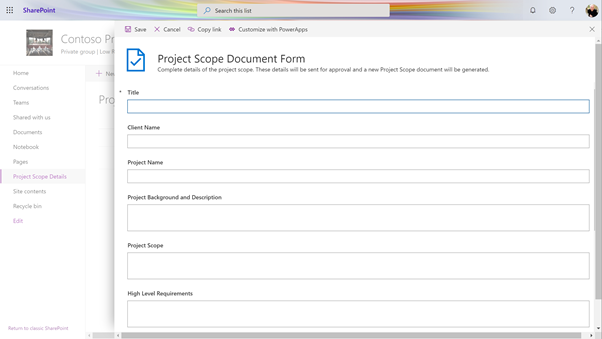
After returning to SharePoint, we can choose New within the SharePoint List to view the form:
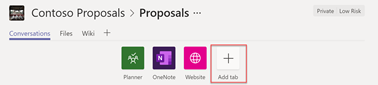
Finally, we’ll add the SharePoint List to our Microsoft Team so it’s easy for the team members to access. To do this, navigate to the relevant channel and choose Add Tab:
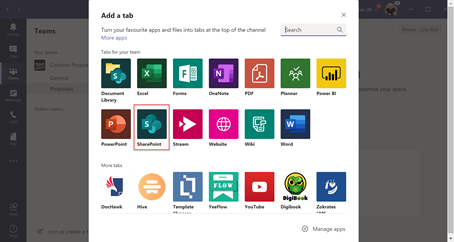
From the Add a tab dialogue, select SharePoint:
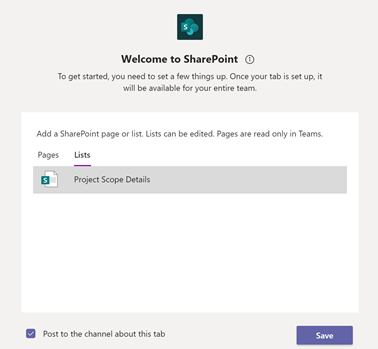
The SharePoint dialogue that shows is connected to our team, and therefore shows the relevant Pages and Lists from the underlying site. We’ll select the Lists tab and select our Project Scope Details list and choose Save:
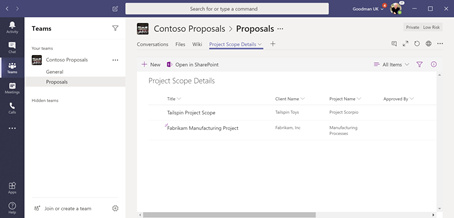
We’ll now have access to the list in a Teams-friendly view, along with the New button to add new proposals:
Using Flow to glue together the process
The rest of our guide, apart from testing out our process, is primarily focused on creating the Microsoft Flow. It is the glue that holds the process together and performs the behind the scenes magic that makes it all possible.
If you haven’t used Microsoft Flow before, then take a listen to episode 29 of my All About 365 Podcast.
If you don’t have time then we’ll explain very simply. Microsoft Flow is an automation tool for both personal tasks and group tasks.
It connects to a variety of systems and allows us to respond to events, or triggers, that happen – such as things be added or modified.
It then has actions that can occur to either retrieve information used to make decisions, or actions that make things happen – such as sending messages, creating documents or system records – anything you want. New improvements to flow even allow you to use AI – such as sending images to AI engines to analyse data within scanned forms.
In the remainder of part two of this series we’ll create our flow and adjust the trigger and approval actions.
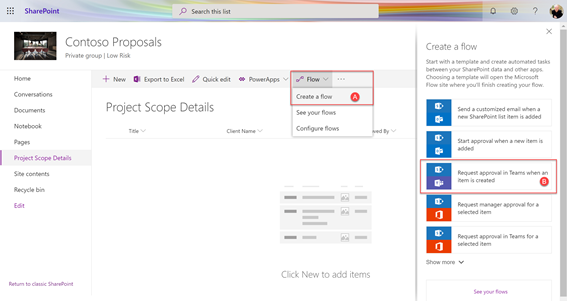
To create the flow, we’ll navigate back to our SharePoint List and from the Flow drop down menu choose Create a flow (A).
We’ll then choose the built-in template Request approval in Teams when an item is created (B):
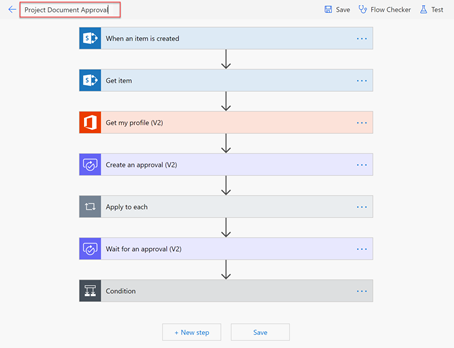
Upon creating a flow, we’ll be redirected over to the Microsoft Flow website. You’ll see the Flow that has been created with the following default core steps:
- When an item is created..
- Get the SharePoint List item and it’s columns…
- Get my profile information..
- Create an approval item…
- Send an adaptive card to each manager listed for approval (Apply to each)…
- Wait for an approval…
- Run actions based on whether the approval answer is yes or no (Conditions)..
We’ll first rename the Flow that has been created to ensure it is easy to identify.
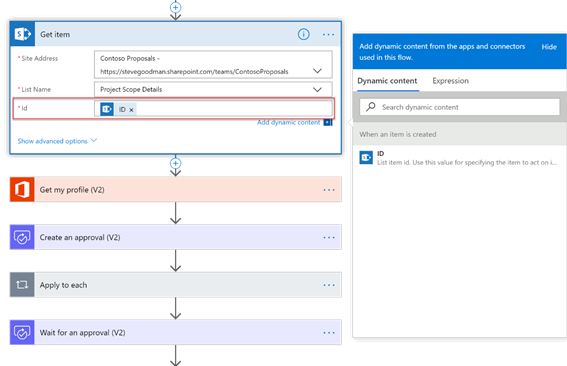
Next, we’ll make a change to the Get item step as at the time of writing, the template doesn’t work correctly. We’ll select the Id field and delete entityID. Then, we’ll choose Add dynamic content and then select ID from When an item is created:
Finally for this part of the guide, we’ll select the Create an approval (V2) action and in the Assigned to field add the email addresses of the managers who will be asked to approve the request. These will need to be people who have access to the Team:
When you’re finished, save the flow to ensure your progress isn’t lost before you begin part three of this guide.
Summary
In part two of this series we’ve created the PowerApp form that connects to the SharePoint List we created in part one of the series. After customizing it, we’ve connect it to Microsoft Teams and then created the Microsoft Flow that will glue our process together. In part three, we’ll complete our Microsoft Flow and test the process.


Hi Steve
Is there another part to come?
How do you get the list data into Word?
Steve-
Let me join the chorus of thank yous!
Do you know if this approach could be used to create call reports that will ultimately be readable in an on-premise Dynamics 365 environment? We will have access to SharePoint Online and we are already extensive users of Teams.
The idea would be to create client-based sales call reports that would be reviewed / approved and then stored in the customer profile.
Thanks again for your efforts here!
Was Part 3 published yet?
Hello,
Yes it’s here:
https://www.practical365.com/teams-2/automating-document-creation-and-approvals-with-teams-and-microsoft-flow-part-three/
Steve