Make Sure that Azure AD Account Creation Uses Accurate Properties
It seems obvious to say that it’s a good idea to standardize Azure AD account creation to generate reliable directory data, but it’s surprising how often an analysis of user account properties reveals missing information. The key to standardization is to make sure to populate all relevant information for user accounts during the creation process, backed up by periodic reviews.
Unlike on-premises applications, where the Exchange GAL is often the only place where people see user account information, Microsoft 365 exposes account properties in many places, including the organization tab for Teams users, Outlook’s organization explorer, and the user profile card. Simple steps like making sure to enter the correct location for a user means that features like the display of local time zones by Teams work properly.
This article discusses two methods to ensure that user accounts have the information necessary to maximize the benefit of Microsoft 365 features.

User Templates
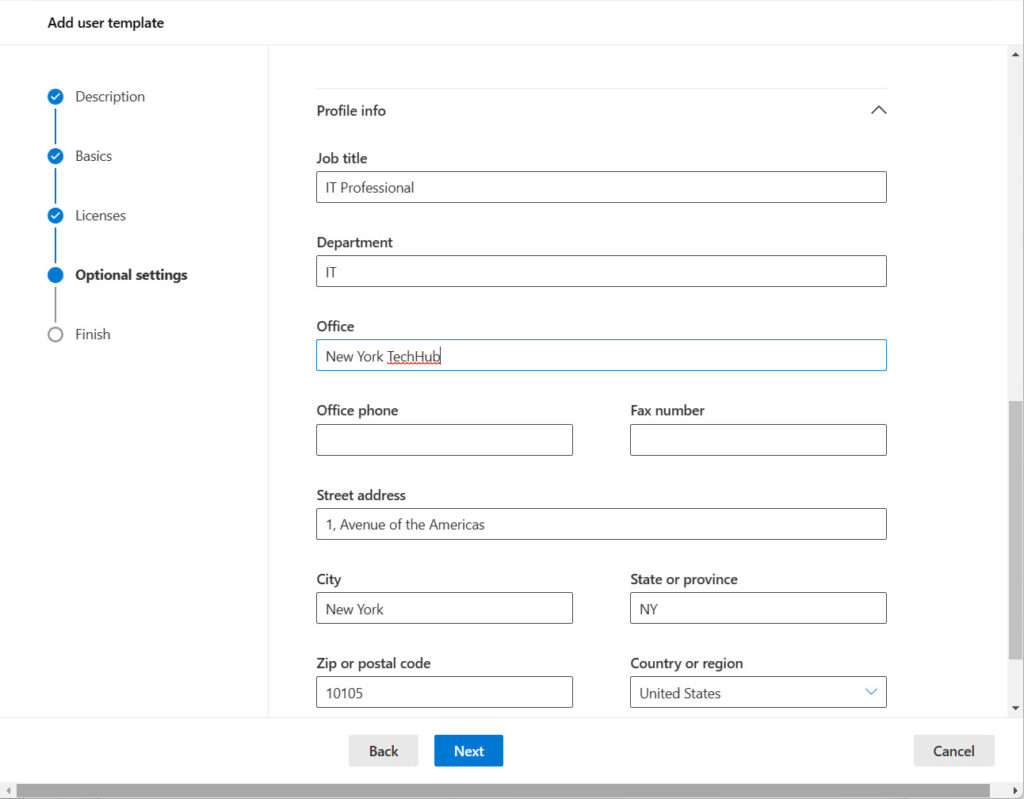
Microsoft 365 user templates are a useful way to make sure that the settings of different types of new user accounts are standardized. Essentially, a template specifies common settings that Microsoft 365 applies when it creates a new account, such as the domain for their user principal name and email address, department name, office location, and usage location (Figure 1). A user template can also specify what licenses to assign to new accounts.
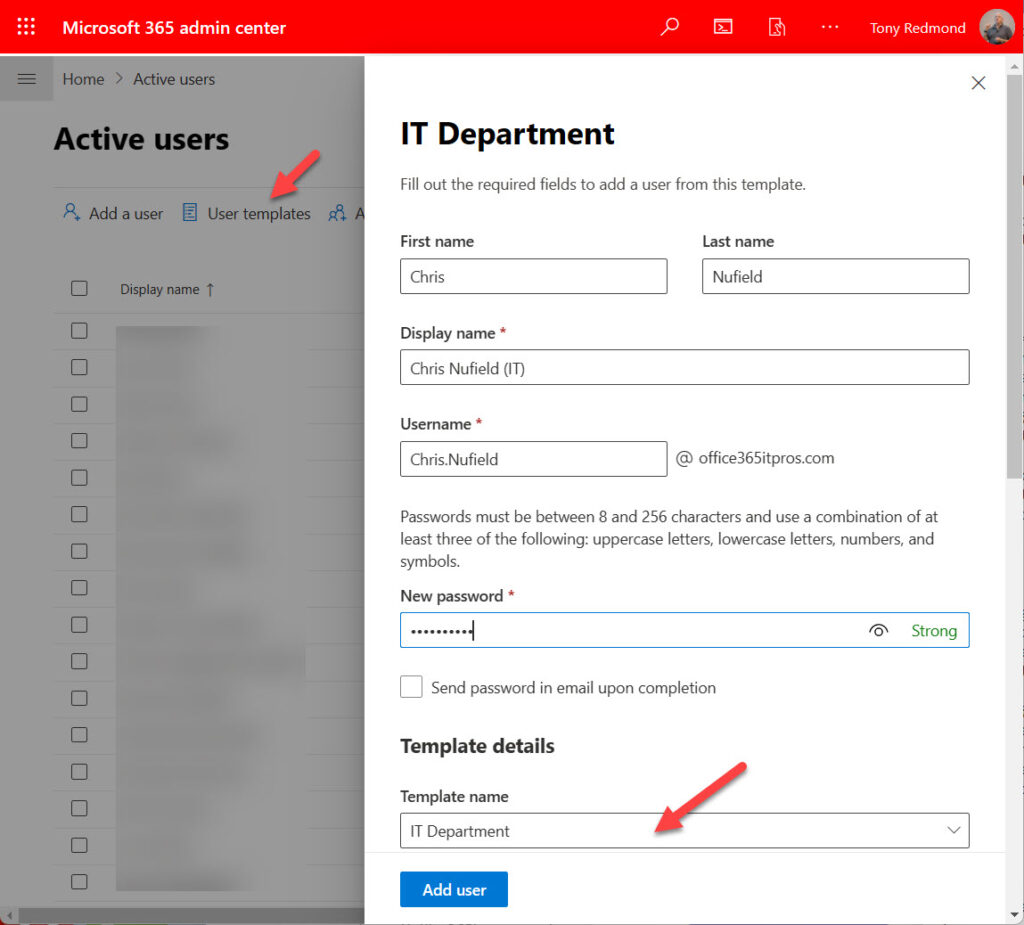
You can create a user template from scratch or save the settings for a newly-created account as a template. Either way, once the template exists, it’s available for all administrators to use when creating new accounts unless you explicitly choose not to publish it. To use a template to create a new account, choose User Templates and then select the template to use. Then all you need to do is complete basic details like their first name, last name, user principal name, and add a password (Figure 2). It’s all very convenient.
One point to be aware of is that license management through user templates isn’t very smart. If the selected licenses are available, the new account receives them. If any of the licenses are unavailable (the available licenses are exhausted), then the new account ends up in an unlicensed state. It’s obvious that no great intelligence applies in this area. Nevertheless, a new user account results even if it needs some licenses.
Cybersecurity Risk Management for Active Directory
Discover how to prevent and recover from AD attacks through these Cybersecurity Risk Management Solutions.
Manual Fixup After Account Creation
Another issue to consider is that some user information is not covered by the template. The following are just some of the personal setup items that a new account is likely to require:
- Mobile and landline phone numbers.
- Photo.
- Multi-factor authentication settings.
- Manager.
- Licenses not covered by the template. For instance, while the template might assign a basic Office 365 E3 license, some people need Teams Premium licenses to help organize and manage webinars.
In short, if you want to have a fully-populated directory so that Microsoft 365 profile cards are as complete as possible, expect to update account information after the initial creation.
A Multitude of Templates
Despite their evident flaws, user templates work well for small to medium organizations with just a few locations or operating units. Once an organization grows and becomes more complex, the number of templates required to cover the combination of departments, locations, and countries expands and can become unwieldy. It’s possible to work with fifty or more templates and assume that administrators will always choose the most appropriate template for a new account, but that might not happen when it’s easy to select a less-than-optimum template.

Automating Azure AD Account Creation with PowerShell
Many organizations solve the problem of standardization of user properties by scripting account setup with PowerShell. They use cmdlets like those listed below to update different aspects of new accounts, usually after reading data about the new user from an HR or other onboarding system:
- New-MgUser to create the account and Update-MgUser to update settings afterward.
- Set-MgUserManagerByRef to update the new user’s manager.
- Set-MgUserLicense to assign licenses to the account.
- Set-MgUserPhotoContent to add a photo to an account. This cmdlet can only be run after the creation of the user’s mailbox.
- Set-MailboxRegionalConfiguration to set the correct time zone for the new account. This makes sure that time zone settings show up properly in profile cards and when scheduling meetings.
- Sending a welcome message to the new user.
Here’s an example of the kind of code to create a new user account with an Office 365 E3 license. The code generates a random password for the new account, then runs New-MgUser to create the account and populate its settings. It then assigns the license, updates the user’s manager, and adds SMS as an authentication method. The script then waits 30 seconds for Exchange Online to create the user’s mailbox before updating the mailbox with a photo. Exchange Online then synchronizes the photo with Entra ID and the other workloads. Finally, the script updates the user’s time zone in their mailbox regional configuration. It’s not compulsory to specify a preferred language for a new account, but this might be useful in the future when configuring language-specific settings for applications.
Connect-MgGraph -Scopes Directory.ReadWrite.All, UserAuthenticationMethod.ReadWrite.All, User.ReadWrite.All -NoWelcome
Connect-ExchangeOnline

$Office365E3Sku = "6fd2c87f-b296-42f0-b197-1e91e994b900"
# This method for generating a password works for PowerShell 5. The code doesn't work for PowerShell 7,
# so you'll need to use a different method. Many examples are available on the web.
# The PassGen function in https://arminreiter.com/2021/07/3-ways-to-generate-passwords-in-powershell/
# is a good choice
Add-Type -AssemblyName 'System.Web'
$NewPassword = [System.Web.Security.Membership]::GeneratePassword(10, 3)
$NewPasswordProfile = @{}
$NewPasswordProfile["Password"]= $NewPassword
$NewPasswordProfile["ForceChangePasswordNextSignIn"] = $True

$NewUserUPN = "Jeff.Atkinson@Office365ITPros.com"
$DisplayName = "Jeff Atkinson"

$NewUser = New-MgUser -UserPrincipalName $NewUserUPN `
  -DisplayName "Jeff Atkinson (Information Technology)" `
  -PasswordProfile $NewPasswordProfile -AccountEnabled `
  -MailNickName Jeff.Atkinson -City NYC `
  -CompanyName "Office 365 for IT Pros" -Country "United States" `
  -Department "IT Operations" -JobTitle "GM Operations" `
  -BusinessPhones "+1 676 830 1101" -MobilePhone "+1 6174466615" `
  -State "New York" -StreetAddress "1, Avenue of the Americas" `
  -Surname "Atkinson" -GivenName "Jeff" `
  -UsageLocation "US" -OfficeLocation "NYC" -PreferredLanguage 'en-US'
If ($NewUser) { Write-Host ("Successfully added the {0} account with password {1}" -f $NewUser.DisplayName, $NewPassword)
  } Else { Write-Host ("Failure adding the {0} account - exiting" -f $DisplayName); break }

# Add license
Set-MgUserLicense -UserId $NewUserUPN -Addlicenses @{SkuId = $Office365E3SKU} -RemoveLicenses @()
# Update manager
$ManagerId = (Get-MgUser -UserId Chris.Bishop@office365itpros.com).Id
Set-MgUserManagerByRef -UserId Jeff.Atkinson@office365itpros.com `
   -AdditionalProperties @{
     "@odata.id" = "https://graph.microsoft.com/v1.0/users/$ManagerId" }
# Add SMS MFA method
New-MgUserAuthenticationPhoneMethod -UserId $NewUserUPN -phoneType "mobile" -phoneNumber "+1 6174466615
# Update user photo
Sleep -Seconds 30
Set-MgUserPhotoContent -Userid $NewUserUPN -Infile "c:\temp\Jeff.Atkinson.jpg"
Set-MailboxRegionalConfiguration -Identity Jeff.Atkinson -TimeZone "Eastern Standard Time"
This code is not perfect. It illustrates the principle of populating multiple aspects of a new user account during the creation process according to a standard set by an organization. In a production environment, the code would have more logging and error checking and be driven by values imported for user accounts instead of the hard-coded value shown here. It might also perform tasks like adding users to specific groups or assigning a role to selected user accounts. The point is that the PowerShell cmdlets available to work with Azure AD user accounts and Microsoft 365 applications allow developers to build scripts to automate many different aspects of user account creation that far surpass the capabilities of user templates.
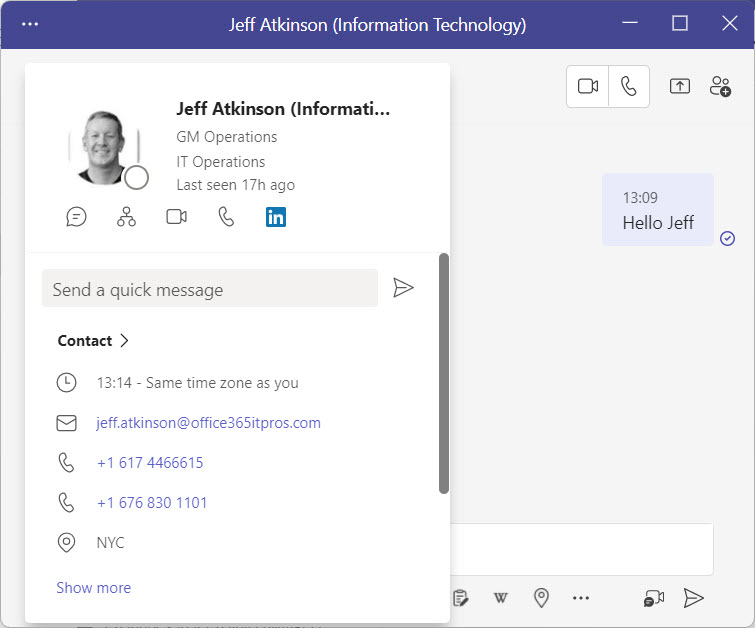
Even the imperfect code used here serves the purpose of populating all the required account properties for Microsoft 365 features to function as designed, such as the user profile card shown in Teams chat (Figure 3).
The Benefits of Standardization
The big benefit delivered by accurate Azure AD user data is that queries executed by other Microsoft 365 features against the directory will return the correct set of users. For instance, an adaptive scope used with retention or communication compliance policies will apply to the proper users. Dynamic Azure AD groups used to generate the membership of Microsoft 365 Groups or Teams will include the right people. Email sent to dynamic distribution lists will reach the correct mailboxes, and so on.
Historically, we know that directory information has a nasty habit of degrading over time. Company restructuring, people changing jobs and locations, mergers and acquisitions, and even the effect of working from home all conspire to introduce inaccuracies into directory data. For that reason, it’s important to check the directory for missing and inaccurate data periodically. Commercial products like Hyperfish exist to help ease the pain, or you can build your own using tools like CodeTwo’s User Photos for Office 365 (freeware) and PowerShell using your own scripts and code found elsewhere (like the script described in this article).
The important thing is to monitor directory accuracy on an ongoing basis. Standardization is easy to achieve for newly created Azure AD accounts. It’s more difficult to maintain over time.
Cybersecurity Risk Management for Active Directory
Discover how to prevent and recover from AD attacks through these Cybersecurity Risk Management Solutions.


Hi sir,
Thanks for your quick reply. while running this script MFA not enabled sir. How to enable MFA for few users (per-user).
#MFA
}
$Users | ForEach-Object {
New-MgUserAuthenticationPhoneMethod -UserId $_.UPN -phoneType “mobile” -phoneNumber $_.Mobilephone
If($?)
{
Write-Host $_.UPN “Success” -ForegroundColor Green
} Else
{
Write-Host $_.UPN “Error” -ForegroundColor Red
}
}
The Graph SDK doesn’t support per-user MFA assignment. Use a conditional access policy instead and make sure that the users are included within the scope of the policy. https://practical365.com/conditional-access-policies-powershell/
Hi Sir,
I am using below script for creating users and adding MFA and groups at a time. But MFA and group part not working. Please guide me sir.
Install-Module Microsoft.Graph
Import-Module Microsoft.Graph.Users
Import-Module Microsoft.Graph.Groups
Connect-MgGraph -Scopes User.ReadWrite.All,Group.ReadWrite.All,Organization.Read.All,Directory.ReadWrite.All, UserAuthenticationMethod.ReadWrite.All, User.ReadWrite.All -NoWelcome
$Users = Import-Csv C:\newuser.csv
$Users | ForEach-Object {$PasswordProfile = @{
Password = $_.Password
}
New-MgUser -DisplayName $_.DisplayName -PasswordProfile $PasswordProfile -AccountEnabled -MailNickName $_.mailNickname -UserPrincipalName $_.UPN -JobTitle $_.Jobtitle -EmployeeHireDate $_.Employeehiredate -UsageLocation $_.UsageLocation -Country $_.Country -GivenName $_.firstname -Surname $_.Surname -EmployeeId $_.Employeeid -Department $_.Department -MobilePhone $_.Mobilephone -City $_.City -PostalCode $_.postalcode
#Assign Lisenses to users
$EmsSku = Get-MgSubscribedSku -All | Where SkuPartNumber -eq $_.license
$addLicenses = @(
@{SkuId = $EmsSku.SkuId
}
)
Set-MgUserLicense -UserID $_.UPN -AddLicenses $addLicenses -RemoveLicenses @()
If($?)
{
Write-Host $_.UPN “Success” -ForegroundColor Green
} Else
{
Write-Host $_.UPN “Error” -ForegroundColor Red
}
#MFA
}
$Users | ForEach-Object {
New-MgUserAuthenticationPhoneMethod -UserId $_.UPN -phoneType “mobile” -phoneNumber $_.Mobilephone
If($?)
{
Write-Host $_.UPN “Success” -ForegroundColor Green
} Else
{
Write-Host $_.UPN “Error” -ForegroundColor Red
}
}
#Install-Module AzureAD
Connect-AzureAD
$Users | ForEach{$Manager = (get-AzureADuser -ObjectId $_.Manager).ObjectId
$gmember = (get-AzureADuser -ObjectId $_.UPN).ObjectId
Set-AzureADUserManager -ObjectId $_.UPN -RefObjectId $Manager
Add-AzureADGroupMember -ObjectId “group ID” -RefObjectId $gmember
Add-AzureADGroupMember -ObjectId “group ID” -RefObjectId $gmember}
Disconnect-MgGraph
Disconnect-AzureAD
Why are you using AzureAD cmdlets to add people to groups? You can do that perfectly well with the Graph SDK. https://office365itpros.com/2022/03/29/create-entra-id-group/