One of the latest features to arrive in Microsoft Teams is Data Loss Prevention, as we mentioned in What’s new in Microsoft Teams at Enterprise Connect 2019.
Whilst some features announced might not be available right now, DLP in Teams is available today. It’s available for Office 365 customers who have E5 licensing or the Advanced Compliance add-on – and you might want to consider enabling it.
In this article, we’ll ask why you should enable Data Loss Prevention (DLP) for Teams and then configure both a basic all-inclusive policy and a custom policy. Then we’ll look at how the policy works inside the Microsoft Teams client, and what reporting capabilities are on offer.
Why would you need DLP in Teams?
Data Loss Prevention features in Office 365 are already available in supporting services, like OneDrive for Business and SharePoint. So, if you are uploading a spreadsheet full of sensitive data to Teams or sharing a file with a colleague that was marked confidential, then policies were already available to detect and prevent this from happening.
For many people configuring Office 365, DLP doesn’t simply mean “detecting sensitive content” in the same way Office 365 defines it. Often, when people are talking about DLP for data in Office 365 what they mean is preventing data leaking from devices. Also, the solution might include preventative measures using technologies like Intune for device management and Azure Information Protection for encryption, along with controls on where data can be shared.
Whilst both the existing DLP and other measures are good, DLP in Teams is focused on providing detection of sensitive information within chat messages. So, whilst you might be able to stop data leaking from devices or stop sensitive documents from being shared – people could still within chats pass sensitive data.
In those kinds of circumstances, where the amount of data is small – but high risk – it’s feasible that other DLP controls will fail if allowed over chat. For example, someone might share a customer’s credit card details and although policies on the device might prevent the recipient from taking a screenshot on their mobile device, it’s a small enough amount of data that the recipient could simply write it down if it’s on their screen. Using DLP in Teams helps remove risks like that from Office 365.
Creating a basic policy that covers multiple Office 365 services
If you have no DLP policies configured within your Office 365 tenant, then using basic policies that cover core scenarios are an ideal starting point. We’ll first look at create a basic policy in the Security and Compliance Center that aims to cover sharing of sensitive information for not only Microsoft Teams, but other services including Exchange, OneDrive and SharePoint.
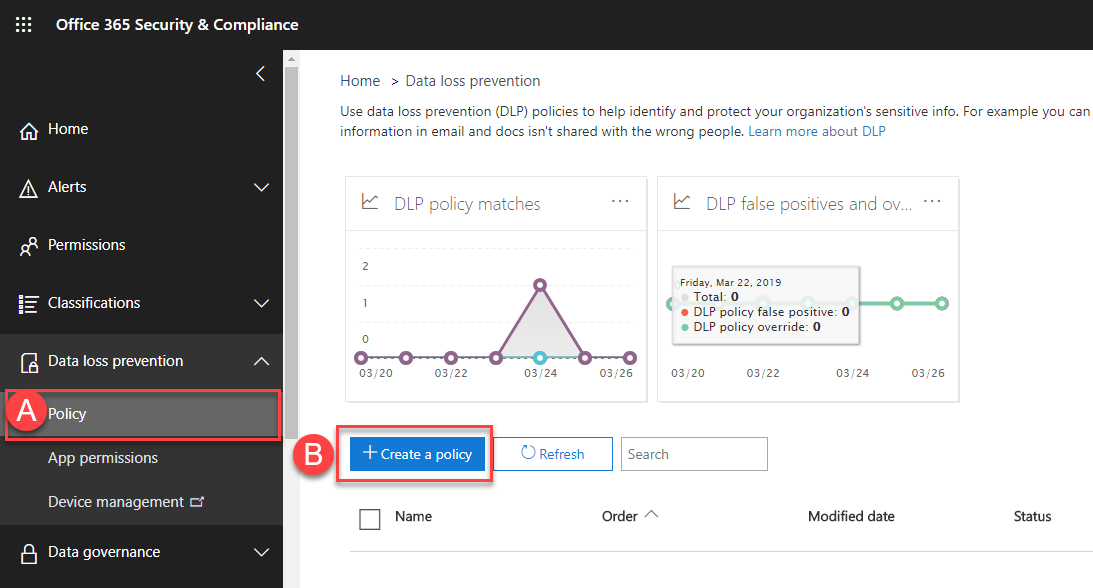
To get started, we’ll visit the DLP section of the Security and Compliance Center and choose Policy (A) followed by Create a policy (B):
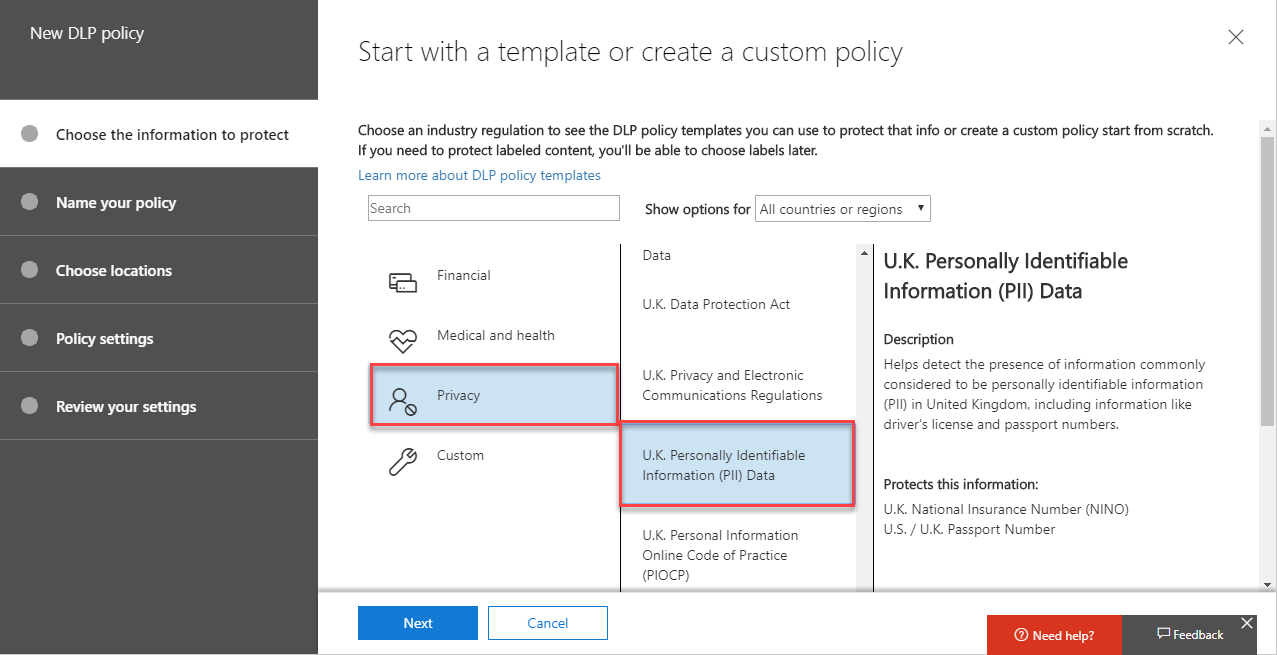
Next, we need to select the type of sensitive information to protect. We have a range of built-in sensitive information types, including categories for Financial Data, Medical, Health, Privacy and we can create custom types. Within each category, groupings are available for standards, like Europe’s GDPR.
For our template, I’ve chosen Privacy>UK Personally Identifiable Information (PII) Data, then chose Next:
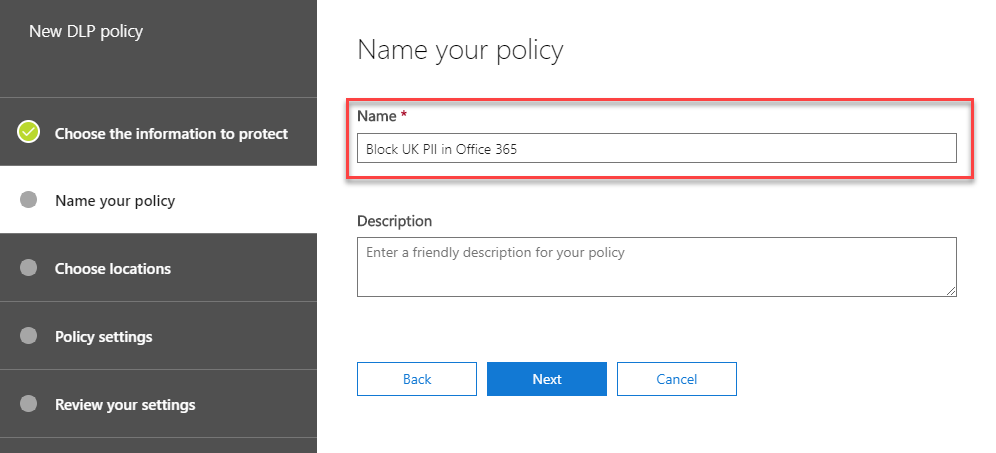
We’ll then give our policy a descriptive name. You might have a large number of DLP policies over time, so give it something descriptive:
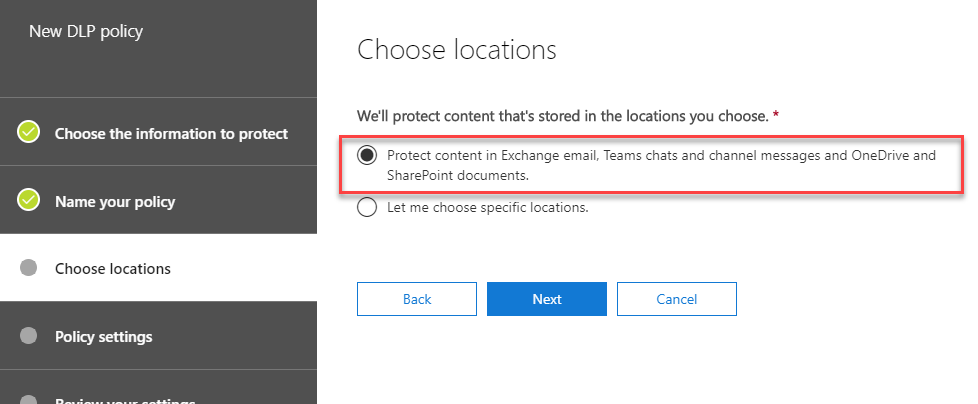
As our policy is aimed at enabling DLP everywhere we can, then when we Choose locations, we’ll select the option to protect all content we can, by choosing Protect content in Exchange email, Teams chats and channel messages and OneDrive and SharePoint documents:
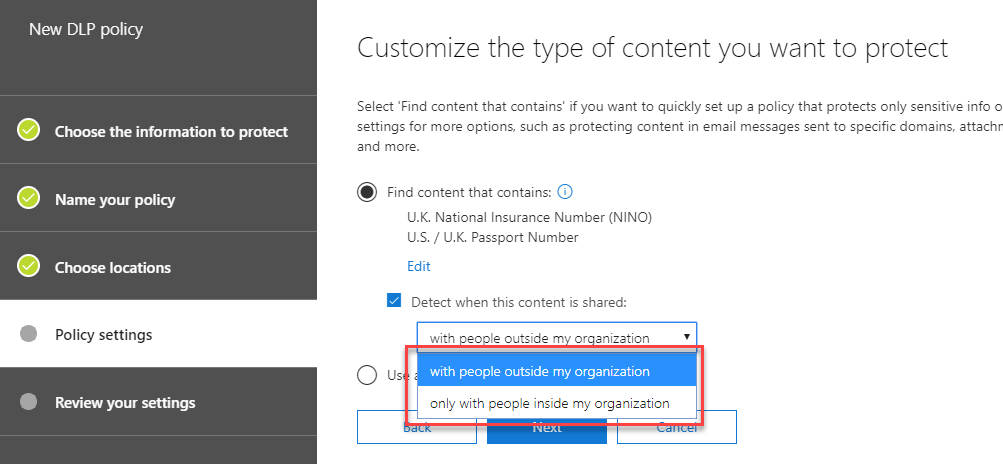
Next, we’ll choose options for how and when sensitive information is detected. In our basic policy, we’ll choose the Find content that contains option. This shows the sensitive information types selected earlier. In this policy, we’ll then choose to just implement DLP when content is shared with people outside the organization:
As you can see, creating a basic policy is very straightforward. In just a few steps we have protected external sharing of sensitive information.
Creating a custom Teams-specific policy
The downside of using DLP policies with the built-in options is that we’re reliant on Microsoft’s criteria for what constitutes sharing too much and we lose a little bit of flexibility.
For SharePoint or OneDrive, sharing one or two items may be acceptable – for example, providing formal information to a nominated HR representative, but within Teams, just one message in a chat or channel could be a breach of policy.
Or, because DLP for Teams requires Office 365 E5 or an Advanced Compliance licence for the users affected by the policy, you might need a separate policy for Teams.
In this example, we will create a custom policy aimed at Teams, with strict criteria.
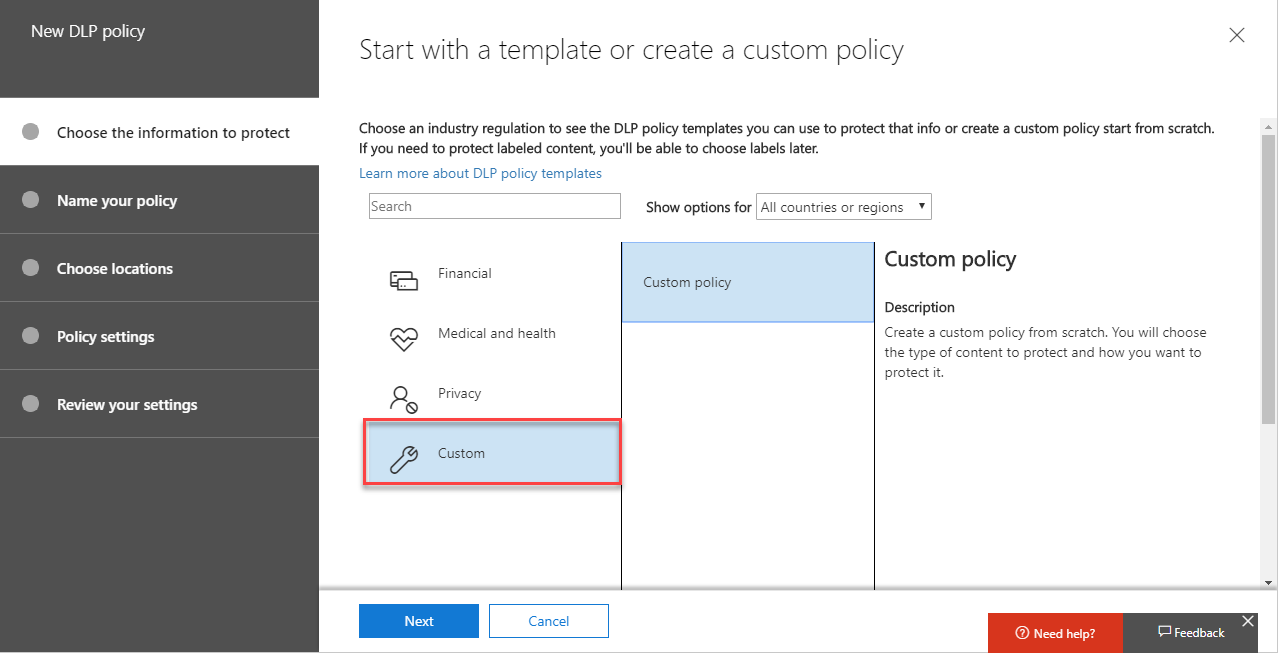
To get started, we’ll create a new DLP policy, and then choose Custom:
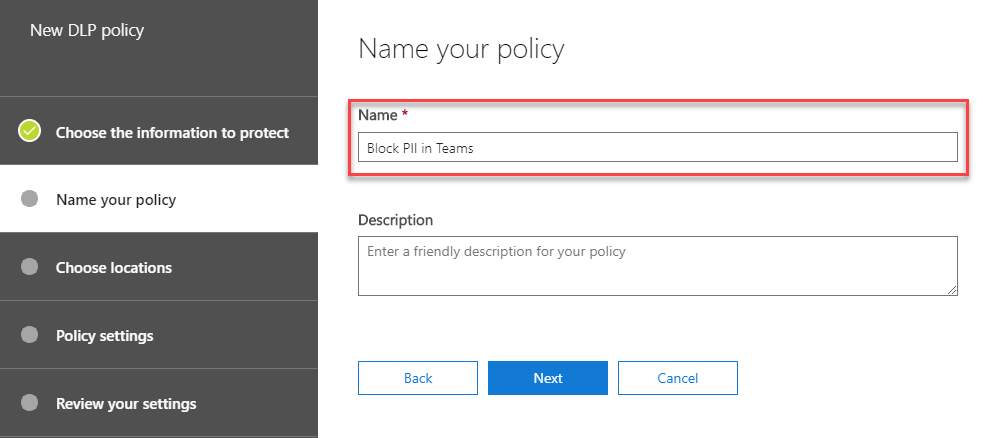
Next, as with the basic policy we will provide a descriptive name. In this case, we’ll call it Block PII in Teams:
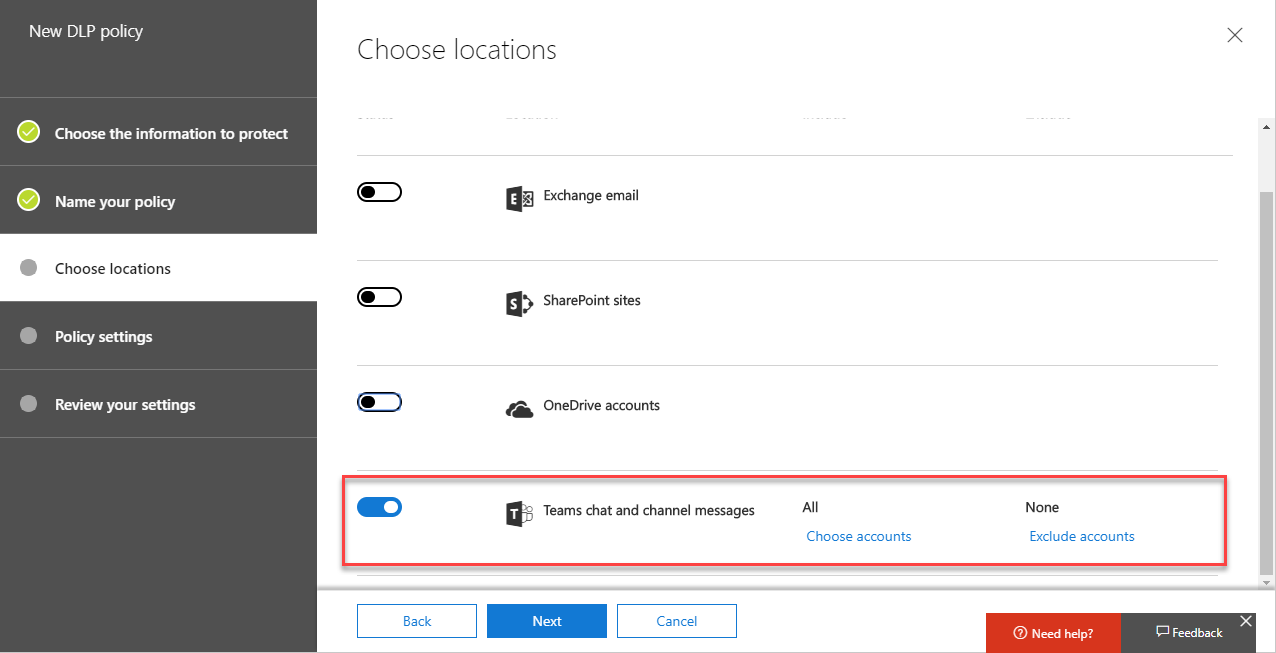
On the Choose Locations page we’ll select Let me choose specific locations and then select just Teams chat and channel messages. You’ll see we can select specific accounts that will be affected by the policy – essential if we need to meet licensing conditions.
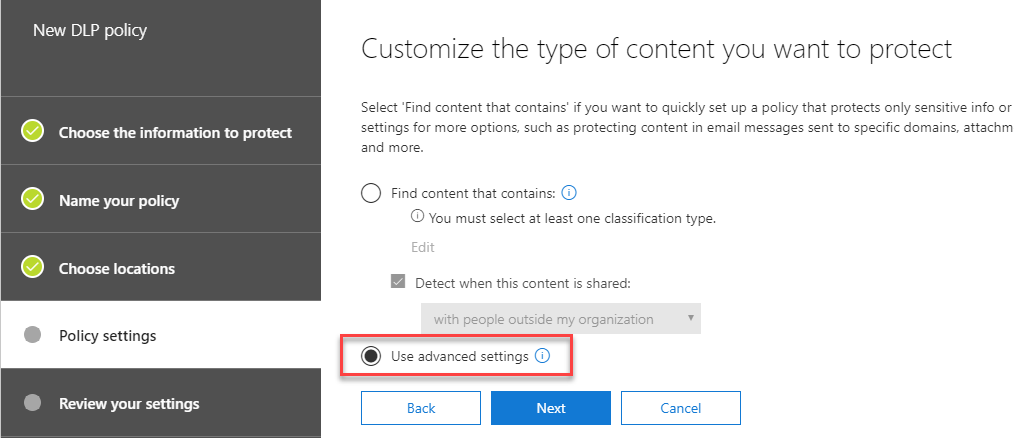
On the Policy settings page, we won’t use the Find content that contains option we selected when creating a basic policy. This time, we’ll choose Use advanced settings:
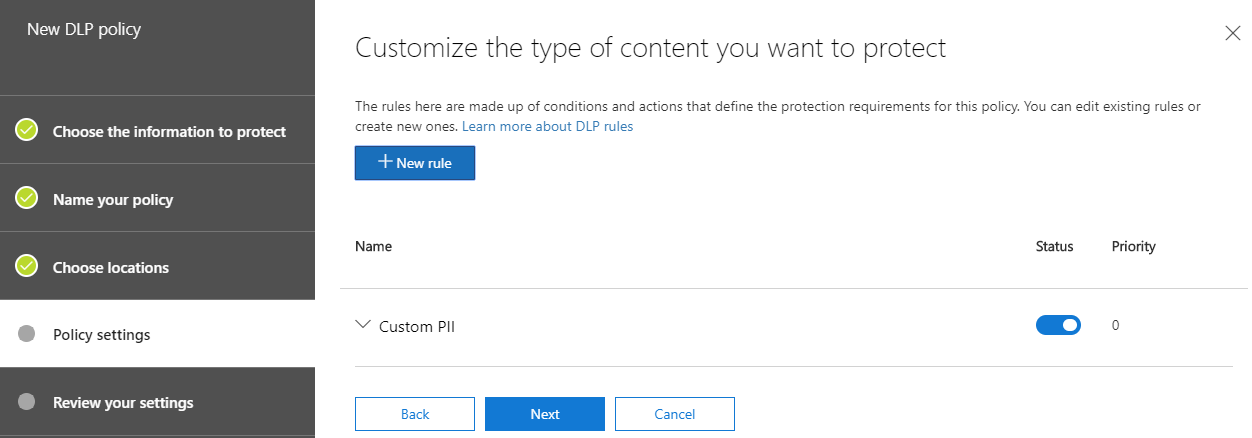
On the next page, we’ll be prompted to create a New rule to customize the type of content we wish to protect:
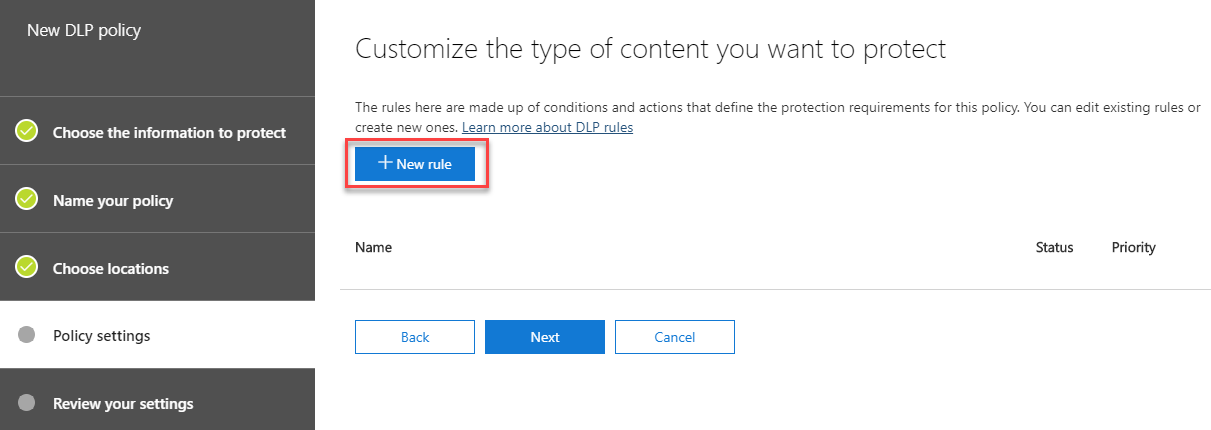
The new rule creation screen will show. This is split into a number of sections, and allows us to define the conditions, exceptions, actions, user notifications and override settings for the rule.
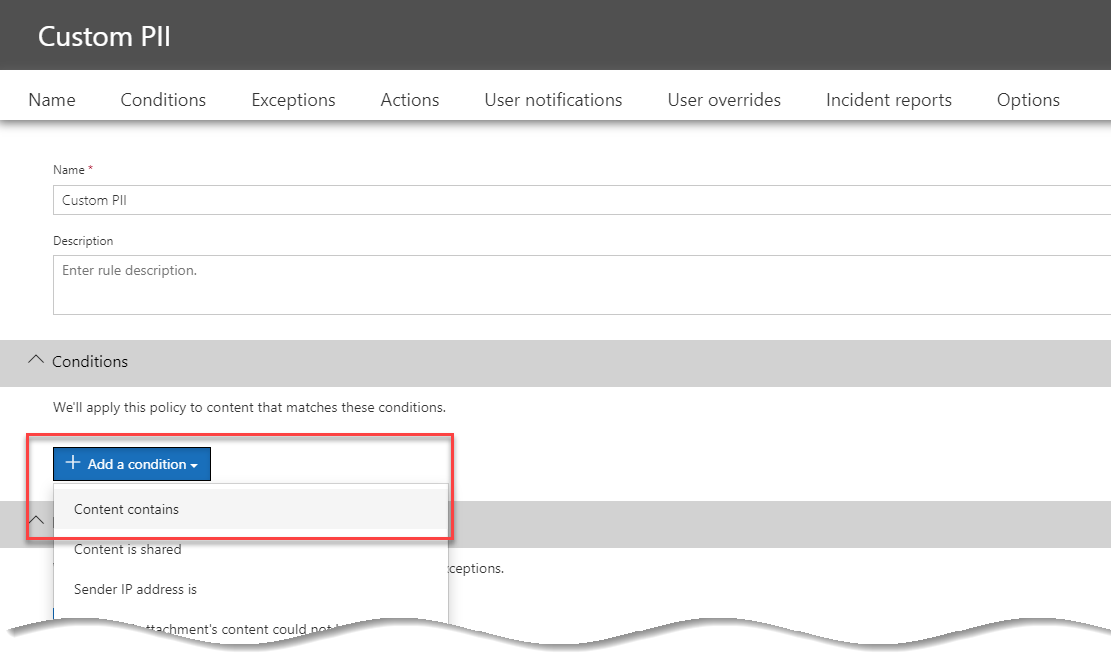
We’ll name the new rule Custom PII, and then within the Conditions section we’ll choose Add a condition:
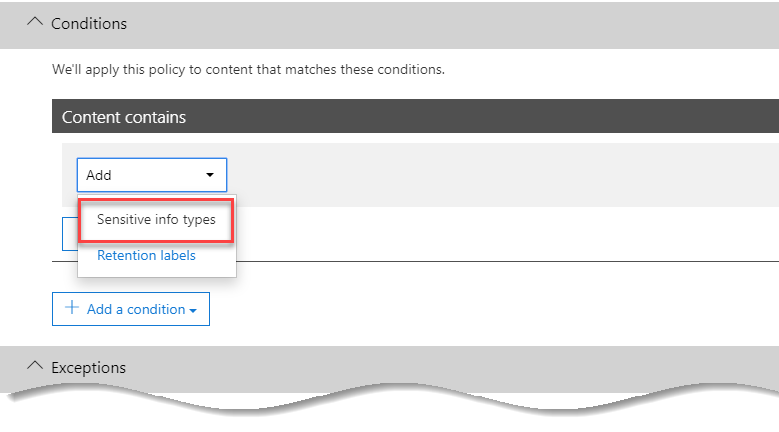
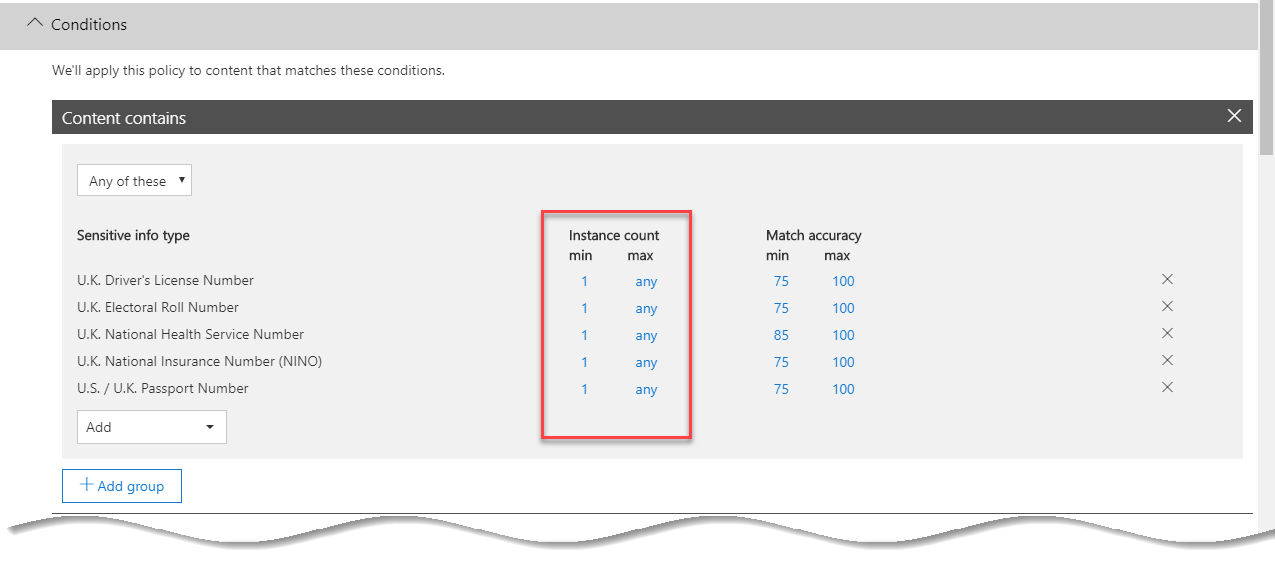
In our new condition, we’ll navigate to the Content Contains section, and choose Add, then Sensitive info types. On the screen that shows, select the PII types relevant to you.
After selecting relevant sensitive information types – in our example, a number of UK-relevant PII examples, we’ll examine the Instance count columns. These contain the minimum to match the policy and the maximum to match the policy.
In the example below, we will leave the defaults for the range in the instance count – a minimum of 1 match will trigger the policy, and there is no maximum.
The usefulness of a range for the instance count is worth understanding. In some cases, we might create two rules within the policy. A low range (perhaps 1 to 5) might allow an override, but any more would provide stricter conditions. However, in our example rule – we will block any occurrences and therefore leave the settings as shown below:
We’ll skip past the Exceptions section and examine the Actions section. We’ll choose to Add an action and then choose to Restrict access or encrypt the content:
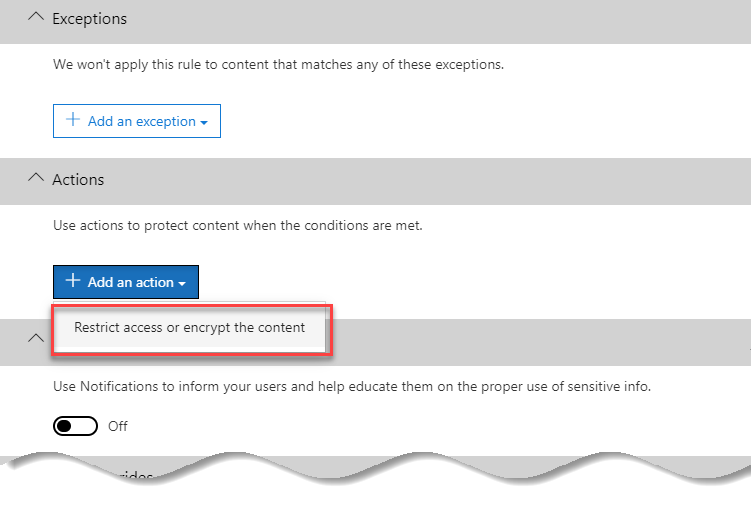
After selecting to add a new action, we’ll then select to block Everyone from accessing the content. Although the wording of the rule mentions OneDrive and SharePoint, this will only apply to Teams chats within our rule:

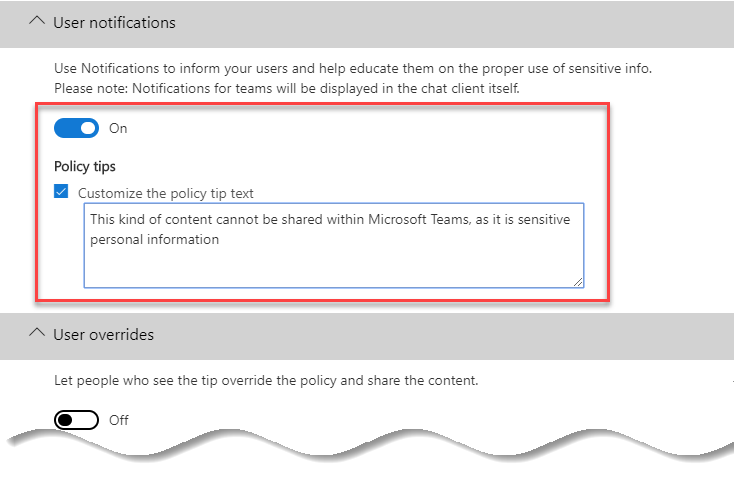
Finally, we will want to notify the user that the content has been blocked. Therefore, within the User notifications section, we’ll choose to switch notifications On, and then provide a custom Policy tip to better inform the user to the reason behind the block:
We’ll save the rule. This should leave us with a single rule within our custom policy, as shown below.
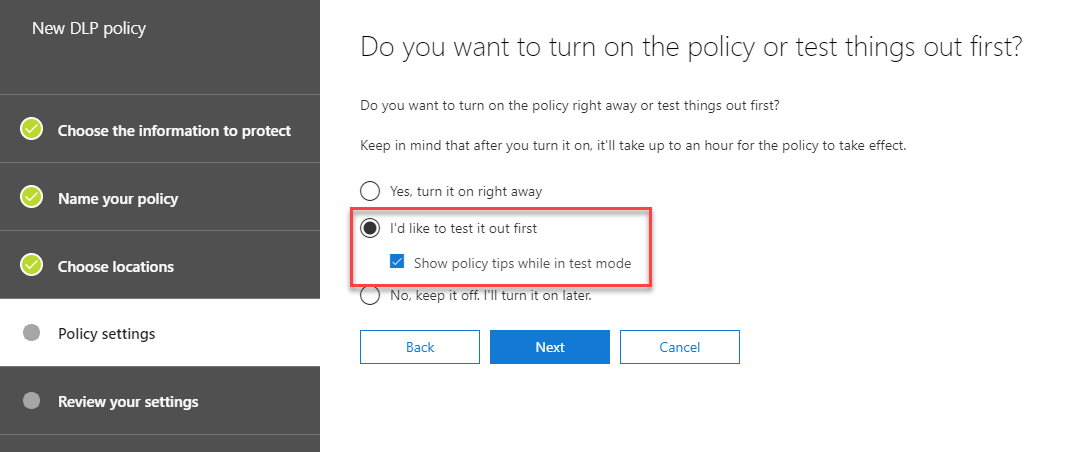
On the penultimate page of the New DLP policy wizard, we’ll have the option to test the policy first, or turn it on right away. As with the basic policy, we recommend testing the policy first before blocking content:
After creating the policy, ensure you wait sufficient time for it to take effect. From our experience, new policies can take around 24 hours to appear for all users.
How does the policy appear when applied to users?
Once our new policy is in place we will want to test it works correctly, and of course we will want to see how it works in practice.
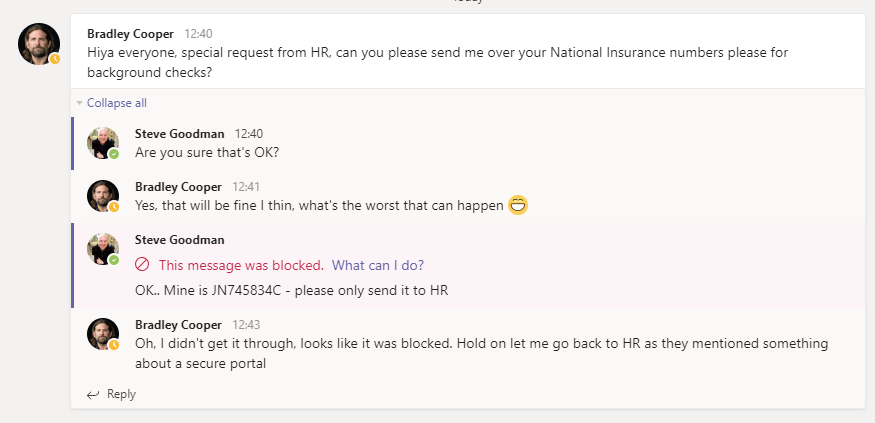
In the example below my example user Bradley has asked for my national insurance number over Microsoft Teams within a channel chat. I’ve grudgingly agreed and attempted to send it to him.
As you’ll see – our policy has taken immediate effect. I see a red no entry icon with the text This message was blocked. What can I do?:
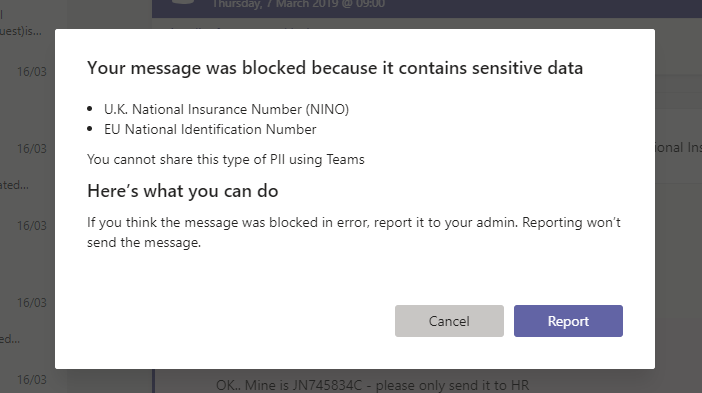
I’ll see more details, including my policy tip by selecting the What can I do? Link. In this example it shows the type of sensitive data identified, along with the policy tip created by the administrator:
But what does Bradley see? The good news is that although as the sender of the message I can see the content I entered, the recipient should not. Instead, they will see the message This message was blocked due to sensitive content:

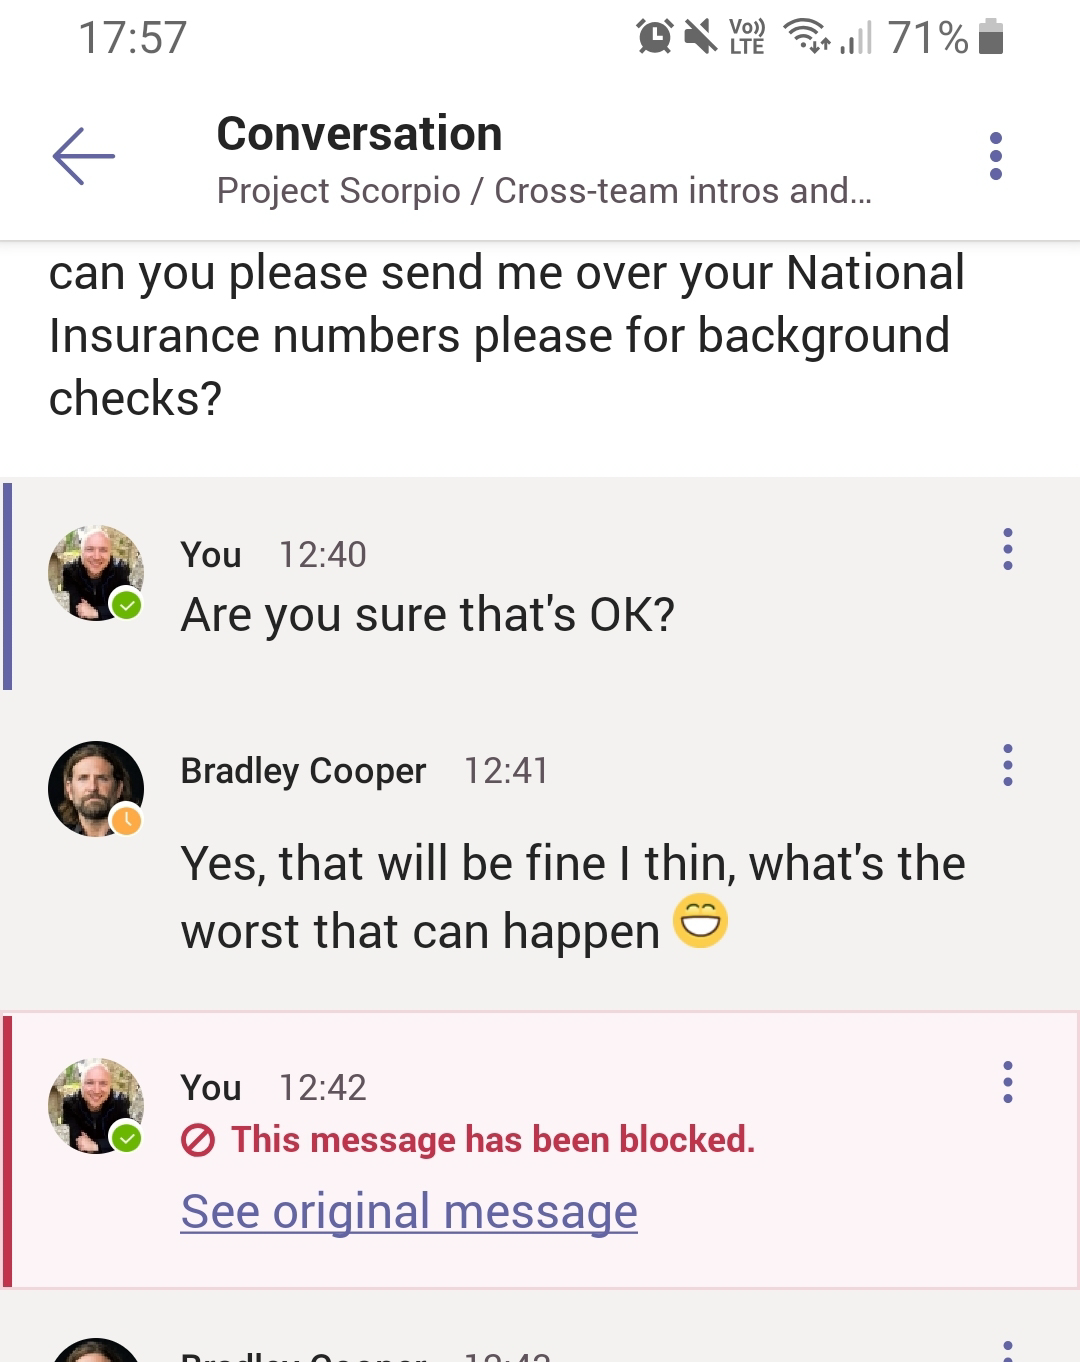
You may also be wondering what the mobile experience is like. The good news is that the user experience is consistent. In the example below we see the same conversation on mobile, with similar DLP notifications:
Reporting facilities for DLP
The reporting facilities of Office 365 DLP aren’t a topic we’ll go into detail on within this post, but we will examine the Teams-specific functionality for reporting.
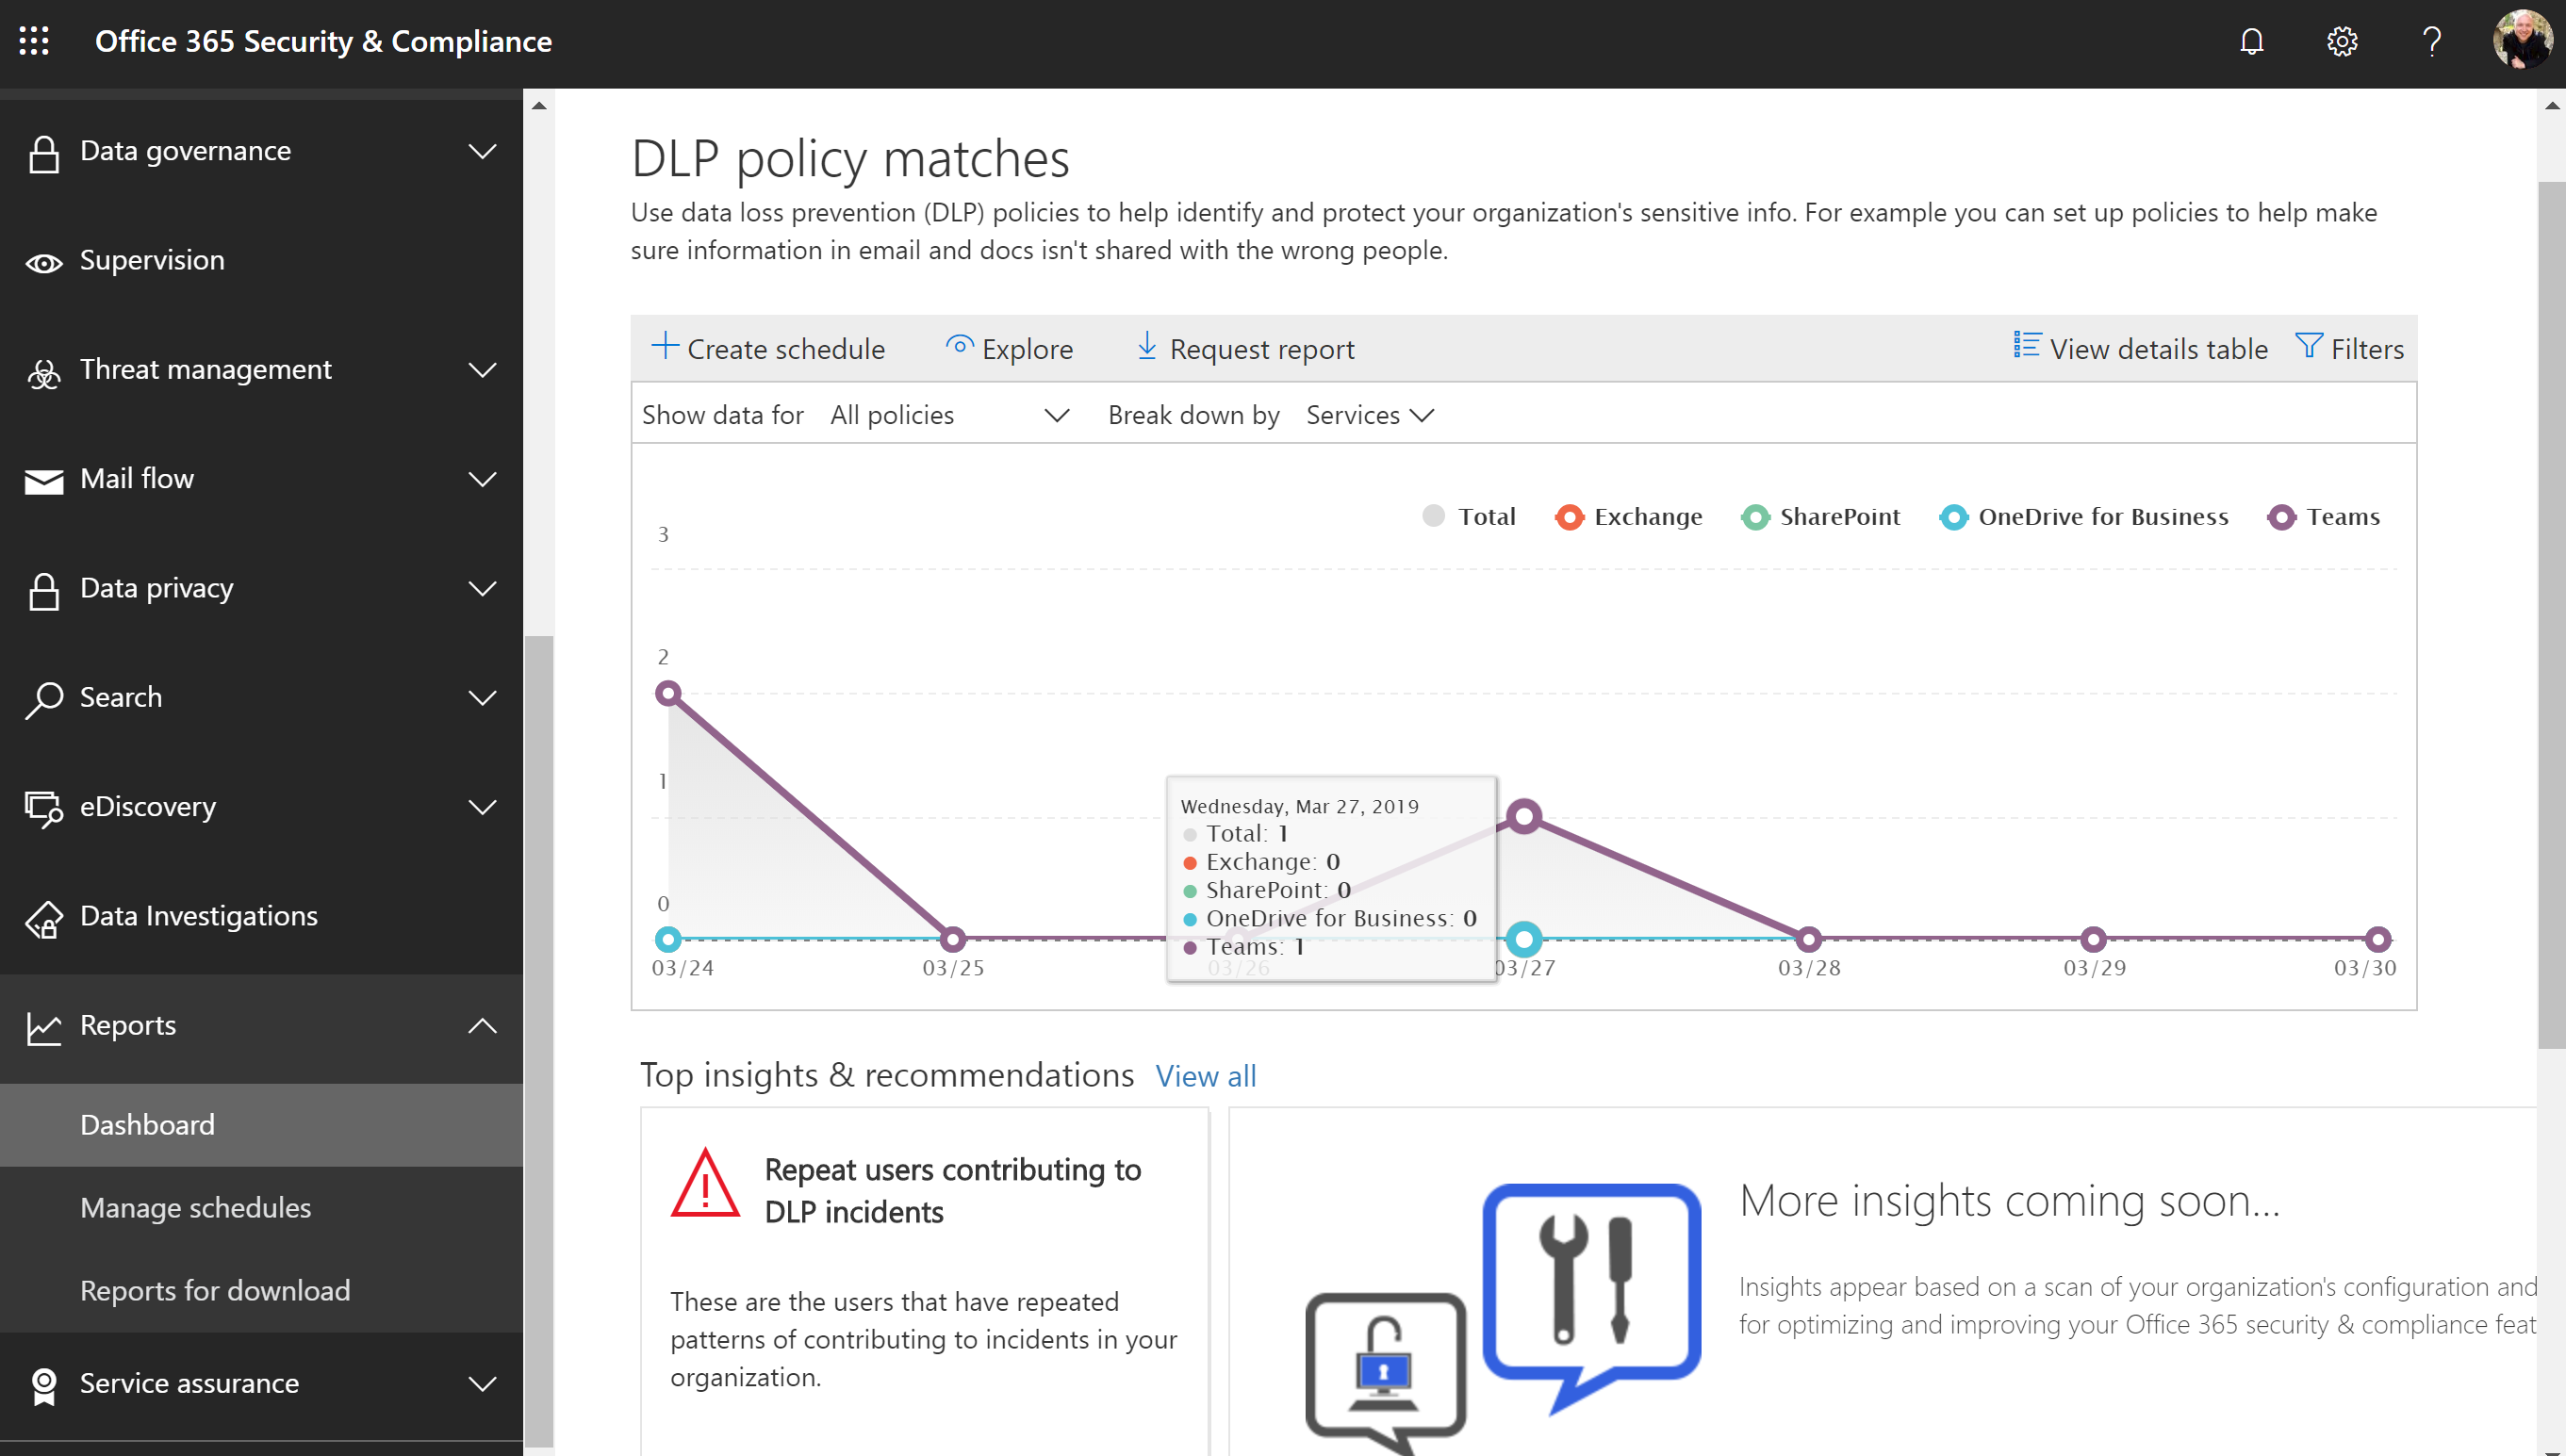
Back in the Security and Compliance center, we’ll look at the DLP reports for policy matches. As well as the existing Exchange, SharePoint and OneDrive for Business information, we see a separate set of collated information for Microsoft Teams:
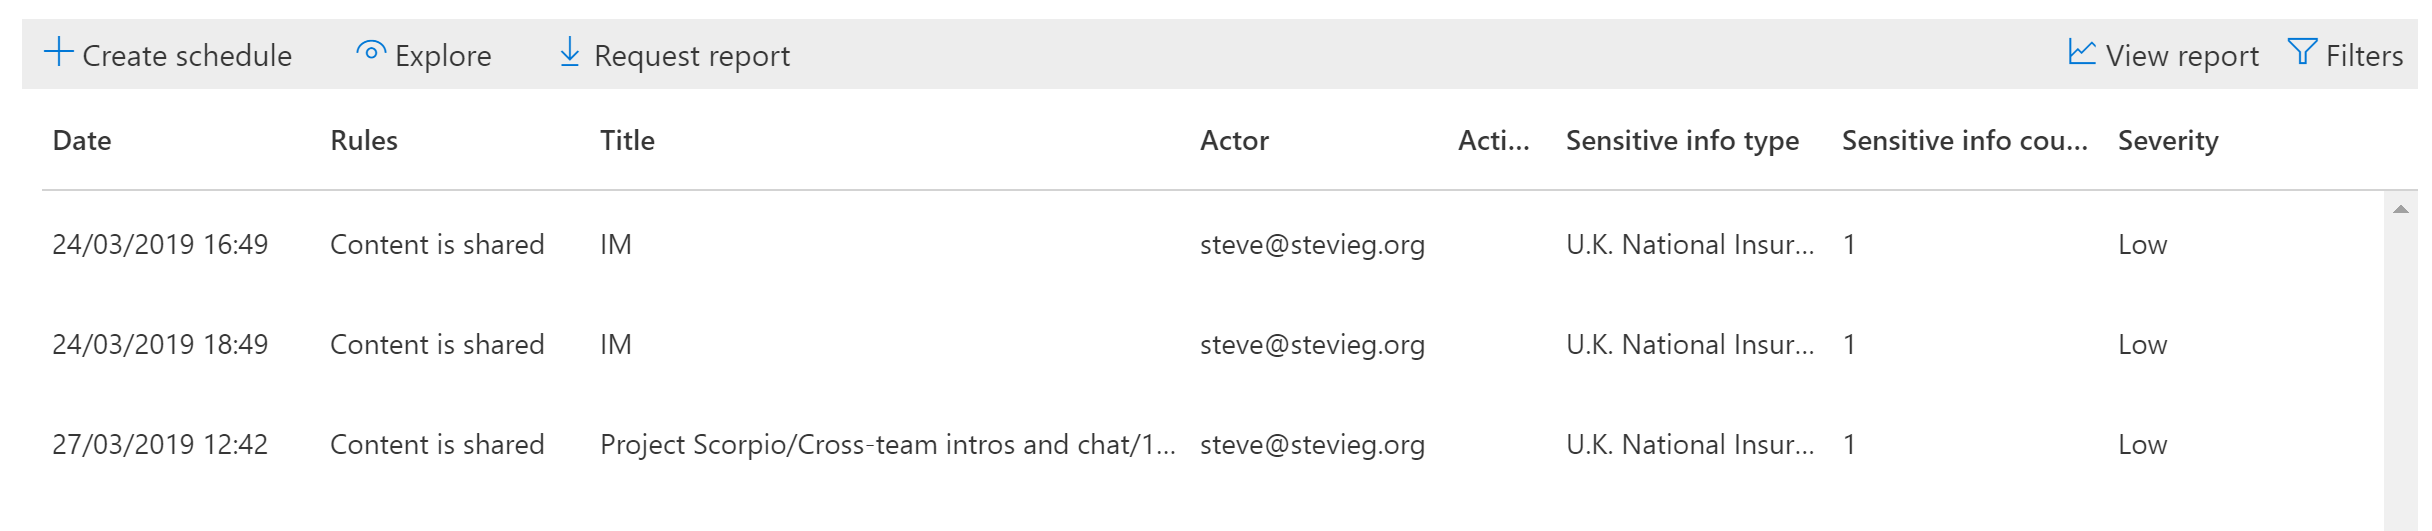
We can, as with other types of content, view Teams information. This shows the rules triggered, and the method shared (for example, the Team and thread, or if it was an instant message). We’ll see the “actor” – the sender – and the sensitive information type and severity of the breach:
Summary
New functionality for Data Loss Prevention in Microsoft Teams is powerful and relatively easy to configure. As ever, deciding upon your DLP configuration and examining all the dependencies is very complex, but the implementation itself works when applied.
The only downside to this is that DLP for Microsoft Teams requires advanced licensing. This is particularly unfortunate, as Teams conversations are usually intended to replace quick questions over emails.
If Teams DLP triggered based on video content or audio content as well, rather than purely text – maybe it would be worth the advanced licensing. It doesn’t and therefore although it’s an excellent feature – not all organizations will be able to use it.
For more best practices on Teams security, check out Microsoft Teams Security: A Primer on How to Secure Microsoft Teams


how do i block message in teams if someone only send 9 digit SSN number without mentioning a word SSN or Discover infront of Credit card information ?
It’s totally racist comment. “It’s almost as bad as the Indians posting in English that is absolutely impossible to understand.” why you’re wasting your time here its the internet if you don’t like the content you switch it over in seconds but you chose to criticized some once effort. I can agree with you that audio quality should be improved, but why to make it sound racist and discouraging. the author has done a good job. keep it up
What happens when it detects information that is not sensitive information, how can I unlock it?
Hello,
i have been trying to get to work preventing passwords share in Teams but no lock. Any tips on how to make this done? I did make custom DLP which includes words password and expansion RegEx but does not work =(
Do you know how to tell me what is the minimum O365 license to have access to these DLP rules?
Irritating. Why would you waste your time, and ours, posting content that is audibly incoherent? Incredible. It’s almost as bad as the Indians posting in English that is absolutely impossible to understand. You spend more time rewinding to try to understand what they’re saying than you do learning. Like this video.
Sorry to be so abrupt and mean. But, really, it is frustrating when audio can be so easily fixed.
Hi Steve,
Great article 🙂 Is there a way to block sending files in the chat window containing i.e. PII as well?
Hiya,
Yes – files are shared in Teams uing OneDrive and SharePoint, so policies for both of those technologies apply to Teams when files are shared.
Steve
Hi Steve, i’m not expert in Cloud, o365 and teams. But, in my office, we recieved the request to open ms teams for our clients who invite us.
I mean (Sorry for my bad english): a client send me an email to join his tenant on his azure.
How can i prevent data loss? I’m not able ti apply on their Cloud any policy, any rules and any dlp because the space Is external and out of control. And I can’t prevently mark all files on all clients with metatags…
On what could we work ti manage and protect US in this scenario? Thanks in advance. Regards, ciao from Italy.
Hi Andrea,
In that case, where you join as a guest into your client’s Microsoft Teams environment, you are governed by their rules.
Therefore if they do not use DLP or similar, then it will not be applied. When you join as a guest you are effectively switching to login to their Office 365 subscription as your external account.
If this is potentially an unacceptable risk, other options may be allowing external access (what was Skype Federation, where you message your client from within the Chat tab in “your” organization’s Teams). Or to not allow users to join other organisation’s Teams – and instead invite them into your environment where you retain control.
However, if it was acceptable to join your client’s Teams before the DLP functionally was available, then continuing to work that way might not be unacceptable as it was deemed an acceptable risk before.
Steve
Steve, did you get this tested with the web client? I imagine it should work there as well, but since the relevant bits are yet to hit my tenant, I’m unable to play with it 🙂
Yes – the screenshots (where we see it blocked for Bradley) are from the web client as it happens. I’ve also recorded a video of this, and in that in just using the web client as the sender too. Actually the web client in Chrome is my default for Teams multi- person demos so I can be logged in as two users
And if you can’t play with it due to licensing or if it’s not hit your tenant yet, then a Microsoft Demos tenant may well have it. The one I provisioned the other day for a customer demo did.