RBAC Roles Control Different Aspects of Tenant Management
In my previous post, I explained that Entra ID (aka Azure AD) is the heart and backbone of all Microsoft 365 services and workloads. I also described built-in administrative roles. The number of these roles is not fixed. Microsoft cloud services are under constant development, and as part of product development, new roles are created to manage new functionality or deleted due to deprecation. In addition, Entra ID tenants can create bespoke roles to meet tenant-specific needs.

Role-Based Access Control (RBAC)
The idea behind RBAC is to grant accounts the roles containing the permissions to perform assigned tasks. For example, the Exchange administrator role contains the permissions to manage Exchange Online, while the License administrator role has the permissions to manage licenses for user accounts and groups.
This can be driven by security-related concerns (e.g. reducing the impact of compromised accounts), legal reasons (e.g. different countries might enforce only local admins), or a requirement to comply with a Data Privacy Policy.
Entra ID permissions are documented in several categories:
- App registration permissions
- Enterprise app permissions
- App consent permissions
- Device management permissions
- User management permissions
- Group management permissions
You can create a custom role in several ways: The experience using the Microsoft Entra admin center is the same as using the Microsoft Entra ID link in Azure Portal.
The process of creating a custom role using Admin Center, PowerShell, or Graph API is documented online.
However, the documentation doesn’t explain the full power behind custom RBAC roles. Let’s explore more.
Create an RBAC Role to Manage Internet Email Protocols
POP3, IMAP4, and SMTP are internet email protocols that are still in use within and outside Microsoft 365 tenants. The clients are third-party vendor products that access Exchange Online mailboxes using legacy protocols. Basic Authentication is not available anymore (Microsoft took four years to eliminate basic authentication for email), and now clients must use OAuth for authentication and authorization. Third-party services and daemons must perform several steps to make their software work with the OAuth2.0 client credentials flow.
Before an app can use the older email protocols with OAuth, someone must grant admin consent for the relevant permissions. By design, an account must have at least the Application Administrator role to grant consent, but assigning this role to an account with the Exchange administrator role would grant high privileges to that account. Therefore, we will create a custom role to allow administrators holding the role to grant consent ONLY for the following three permissions:
- IMAP.AccessAsApp
- POP.AccessAsApp
- SMTP.SendAsApp
To simplify the steps, I use the Microsoft Graph PowerShell SDK. Here the code to create the custom role:
Connect-MgGraph -Scopes Application.Read.All,Policy.ReadWrite.PermissionGrant,RoleManagement.ReadWrite.Directory
# Get the Microsoft Graph and Exchange Online service principal
$EXOSPN = Get-MgServicePrincipal -Filter "AppId eq '00000002-0000-0ff1-ce00-000000000000'"
# extract AppRoles
$EXOAppRoles = ($EXOSPN).AppRoles |
 Where-Object -FilterScript { $_.Value -match '^(IMAP.AccessAsApp|POP.AccessAsApp|SMTP.SendAsApp)$'}
# create base policy
$permissionPolicy = @{
    Id = 'exchange-admin-consent-policy-legacy-protocols'
    DisplayName = 'Exchange Administrator consent for IMAP, POP and SMTP application permissions'
    Description = 'Consent policy to allow Exchange administrators grant admin consent for legacy protocols only.'
}
$exchangePolicy = New-MgPolicyPermissionGrantPolicy @permissionPolicy
# create condition sets for all permissions
$conditionSet = @{
    PermissionGrantPolicyId = $exchangePolicy.Id
    PermissionType = 'application'
    Permissions = @($EXOAppRoles.Id)
    ResourceApplication = '00000002-0000-0ff1-ce00-000000000000'
}
$exchangePolicyGrant = New-MgPolicyPermissionGrantPolicyInclude @conditionSet
# Create a custom role which allows granting permissions conditioned on the Exchange consent policy.
$roleDefinition = @{
    DisplayName = 'Exchange Administrator Admin Consenters (legacy protocols)'
    Description = 'Custom role for Exchange Administrators to grant admin consent for certain permissions.'
    IsEnabled = $true
    RolePermissions = @(
            @{
                'allowedResourceActions' = @(
                    ("microsoft.directory/servicePrincipals/managePermissionGrantsForAll.{0}" -f $permissionPolicy.Id )
                )
            }
        )
    ResourceScopes = @('/')
}
$exchangeRole = New-MgRoleManagementDirectoryRoleDefinition -BodyParameter $roleDefinition
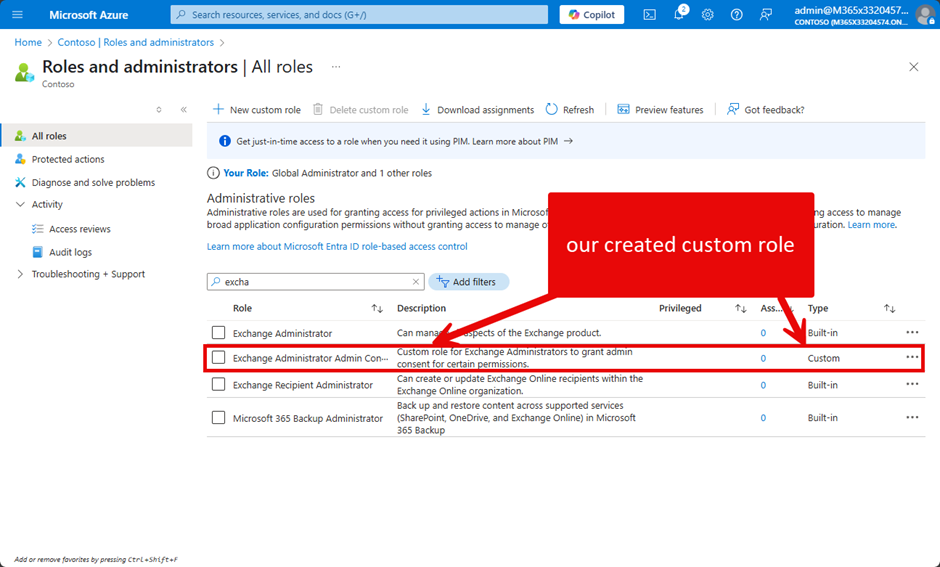
When you now filter for roles in the Entra admin portal for “excha”, the custom role is available (Figure 1):
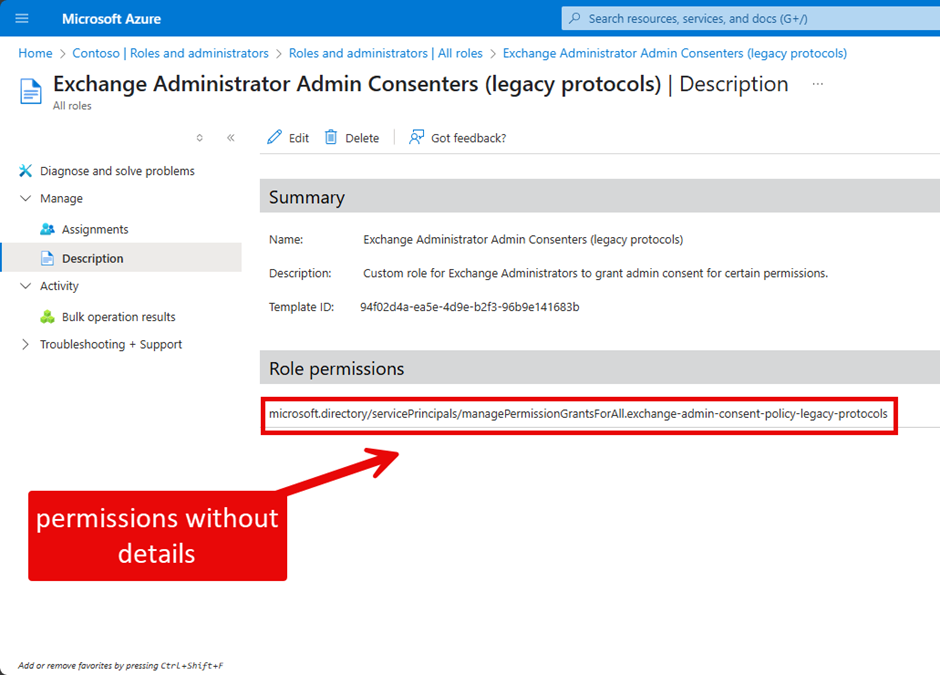
When you try to see the details about the permissions assigned to the custom role, both the Azure portal and the Entra admin center only show non-human friendly details (Figure 2):
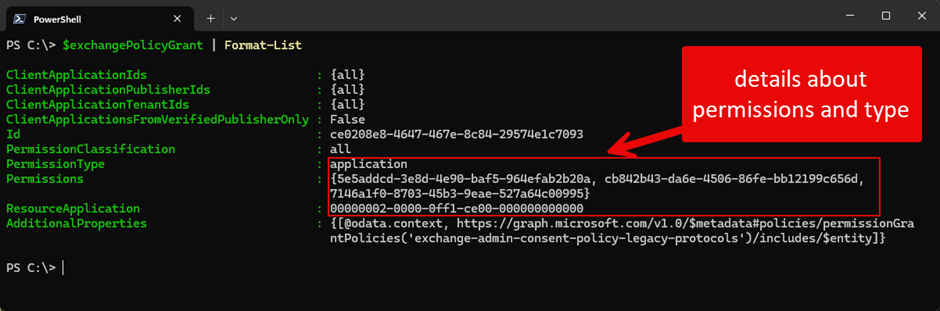
To see the permissions assigned to the custom role, you must use the Microsoft Graph PowerShell SDK. The $exchangePolicyGrant variable shown in Figure 3 is the output of the New-MgPolicyPermissionGrantPolicy cmdlet run in the code sample shown above to assign the permissions to the custom role. The details listed in the permissions property are the identifiers for the permissions assigned to the role.
Custom RBAC Role in Action
Now to see our role in action. Let’s assume that the user Christie is an Exchange Administrator and needs to allow a line-of-business application to use IMAP and SMTP. As previously mentioned, the application must be granted admin consent for these two permissions.
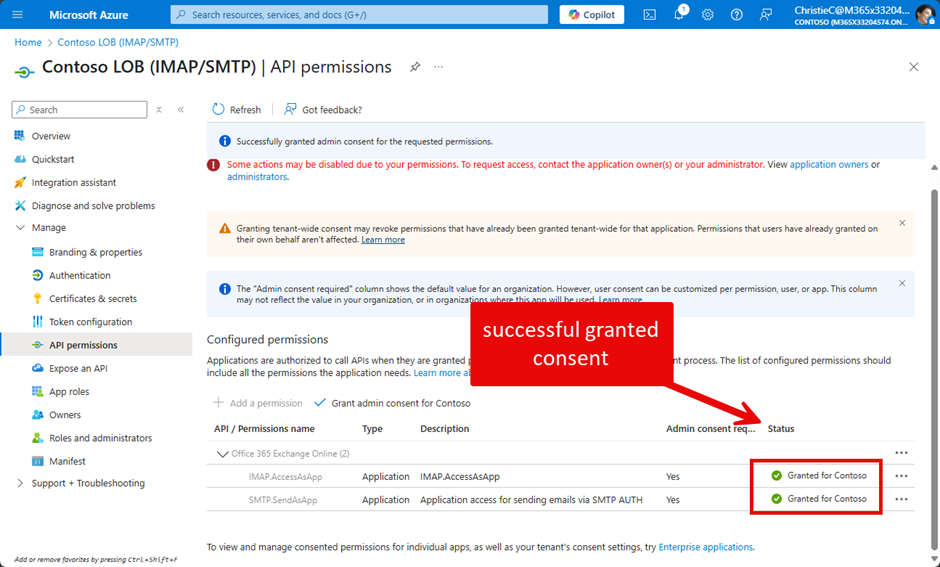
The first step is to assign Christie the custom role. Go to the Roles section of the Entra admin center, find the custom role, and grant it to Christie. Now she can grant admin consent to the app using the portal by clicking on “Grant admin consent for Contoso” (Figure 4):
One important thing to mention about the portal: if there are other permissions configured than those granted by our custom role, the button “Grant admin consent for Contoso” is greyed out (Figure 5):
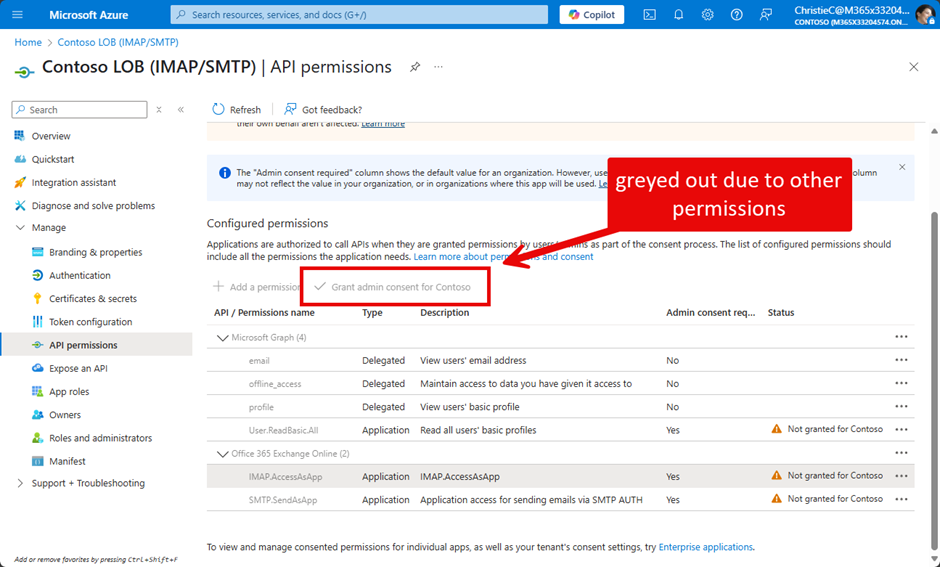
In such a case, you either need to remove the unsupported permissions from the app or use Microsoft Graph PowerShell SDK to Grant an appRoleAssignment to a service principal.
Alternatively, you can use the function Set-AppRoleAssignmentforMG, which is part of my HelperFunctions.

Custom RBAC Helps to Improve Security
Custom RBAC roles can help improve security by avoiding overprivileged administrative accounts. You should always follow the least privileged principles, and by doing so, question administrators about what permissions they really need to do their job.
You can only use a subset of “microsoft.directory/*” permissions in custom RBAC roles (outlined at the beginning). Other permissions like “microsoft.office365.exchange/allEntities/basic/allTasks” to manage Exchange Online or “microsoft.intune/allEntities/allTasks” to manage Intune, are not available.
This is only a simple example of what’s possible. In other articles, I will cover Administrative Units and how we can use them in combination with RBAC roles.


Great article, Ingo. Thank you.