The Office 365 Install Toolkit is a downloadable tool provided by Microsoft that packages an Office 365 client installation into a single executable or MSI package file. You can then use the package file to deploy new Office installations to your client computers, manage existing installs, or uninstall Office applications from clients.
Note, this is a different process than deploying Office 365 ProPlus from a network share. Personally, I prefer to just deploy from a network share. In the comments for this blog post below, there’s reports of people having trouble getting the MSI/GPO deployment to work. I rarely encounter problems with distributing from a network share, so you might like to consider that option instead.
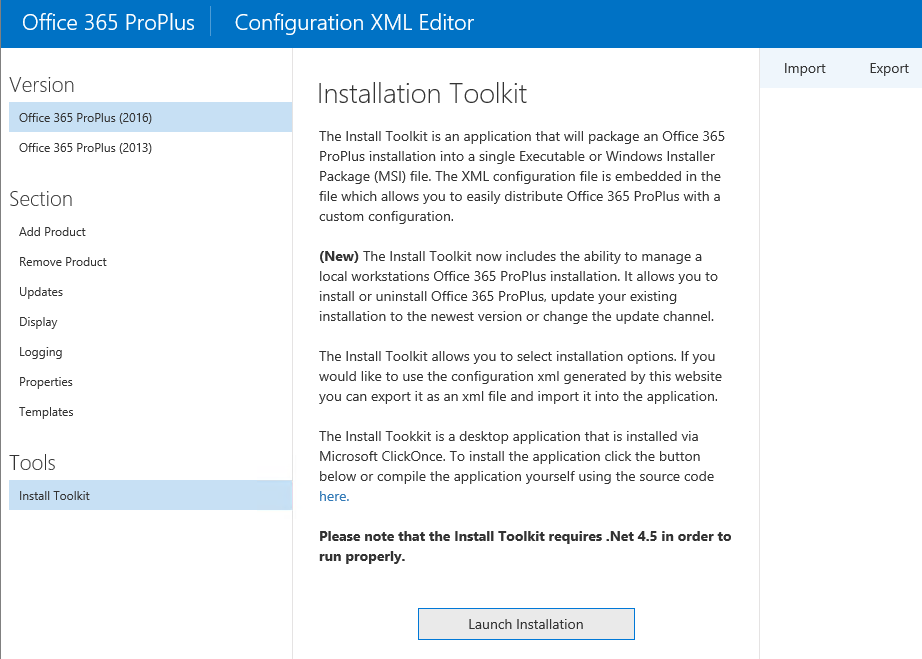
The Install Toolkit can be downloaded from the Office 365 ProPlus Configuration XML Editor site, under the Tools section on the left column of the page. The page refers to Office 365 ProPlus but the Install Toolkit can also be used to create and manage installers for the Office 365 for Business SKU, as well as Visio and Project.
After downloading and launching the Installation Toolkit you’ll be presented with the options to either:
- Create a new Office 365 ProPlus installer
- Import an existing Office 365 ProPlus installer
- Manage your local Office 365 ProPlus installation
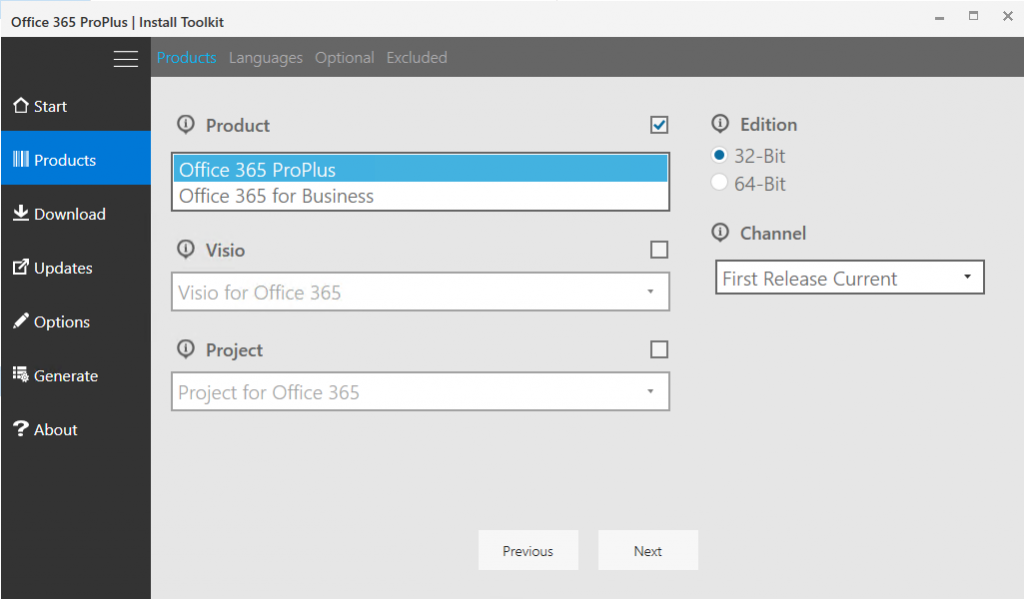
For this tutorial let’s look at creating a new Office 365 ProPlus installer. On the Products screen of the Install Toolkit we have the choice to deploy 32-bit or 64-bit, and can also choose the channel to install. For this demonstration I’ll use 32-bit and the First Release Current channel.
The next step is to choose which languages to include in the installation package. After you’ve selected languages, you’ll be asked to specify a version number to use for the install package. If you want to create a package for a specific build of Office you can enter it in the Install Toolkit at this stage. A full list of the Office build history is available on the Microsoft Support site. If you don’t specify a build number, the Install Toolkit will download the latest build for the channel you selected.
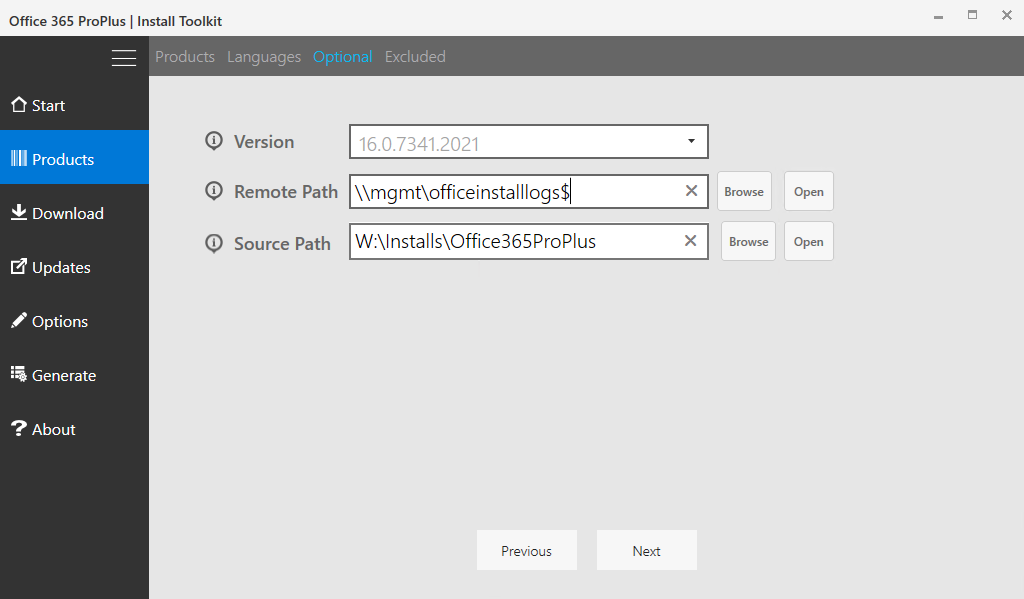
You can also specify a remote path where you would like the Office install logs to be written to, and then choose the source path where the downloaded Office 365 ProPlus files will be stored.
Next, select which applications in Office 365 ProPlus you want to include or exclude. When using the Install Toolkit the item “Lync” applies to “Skype for Business”, and “Groove” applies to “OneDrive for Business”.

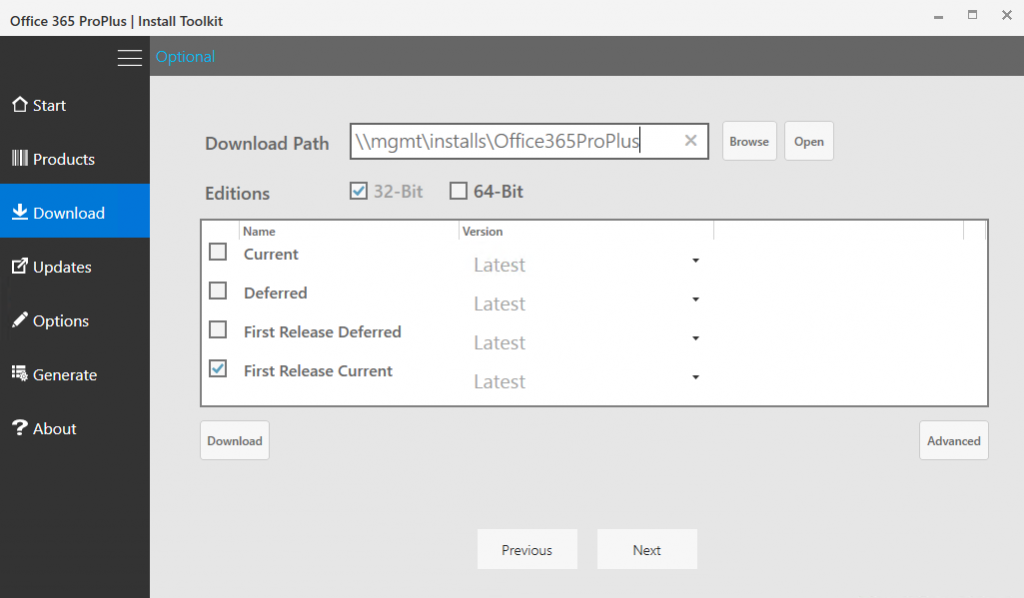
Next, the Office 365 ProPlus files will be downloaded to the path that you specified. At this stage you can select multiple editions and channels if you know that you will be building additional install packages for different channels later. Each channel will be saved in a sub-folder of the download path that you specified. In the Advanced options you can also choose whether multiple channels can be downloaded at the same time, depending on whether you have adequate bandwidth for the task. When you’re ready to download the files, click the Download button and wait for all the downloads to complete before you move on to the next step.
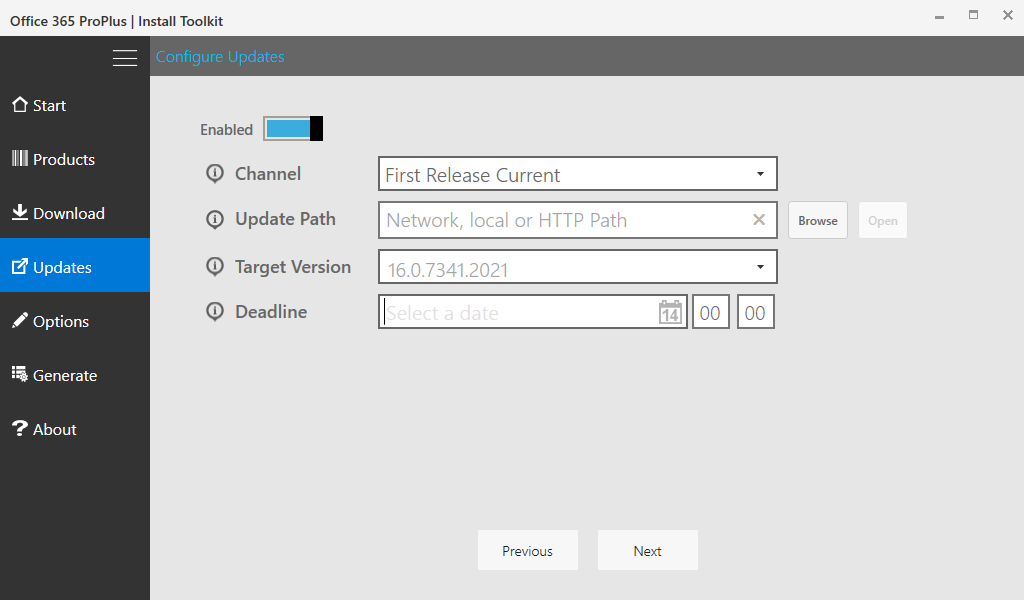
Next, configure how you want to handle updates. If you leave the update path blank, clients will update directly from Microsoft. The update path can also be a UNC or HTTP path on your network. If you need to change this setting later for clients you can do so using Group Policy. For this demonstration I’ll leave updates enabled, and allow clients to download updates from Microsoft directly.
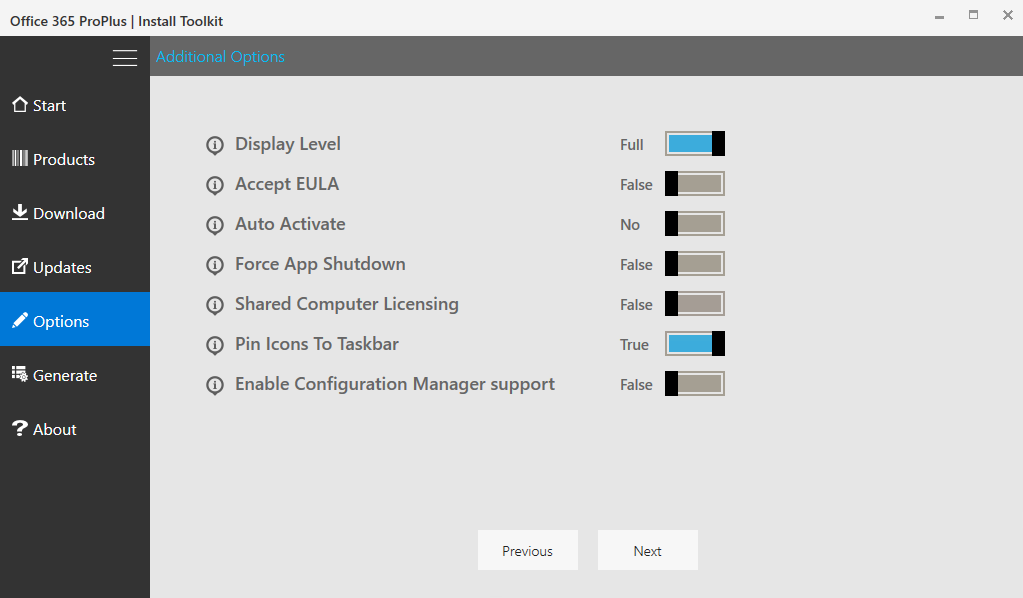
The Additional Options screen of the Office 365 ProPlus Install Toolkit lets you further customize the install package. You can click on the information icons next to each one for a full explanation. For this demonstration no changes are required, because I’m planning to deploy the MSI package using Group Policy to Windows 10 clients.
Now it’s time to generate the installer. For this demonstration I’m using an MSI file, and specified a file path of “W:\Installs\Office365ProPlus\MSI\OfficeProPlus-FRCurrent.msi”. I have also chosen to embed the Office installation files so that the MSI is a single, self-contained installer.
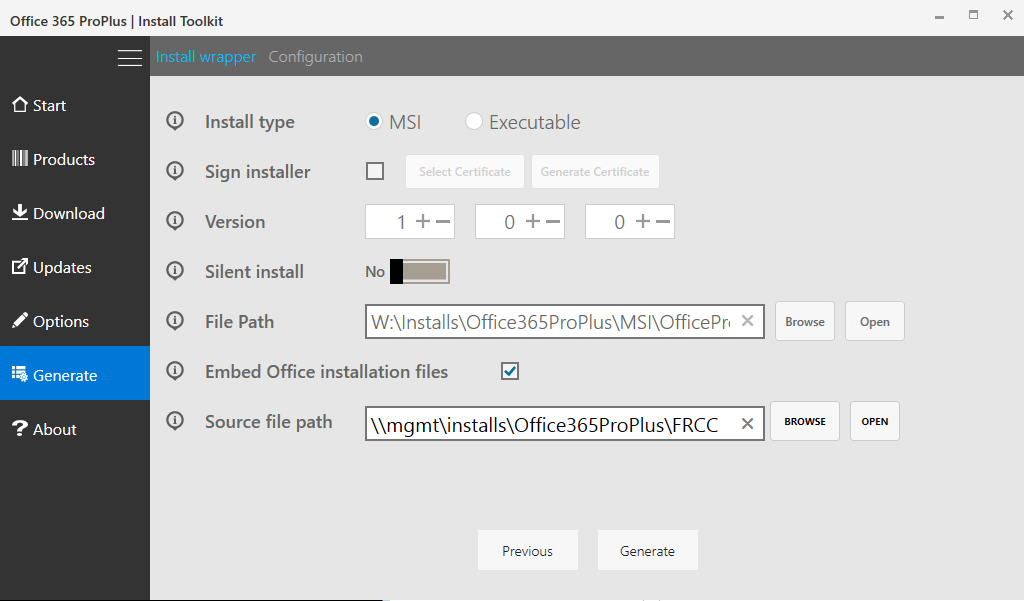
When you’re ready, click the Generate button to produce the MSI file.
When you have the MSI file generated (or the EXE if you prefer) you can then deploy the Office 365 applications to your users’ computers using whichever software deployment mechanism you have available to you, for example by using Group Policy or Configuration Manager.


https://config.office.com/deploymentsettings
Any ideas where this tool has been moved too?
hi
thank you very much
your article was very helping
i had problems with installing, because we use an old exchange 2008 (office must not be higher than 2013) and liked to use office 365. so i configured the old offices with only feature outlook and installed customized office 365 (without outlook). i installed everything with the cmd-tool office deployment setup.exe. but when i was confronted with network problems i needed a packed msi or exe file – this tool was my rescue
thank you very much
best regards from germany
Thanks for your post, it has been very useful,
however, I only have an inconvenient, I got an error when I try to embeding the installation files, the error says: “The Office Source Files are invalid. Please verify that all of the files have been downloaded”.
I know that the files that I downloaded are correct because I deployed Office without problems, I even compare the configuration.xml file that creates the “Configuration XML Editor” vs the XML configuration of the “The Installation Kit” and are identicals, but I still can’t create the MSI with the installation files.
The source file path is: C:\ODT, and in this folder are the configuration.xml file and the setup.exe, also there is a folder named “Office” that was created when I downloaded the files
“C:\ODT\setup.exe /download configuration.xml”.
As I commented, I realized the installation with the next statment: “C:\ODT\setup.exe /configure configuration.xml” and the installation was succesful, so I know that the all the files were downloaded.
Any idea?
Thanks in advance
Thanks for the post
However, I’m confused with the difference between sourcepath and downloadpath. As they seem to suggest they do the same thing
Can they be the same path?
Martin, my question exactly until I actually used the tool to perform the download. For example, I have roaming profiles for some users. I downloaded the current branch to “\\SRV-FILES\O365\ROAM” and noticed that “CC” was appended to that path. That’s where the client install files live, so my SOURCE path is “\\SRV-FILES\O365\ROAM\CC”
I suspect the download component isn’t needed in the .xml configuration file after the source files have been downloaded. In fact, if you use the installation kit discussed in this article to download the source files to your computer environment, you wouldn’t need it in the .xml file at all.
But you will perform the client install with the .xml file and thus will need to specify the SourcePath in the .xml, especially if you are using different configurations for different users. You’ll notice that after you download the files using the tool, the “Source file path” field is automatically completed when you get to the setup file generation step.
When I create this I am only getting the Office 365 ProPlus Installer. Is there a way to complete the instillation in an automated way?
I don’t understand your question. Can you provide more detail about what exactly you mean?
I see the same thing, so I run through these steps, create my .msi installer, and run it through a GPO or even manually and all it installs is “Microsoft Office 365 ProPlus Installer” but not Office 365 ProPlus…
It appears to just copy the contents of the MSI to C:\Program Files (x86)\Microsoft Office 365 ProPlus Installer, with the XML file configuration file and InstallOfficeProPlus.exe which is 1.5GB. When I run the .exe nothing happens.
Have you actually installed Office using this method? I’ve seen a couple of walkthroughs like yours that go over the creation process but never saying they actually used it.
Yep, GPO deployment of my MSI works fine. Add/Remove Programs shows two entries, one for the installer, one for Office itself.
There might be an issue with your build or the XML file it produced, so that’s where I’d start.
You can also look at installing from a network share instead of a GPO deployment.
https://www.practical365.com/clients/office-365-proplus/automate-deployment-office-from-network-share/
It would be helpful to followup on this post with specifics about how you actually successfully deployed this via a policy.
Lots of people are having this problem where deploying the MSI via GP only creates the installer files, and no applications actually appear.
Following the same steps provided by this and other tutorials does not result in a working MSI install.
Since the steps are identical, there is probably something environmental, or something different about the actual GP used.
The MSI has worked fine for me as a GPO software deployment in the past. I haven’t used it recently though, because most of my clients opt for a network share distribution like this:
https://www.practical365.com/clients/office-365-proplus/automate-deployment-office-from-network-share/
Perhaps there is something environmental, or something else that breaks the install, but I don’t have any more to share on it from personal experience.