
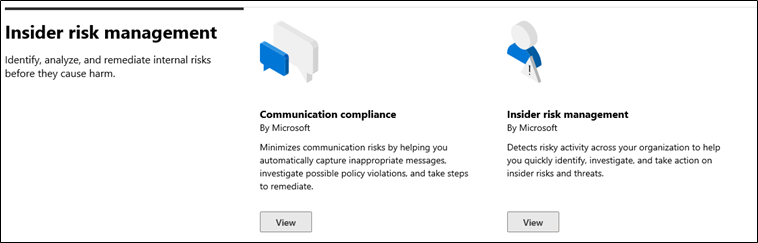
Back at Ignite 2019, Microsoft announced a few new compliance features under the Insider Risk Management “solution”. In this article, we’ll take a quick look at one of them – the Communication compliance feature.
What is Communication compliance?
Communication compliance is a set of controls designed to identify, collect, review and act upon offending instances of communication across the different Office 365 workloads. Currently, Exchange, Teams and/or Skype for Business communications are covered. Data from third-party sources can also be included, but it needs to be ingested in Exchange Online mailboxes first.
Now, if the short description given above sounds familiar, it’s because the Communication compliance feature is basically the successor of the Supervision (Supervisory review) feature we’ve had in Office 365 for a while.
Sadly, there is no built-in method to “migrate” or “upgrade” Supervision policies to Communication compliance ones. Moreover, any data you have previously collected as part of the Supervisory review process will not be moved either. You can, however, continue working with these in the Security and Compliance Center.
Anyway, to access Communication compliance, open the new Microsoft 365 Compliance Center, and under Solutions on the left, select Communication compliance. Alternatively, you can use the direct link here. If this is the first time you are accessing the feature and you haven’t read the documentation, you will run into the below screen, which informs you that you lack the necessary permissions:

To add the permissions, you need to use the Security and Compliance Center, as the newly released “specialized” workspaces do not support managing permissions yet. Please note that no Role Group containing all the needed permissions exists, so you will either have to create a custom one (as suggested in the documentation) or add yourself to multiple existing Role Groups that contain one of the individual roles. The Supervisory Review Role Group contains the Supervisory Review Administrator role, but it doesn’t contain the Reviewer and the Case management roles, both of which are needed to access the feature.
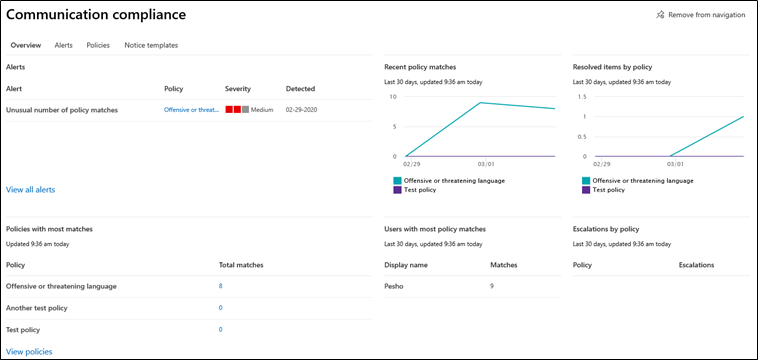
Another thing you will run into when accessing Communication compliance for the first time is the Getting started wizard, which gives you a brief summary of the feature in four pages. You will then land on the Overview page, where you will find a dashboard giving you an “at a glance” view of the configured policies, alerts, matches per policy and per user, and so on. Since it’s no fun looking at an empty screen, the screenshot below illustrates the state of the dashboard after creating few policies and generating some matches:
Creating a Communication compliance policy
Now we’ve outlined a brief introduction of the feature, let’s dive right into exploring its capabilities. The first thing you will need to do is create a Communication compliance policy, which you can do by navigating to the Policies tab and hitting the Create policy button. You will be given the option to select from one of three existing templates (“Monitor for offensive language”, “Monitor for sensitive info” or “Monitor for regulatory compliance”) or create a Custom policy from scratch. The policy template names are self-explanatory and you can find additional details about their configuration in the documentation.
Since this will be the first policy we’re creating, let’s start with something simple – the Monitor for offensive language scenario. Clicking the corresponding item under Create policy will bring forth the “Monitor communications for offensive language” template pane, as depicted below. The Policy name will already be populated, but you can change that as needed. The template, however, won’t allow you to modify the selection for Communications to monitor, which is configured to cover all communications across Exchange, Teams and Skype for Business. The Conditions field also cannot be modified and is set to capture 100% of the communications.
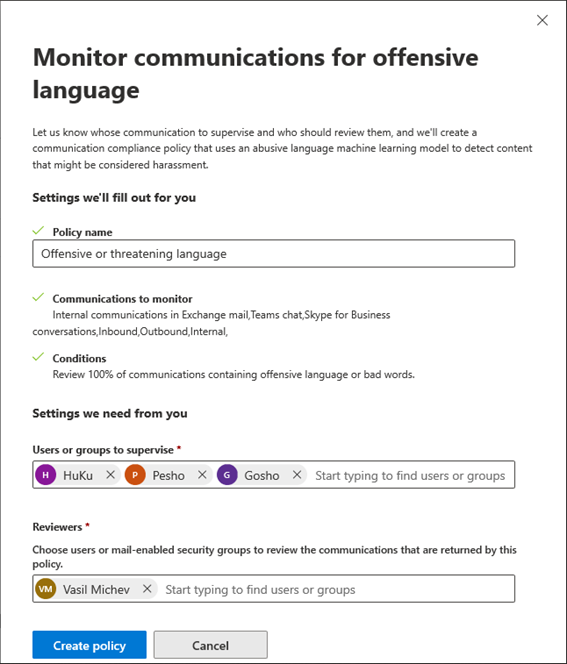
The last item you need to configure is the Users or groups to supervise, where you can specify individual users by typing their name or email address (or part of it). The selection control seems to work a bit slow for my taste and only shows the display name of any potential matches found, making it hard to select the correct person when multiple users with the same display name exist. The same applies to the Reviewers field, under which you will specify a user (or group of users) who will be responsible for reviewing the captured communications and performing any actions as needed.
Nowhere in the creation process are you specifying the actual “offensive language” to look for. Instead of having you compile a list of all the bad words that you want to monitor, Microsoft is employing machine learning models to detect instances of profanity, harassment and threats. While this works well for English-language content, no other languages are currently supported, so bear that in mind when creating these policies.
Pressing the Create policy button will start the provisioning process and display a summary page, warning you that it might take up to an hour to activate the newly created policy. Until the provisioning process has completed, you cannot take any action on the policy or even view its properties – another experience which leaves something to be desired.

Creating a custom policy
As another example, we will create a custom Communication compliance policy and will use the process to explain the different policy settings. Start by navigating to Communication compliance -> Policies -> Create policy -> Custom policy. The new, streamlined wizard interface you’ve probably seen throughout other parts of the modern Microsoft 365 admin UI will appear. On the first page of the wizard, you will have to Name and describe your policy, with only the Name being mandatory. Of course, properly documenting your policies is a good practice, especially when you use them for more than just testing.
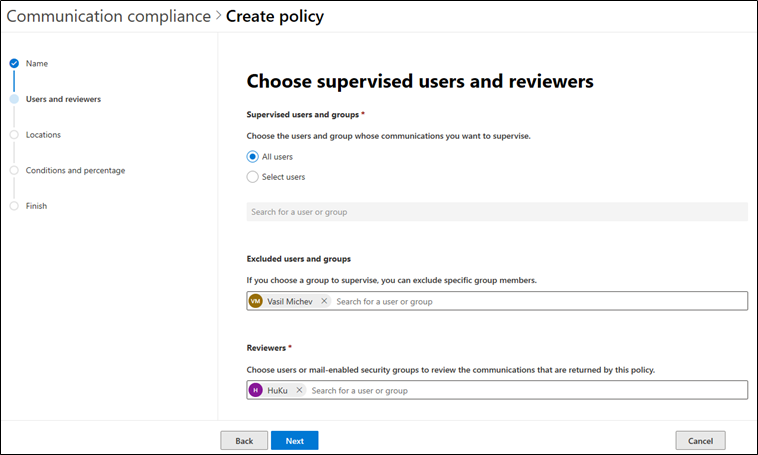
On the next page, Choose supervised users and reviewers, you will provide a list of users whose communications will be supervised, a list of users excluded from the policy and the set of reviewers. You can use Distribution groups to specify a set of users, in which case all members of the DG will be added to the policy. Interestingly, the UI also allows adding Dynamic Distribution Groups, however those are not supported. Office 365 Groups can also be specified, in which case the policy will include the Group mailbox or associated Team, not the members of the group. If needed, you can also specify All users via the corresponding toggle.
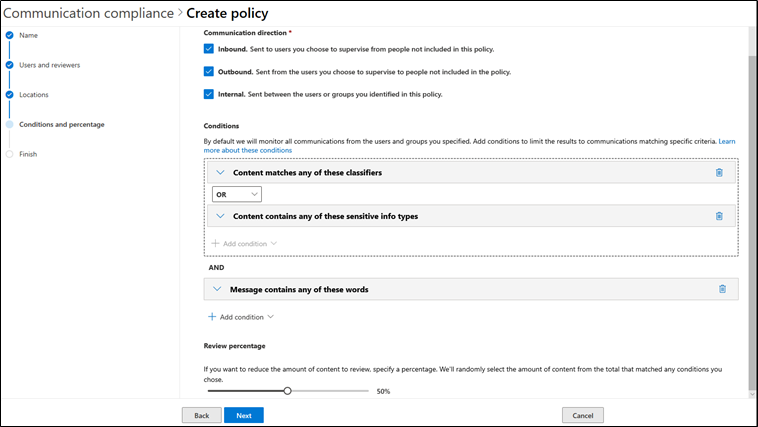
Next, you will have to Choose locations to monitor communications. By default, all supported locations are included in the policy, such as Exchange, Teams, and Skype for Business. You can toggle those on/off as needed. To get more granular, you can Choose conditions and review the percentage on the next page. Under the Communication direction section, you can decide whether to include Inbound (sent to user’s subject to the policy), Outbound (sent from user’s subject to the policy) and/or Internal (sent between members of the policy) communications. You can also specify the percentage of communications to be captured, with the default value set to 10%.
The robust Conditions control allows you to further narrow down the set of items that will be captured. The list of conditions and exceptions you can configure is too broad to be covered in a single article, so I will refer you to the documentation for more details. I will briefly mention few things that stand out as upgrades compared to the old Supervisory review feature: the ability to Group conditions; use Sensitive information types; use Custom keyword dictionaries; the expanded use of Classifiers; and more. Multiple conditions are linked together in a logical configuration as illustrated below:
Lastly, you can proceed to the next page where you can review the settings you’ve configured for the policy and if everything checks out, press the Create policy button to complete the process.
Whilst playing with custom policies, I run into a few more glitches. Even though no errors were encountered during the actual policy creation policy, some custom policies I created failed provisioning. The UI will show Error under the Status field in such cases but won’t give you any actual details on why the provisioning process failed. Looking at the underlying PowerShell cmdlets (Get-SupervisoryReviewPolicyV2, the same we use for managing Supervision policies created in the SCC), the ProvisioningStatus shows as NotStarted.

What’s more interesting, no matching Rule is created (Get-SupervisoryReviewRule). In some cases, “touching” the newly created policy via the UI seems to fix things, while in others the policy remains in broken state, with zero details given as to the actual reason why. On the other hand, using “template” policies resulted in no issues, so the experience described above might simply be a result of my toying with the different settings in an unsupported way.
Working with alerts and policy matches
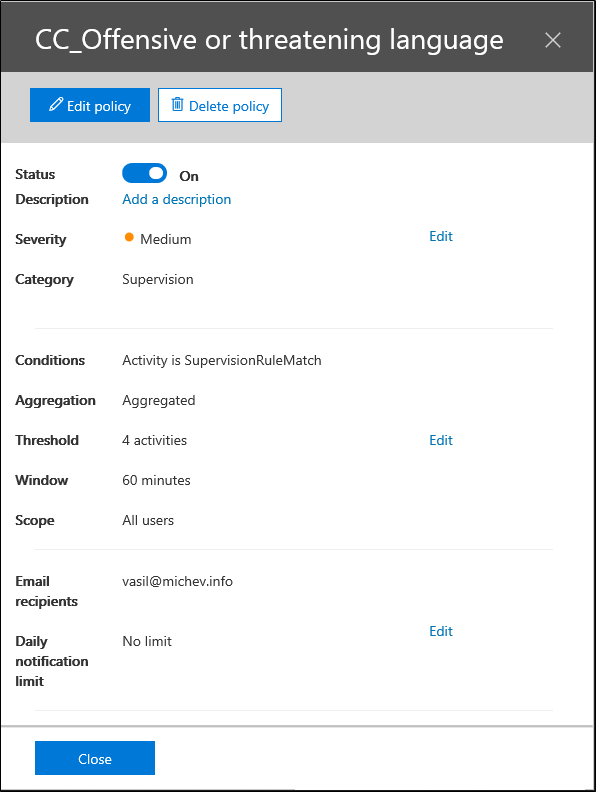
Creating a communication compliance policy will result in an Alert policy configured for the corresponding SupervisionRuleMatch activity, as depicted below. In turn, policy matches will trigger email notification to the reviewer(s), provided the condition of the alert policy is satisfied (4 matches in 60 minutes by default). While you can see the Alert policy under the Alerts tab in the Microsoft 365 Compliance center, the functionality exposed there is minimal and if you want to modify it, you need to use the SCC.
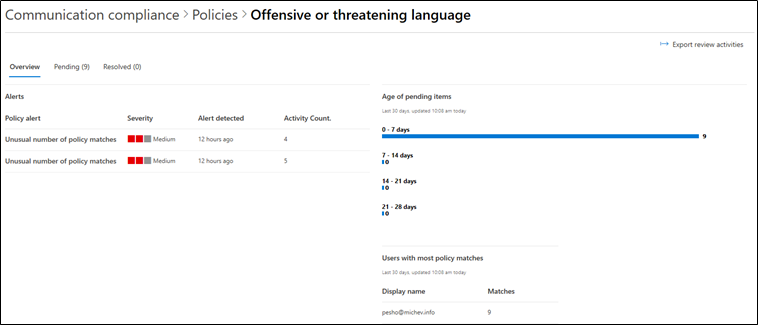
Alerts will be visible under the Compliance Communication -> Alerts tab, as well under the Communication compliance dashboard and the individual policy space. For example, the screenshot below lists the alerts generated for the Offensive or threatening language policy we created in the first section of the article. Apart from the actual number of matches, you are presented with information about the Users with most policy matches for the last 30 days, as well as the Age of pending items.
Apart from simply viewing statistics about the effectiveness of your policy, reviewers can look at individual offences and act upon them as needed. This is done by navigating to the Pending tab above, where you can see the list of all currently unresolved items. If needed, you can filter them by using the robust set of controls available, as well as Group and Sort the items. If duplicate items are detected, the Near/Exact duplicate controls can help you quickly act upon them as a group, instead of going over each individual item.
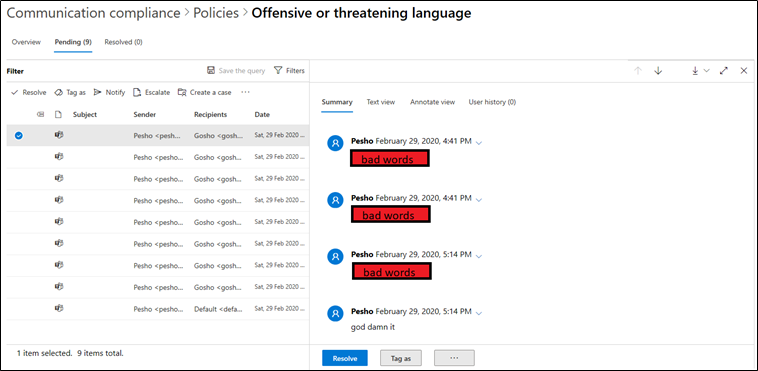
Selecting a given item allows you to preview it in several different ways (Summary, Text View, annotate view), or perform a variety of actions. Those include:
- Resolve – end processing of the item
- Tag as – marks the item as either Compliant, Non-Compliant or Questionable
- Notify – send an email notification to the offending user
- Escalate – send the item for additional examination to one of the reviewers configured for the policy
- Create a case – add the item(s) to an Advanced eDiscovery case
- False positive – resolve the item as false positive match
- View message details – get all the additional properties of the item
- Download – get a copy of the message (either as original or PDF)
- View item history – get a list of all the actions performed on the given item
Additional details on all these can be found in the documentation. For the Notify action, different templates can be configured for reuse under the Notice templates tab, which is the only part of the UI we haven’t covered so far. Notice templates are simply email messages that can be sent to the user generating the policy match with a click of a button.
Before moving onto the Summary section, it’s worth mentioning that not all policy matches will be detected in real time. Teams and Skype for Business events will be processed once every 24h, so have that in mind. Email items should be processed almost immediately.
Summary
In this article, we explored the Communication compliance feature. While there are some UI glitches that might spoil the experience, Communication compliance offers several great improvements compared to its predecessor, the Supervision feature. Expanded conditions engine, support for sensitive information types, custom keyword dictionaries, Classifiers, conversation threading, additional actions, notice templates are just a few of the features worth mentioning. And there are additional things we didn’t touch upon, such as the robust Audit controls. Make sure to check the documentation and videos from Ignite to get additional details on those.


Very informative blog, every aspect, and point are explained so well. thank you for this information. I have also gathered detailed information on communication compliance and about its working on the Shield. https://www.shieldfc.com
Vasil, Great article. Thank you. When we need to monitor multiple groups and each group needs a separate reviewer. Can this be archived in the single policy.
Hi Vasil, great article. One question, if I want to generate custom reports from the Communication Compliance alerts? can I export the audit log for that? How can I do that and how can I identify alerts related to Communication Compliance module. Thanks!