When you are administering an Exchange Server environment one of the things you frequently need to do is change settings for multiple mailboxes that match specific criteria.
For example you may need to find all of the mailbox users in one office location so that you can add them all to a distribution group.
As another example you may need to find all mailbox users in a branch office to make sure that they are blocked from using non-cached mode Outlook.
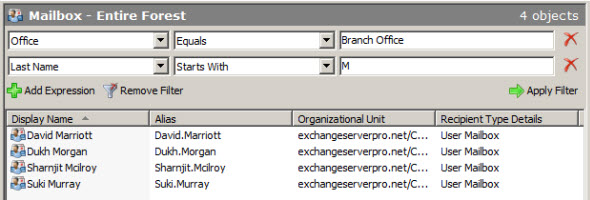
The Exchange Management Console has a filtering feature that lets you create a view of mailbox that match a set of criteria. You can find this in the Recipient Configuration -> Mailbox node of the Exchange Management Console.

Filters can be created based on a pre-set series of attributes, and can also be created with multiple filter criteria.

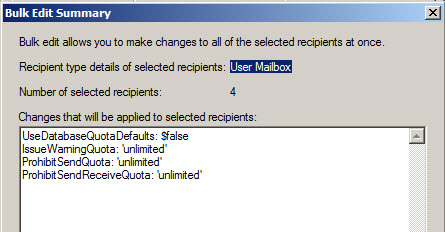
You can select multiple mailbox users and then open the Properties of those mailboxes to perform bulk edits of some settings.

Although these filtered views are useful for some tasks there are also a lot of common administrative tasks that are not available to perform this way. Also, the Exchange Management Console does not allow you to filter by the complete set of mailbox attributes.
For more advanced Exchange administration you can use the Exchange Management Shell. For example to find the same list of mailboxes shown above you would run this Get-User command.
[PS] C:\>Get-User | where {$_.office -eq "Branch Office" -and $_.lastname -like "M*"}

Name                                                        RecipientType
----                                                        -------------
David.Marriott                                              UserMailbox
Dukh.Morgan                                                 UserMailbox
Sharnjit.Mcilroy                                            UserMailbox
Suki.Murray                                                 UserMailbox
But we can also use the shell to filter our queries on criteria that the management console does not give us access to. For example to list all mailboxes in the branch office that do not use the database default storage quota you would run this Get-Mailbox command.
[PS] C:\>Get-Mailbox | where {$_.office -eq "Branch Office" -and $_.UseDatabaseQuotaDefaults -eq $false}

Name                      Alias                ServerName       ProhibitSendQuota
----                      -----                ----------       -----------------
David.Marriott            David.Marriott       ex2010           unlimited
Dukh.Morgan               Dukh.Morgan          ex2010           unlimited
Kelly.Chatir              Kelly.Chatir         ex2010           unlimited
Neville.Sherwin           Neville.Sherwin      ex2010           unlimited
Sharnjit.Mcilroy          Sharnjit.Mcilroy     ex2010           unlimited
Suki.Murray               Suki.Murray          ex2010           unlimited
Because the shell gives us so much more flexibility in how we query Exchange it makes it a more powerful tool for performing bulk edits.
Taking the examples from the start of this article here is how you can achieve those outcomes.
The first example is adding all users in a particular office to a distribution group. We know that we can query Exchange for all users in “Head Office” with this command:
[PS] C:\>Get-Mailbox | where {$_.office -eq "Head Office"}
So here is how I would add them all to the “Head Office Staff” distribution group that already exists.
[PS] C:\>$headofficeusers = Get-Mailbox | where {$_.office -eq "Head Office"}

[PS] C:\>$headofficeusers.count
367

[PS] C:\>$headofficeusers | Add-DistributionGroupMember -Identity "Head Office Staff"
I can then quickly check the outcome.
[PS] C:\>$members = Get-DistributionGroupMember -Identity "Head Office Staff"

[PS] C:\>$members.Count
367
The second example is configuring branch office users to be blocked from connecting with non-cached mode Outlook clients. Here is how I would perform that task.
[PS] C:\>$branchusers = Get-Mailbox | where {$_.office -eq "Branch Office"}

[PS] C:\>$branchusers.Count
20
I want to filter them further down to only the users not currently blocked from using non-cached mode.
[PS] C:\>$branchusers = $branchusers | Get-CASMailbox | where {$_.MAPIBlockOutlookNonCachedMode -eq $false}

[PS] C:\>$branchusers.Count
19
Now to perform the bulk edit to disable non-cached mode Outlook for the 19 branch office users who are currently not blocked.
[PS] C:\>$branchusers | Set-CASMailbox -MAPIBlockOutlookNonCachedMode $true
As you can see the Exchange Management Shell is a very powerful tool for Exchange administrators especially when performing bulk administration tasks.


Buen Tutorial.
Thanks