Guiding Teams Premiums Admins
In my two previous articles in this series, I focused on securing meetings in Microsoft Teams with Teams Premium functionality. You can find both articles here:
Secure Meetings with Teams Premium | Practical365
Templates and Sensitivity Labels in Teams Meetings | Practical365
Teams Premium offers much more than secure meetings, with new features being added over time. Microsoft’s current approach requiring add-on licensing continues, with Teams Premium being the “add-on” for everything Microsoft Teams related.
When at least one user has a Teams Premium license assigned within an organization, several new features and settings are activated. In this article, I will provide guidance to Teams administrators on which settings to monitor, whether they are enabled by default or require specific configurations to work, including identifying who needs a Teams Premium license to access and use these various features.

Premium Meetings, Town Hall, and Webinar Functionality
Secure meetings, including meeting templates, are described in detail in the previous articles in this series, but Teams Premium offers additional non-security related meeting features as well. Let’s look at these from a high level!
| Feature | Description | License requirement |
| Increased attendee capacity | 20K attendees (soon 100K) and up to 50 concurrent (standard: 10K and 15K). | Organizers need Teams Premium |
| eCDN | A Content Delivery Network within your own network provides quality assurance and bandwidth saving when running large meetings. | Attendees need Teams Premium |
| Customized registration workflows | Custom attendee emails, approvals, and waitlists. Registration starting and end times. | Organizers need Teams Premium |
| Additional meeting insights | Customize meeting invites with colors, logos, etc. | Organizers need Teams Premium |
| Meeting themes | Custom attendee emails, approvals, and waitlists. Registration starting and end times. | Real-time Admin Alerts for Audio/Video/Screen sharing performance |
| Custom attendee meeting backgrounds and together mode scenes | Distribute custom meeting backgrounds to users and create and share customized together-mode scenes. | Attendees need Teams Premium |
| RMTP-In available | Notify administrators in real-time when selected users experience audio and/or video and sharing issues in meetings. | Organizers need Teams Premium |
| Town hall meeting chat and reactions | Organizers can enable chat in Town halls to have attendees interact with each other. Receive real-time feedback from your audience with reactions. | Organizers need Teams Premium |
| Real time Admin Alerts for Audio/Video/Screen sharing performance | Notify administrators in real-time when selected users experience audio and/or video and sharing issues in meetings. | Attendees need Teams Premium |
| Custom meeting invites | Customize meeting invites with colors, logos etc. | Organizers need Teams Premium |
With Teams Premium, administrators and organizers can run larger high-quality meetings and events with more options for customization, and real-time analytics for troubleshooting. Organizations might benefit from using Teams Premium if quality, performance, and attendee experience are of importance. Teams Premium also enables AI features for meetings:
| Feature | Description | License Requirement |
| Intelligent Recap | Meeting recaps with AI notes and follow-up items based on transcription. Meeting timelines and name-mention markers. | Attendees need Teams Premium |
| Decorate my background | Use AI to enhance/remove/add elements in your meeting background when using video. | Attendees need Teams Premium |
| Live translated captions and transcripts | Provides real-time translation of spoken language into captions and translation of transcription to your own language. | Attendees need Teams Premium |
Intelligent Recap in Teams meetings is a popular feature and is also included in a Microsoft 365 Copilot license. Organizations rolling out Microsoft 365 Copilot should consider using Teams Premium instead for these use cases since Teams Premium is considerably cheaper.
See Teams Premium Pricing versus Microsoft 365 Copilot Pricing
Microsoft Places
Microsoft Places is a workplace app for offices. Places can help employees connect so that everyone makes the most of in-office days with options for setting and viewing other’s work locations. Spaces can also optimize space management with features like room occupancy and desk-booking.
Some Microsoft Places features are set to ON by default and will work out of the box, while others need to be enabled/configured to be available to users. This is important to note as some organizations might want to disable those features.
To manage Microsoft Places settings using PowerShell you need to meet these requirements:
- PowerShell 7 version 7.4.0 or higher
- Having the “TenantPlacesManagement” and “MailRecipient” roles. These are most often included in the Exchange Administrator role
- Exchange Online and Microsoft Places PowerShell management modules
The Microsoft Places module can be installed and enabled with:
Install-Module -Name MicrosoftPlaces -Force
Connect-MicrosoftPlaces
Core Places Functionality
Some core Places features are available to all users with an assigned Microsoft 365 Business or Enterprise plan from the Places App and via calendar integrations in New Outlook and Microsoft Teams (only from the new Teams calendar experience).
Core functionality includes creating a work location schedule (Work plans), including setting co-workers’ work locations, workplace presence, creating in-person preferred meeting invites, and replying as an in-person or remote attendee.
The above core features are enabled by default.
The cmdlet below shows an overview of all Places settings and their status:
Get-PlacesSettings</em>
To disable the addition of co-workers to Work Plans, run the following cmdlet using the MicrosoftPlaces module:
Set-PlacesSettings -AllowInConnectionsList 'Default:false'</em>
To disable the Places App including calendar integration, run:
Set-PlacesSettings -EnablePlacesWebApp 'Default:false'</em>

Premium Places Functionality
With Teams Premium, additional functionality is made available to Microsoft Places. Premium Places features like the ability to add buildings, floors, meetings, and working spaces, are added to the service to better utilize and manage office spaces and hybrid work.
This includes Places explorer and finder, desk booking, room check-in including auto release, intelligent space suggestions, office space occupancy analytics, and team working habit analytics for managers.
A Teams Premium license is required for all users taking advantage of any of these premium features!
Most premium features are disabled by default. An exception is the parameter “-EnableBuildings”, which controls whether users can see buildings in created Work plans, Workplace presence, Places finder, and other parts of the Microsoft Places experience. These features will not work until you create a building and floor plan for your office(s). Since the parameter is set to enabled by default, it allows administrators to upload building plans, hence enabling the mentioned features for Teams Premium users.
Disabling all Microsoft Places Features
As an administrator, it is often a good idea to disable new services and features until assessments and testing of the potential effects and risks have been made.
To disable all Microsoft Places functionality, run the following PowerShell cmdlet’s:
Set-PlacesSettings -EnablePlacesWebApp 'Default:false'
Set-PlacesSettings -EnableBuildings 'Default:false'
Microsoft also recommends disabling the Microsoft Places service plan, included in the Teams Premium license. Instructions can be found here:
How to turn off Microsoft Places – Microsoft Places | Microsoft Learn
Microsoft Places includes a variety of features, some of which can be used without administrative effort, and Teams Premium licensing. For Premium Places features, planning, testing, and often configuration, are required. All users using premium Places functionality must be licensed for Teams Premium, adding the cost to be included in any assessment.
Priority Account Chat Control
Organizations can enable users with Teams Premium to block new incoming chats from within the organization, in addition to blocking external sender messages, which are available to everyone.
This feature is disabled by default. To configure, “Priority account chat control” must first be enabled in the organization from the messaging settings in Teams Admin Center.
Administrators can also check and change the setting via PowerShell using the Teams module:
Get-CsTeamsMessagingConfiguration</em>
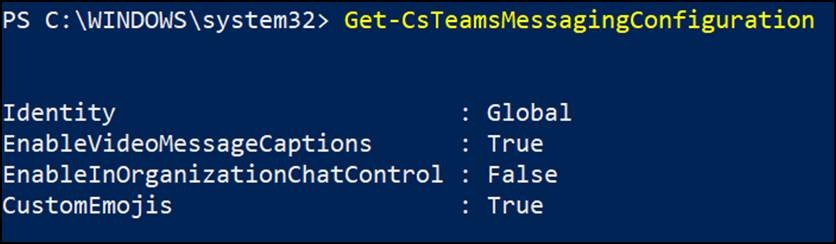
Change the value to “True” to enable “Priority account chat control”:
Set-CsTeamsMessagingConfiguration -identity Global -EnableInOrganizationChatControl $true</em>
Once enabled from the organizational level, a message policy must be configured and assigned to users.
From the Teams Admin Center, create or edit a messaging policy and set “Priority account chat control” to “ON”
To set the Priority account chat control” to “ON” from PowerShell, change the parameter “InOrganizationChatControl” from “blockingdisallowed” to “blockingallowed”:
set-CsTeamsMessagingPolicy -Identity <your policy> -InOrganizationChatControl blockingallowed</em>
Make sure selected users are assigned to the policy.
When a chat is initiated by a user within the same organization, users with this policy enabled can now choose to block the sender, as seen in figure 2. The blocked individual will be unable to communicate with that user, nor view their status unless they are later unblocked.

Using Priority account chat control gives users more control over their communication experience and typically fits high-profile individuals, those who might not want to have anyone reaching out over chat. It’s a light alternative for using Information barriers, where users can be fully restricted from contacting certain parts of the organization.
Microsoft Queues App
Users with both Enterprise Voice and Teams Premium enabled have access to the new Queues App in Microsoft Teams by default. A user needs to be set as an authorized user for at least one Call Queue in the Call queue configuration and have a Voice application policy assigned to make changes from the app
An authorized user is a user who has been granted permission to make configuration changes to specific Auto attendants and Call queues. The Voice application policy assigned to a user then dictates what settings can be configured for those users.
With the Queues App and Teams Premium, administrators can delegate more capabilities to authorized users using the premium settings inside a Voice application policy. Some premium settings include:
Language and opt-out settings, routing modes, configuring business hours, after-hours, holiday call routing, and access to real-time and historical metrics for Auto attendants and Call queues.
Even though the Queues App is enabled by default, additional premium functionality cannot be used or accessed unless a Voice application policy is configured and assigned to allow the functionality. Without any administrative changes, Teams Premium users are authorized for managing call queues and auto attendants can use the Queues App from Teams to perform the same tasks as previously.
Conclusion
Understanding licensing requirements is crucial to avoid unnecessary costs while aligning with organizational needs. It is equally as important to assess risks, configurations, and their technical impact.
Since Teams administrators do not necessarily know the specific use cases and target audiences of their business, organizations should find ways to make Teams Premium available to users who will truly benefit from Teams Premium. Rather than just making the license available for users on demand or by decision, general use-cases must be identified for relevant Premium features. Furthermore, training and communication on how to utilize Teams Premium for each use case is not to be forgotten.


Another great article. Nicely done.