
In this two-part blog series, I will guide you through how to use Microsoft Cloud App Security and PowerAutomate to prevent malicious activity when employees extract confidential corporate information from cloud repositories.
Many organizations are moving their collaborative computing tools outside the boundaries of their firewalls. As you know, Microsoft 365 is a broadly used cloud platforms to send and receive emails via Exchange Online, host files in SharePoint and OneDrive, collaborate via Teams, and more.
Also, a lot of businesses are using third-party cloud SaaS applications such as Box, Salesforce, YouTube, and more to address daily specific needs. Consequently, IT and security operations teams are tasked to secure data that is sitting and traveling across applications and clouds. The challenge both teams face is ensuring the security and data governance is correctly in place, and that it doesn’t impact end-user’s productivity.
Microsoft Cloud App Security and PowerAutomate Use Case
Before we get started, I’ll walk you through the common business security use case that we’re going to address in this article.
The scenario is you have a user who has started to extract confidential information from the corporate cloud repository before their last date of employment. We will also be looking at a similar situation, where a malicious counterpart has gained access to your user’s account and is trying to steal intellectual property.
To prevent this malicious activity, we will be using Microsoft Cloud App Security (MCAS) to monitor SharePoint and OneDrive file repositories and PowerAutomate to streamline the remediation process workflow.
What is Microsoft Cloud App Security?
Microsoft Cloud App Security (MCAS) is Microsoft’s Cloud Access Security Broker that provides visibility and control over data that travels within or between cloud applications. Below are three primary functions that MCAS plays in your environment:
- Understands your data that is exposed in the cloud
- Classifies your data regardless of the location
- Monitors and remediates any types of violations according to policies configured by the Security Operations Team.
What is PowerAutomate?
PowerAutomate is Microsoft’s workflow engine that boosts productivity by automating manual processes that involve many first and third-party applications via connectors. Using PowerAutomate, you can take action in the cloud or on-premises applications, set up notifications, run PowerShell scripts in the serverless environment, and more.
Before you begin designing a solution based on the use case in this article, you will have to make sure that you have appropriate licensing and permissions:
Licensing you’ll need:
- MCAS
- Microsoft Cloud App Security Standalone
- Microsoft Cloud App Security + EMS E3
- EMS E5
- Microsoft 365 E5 Security
- Microsoft 365 E5
- PowerAutomate
- Flow for Office 365
- PowerAutomate per user Plan
- License by Flow
Permissions you’ll need:
- MCAS
- Any role in Microsoft 365 or Security and Compliance that has access to create and modify MCAS policies
- PowerAutomate
- All users have access to develop Flows in PowerAutomate unless IT has placed a restriction
Solution overview
Before diving in and creating the security, let’s quickly refer back to the use case where the user is downloading an unusual amount of content from the corporate cloud file repository to the local machine.
To combat this event, we’re going to take the below actions:
- Capture mass file download event and generate an Alert – MCAS
- Identify user – MCAS
- Lookup user’s Manager – PowerAutomate
- Send Email to the user’s Manager with action buttons – PowerAutomate
- Capture Manager’s response and take appropriate actions – PowerAutomate + MCAS
Connecting MCAS to PowerAutomate
The first step in the configuration process is to connect MCAS to PowerAutomate.
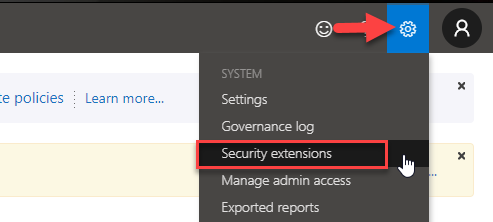
Start by navigating to the MCAS Admin Portal, click on a gear icon at the top right corner and select Security Extensions.
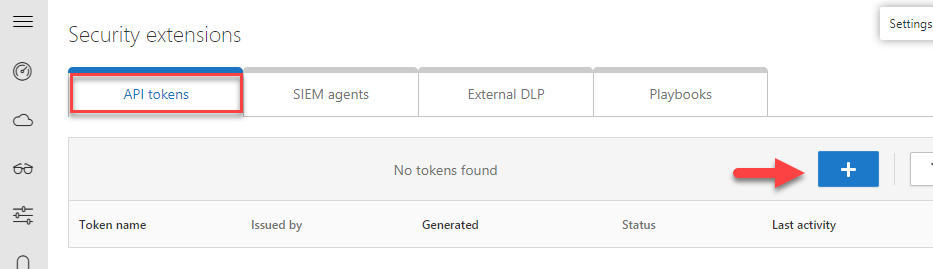
In the Security Extension page, under API tokens click on the + sign.
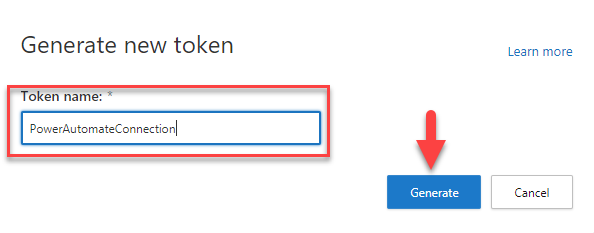
In the pop-up menu, type the name of the connection and click Generate. You can name your connections however you want. In my case, I’ve called it “PowerAutomateConnection”.
API token will be generated for you to save. Make sure to note the token and URL before closing the window.

Next, we will navigate to PowerAutomate, and click Data on the left navigation menu and select Connections.

On the Select New Connection, search for Cloud App Security.
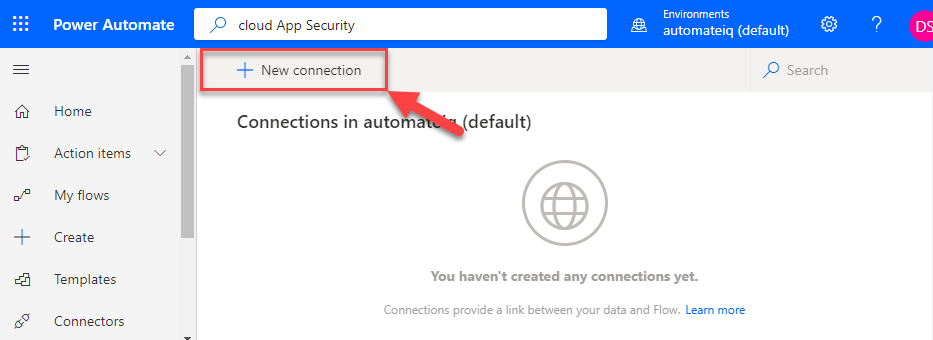
Cloud App security will show up as a result of the search with an ability to add to your PowerAutomate connections.
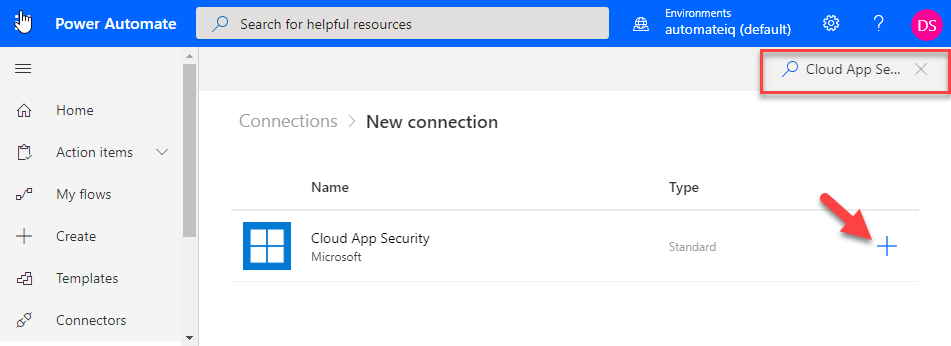
Click on the + sign and paste API Key.
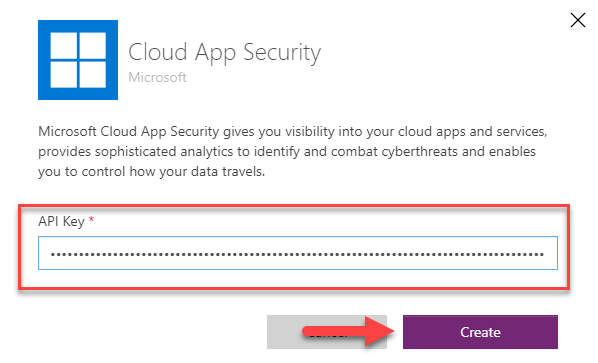
This completes the series of steps to connect PowerAutomate with MCAS.
Creating Flow in PowerAutomate
In the next few steps, we are going to be creating a flow in PowerAutomate to:
- Capture an event in MCAS
- Identify the user whos incident generated the event
- Lookup user’s manager in Office365
- Send an email to Manager requesting actions
- Take actions against violator according to Manager’s response
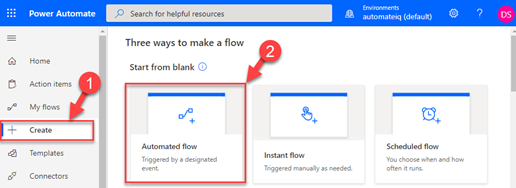
Navigate to PowerAutomate portal and click Create. From Start from a blank section, click Automate flow.
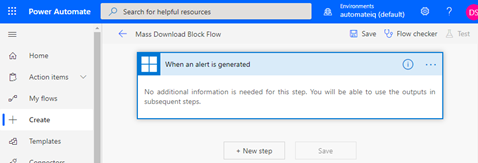
In the Build an automated flow screen, type the name of your Flow into the Flow name field. Search for Cloud App Security in the Choose your Flow’s trigger and select When an alert is generated in Cloud App Security.
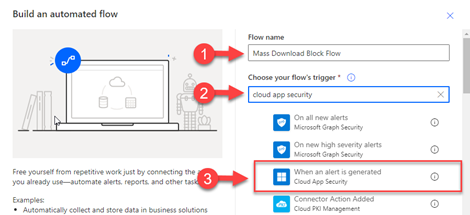
Note: the Flow we’re creating in the next few steps can be attached to any alert generated by Cloud App Security Policy. Later in this post, I’ll demonstrate how you can do that.
After completing the above steps, you should see a screen like the below:
In Part Two of this blog series, we’ll look at how you identify your users managers and incorporate them into your Flow.


