It’s More Than Just a Data Transfer
When embarking on a Microsoft 365 tenant-to-tenant migration, it’s crucial to remember that this process is more than just a data transfer. It’s akin to moving into a new home: the goal is not just to relocate your belongings, but to create a space that feels familiar and comfortable. For businesses, this means ensuring that your digital workspace reflects your brand identity and fosters a sense of continuity for your users.
Acquisitions are a common scenario for a tenant-to-tenant migration: Company A acquires Company B and migrates Company B’s data into Company A’s tenant. With some acquisitions, businesses choose to keep Company B’s distinct identity. In these cases, extra considerations can improve the tenant-to-tenant migration experience.
This article explores practical steps and scripts to establish cohesive visual branding in a Microsoft 365 tenant, ensuring a seamless transition for both your team and data.

Customizing the Sign-in Experience
The browser sign-in page is often the first point for user interaction in a Microsoft 365 environment. Customizing the sign-in page reinforces the identity of the environment and reassures users that they are signing into the correct tenant. The sign-in page can include IT support information for users who may have trouble logging in.
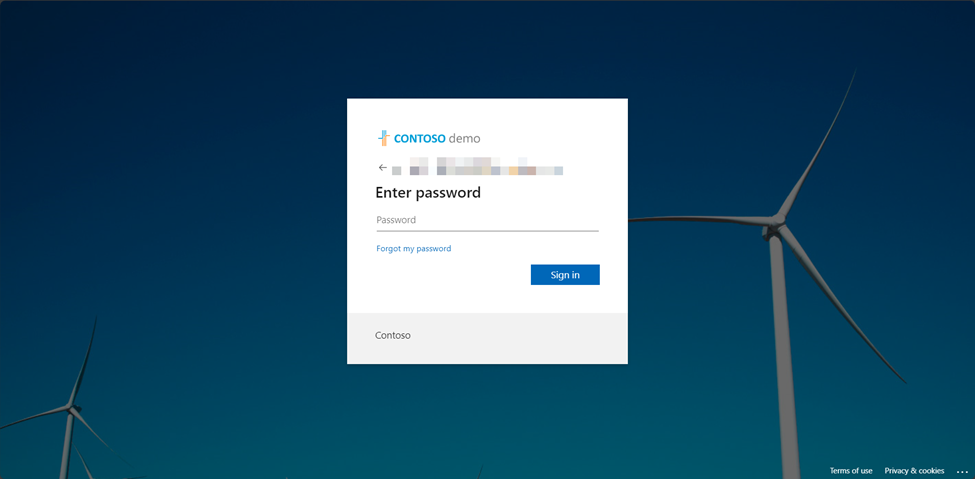
Microsoft documents the prerequisites to add custom branding to a sign-in experience. Below is a comparison of the default Microsoft 365 sign-in experience (Figure 1) and a customized Microsoft 365 sign-in experience (Figure 2).
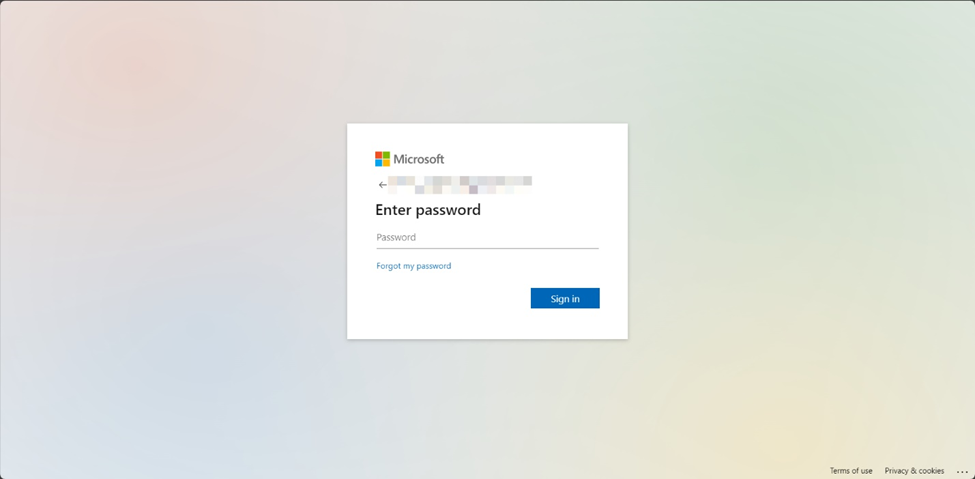
When a user logs into Microsoft 365 using generic links (e.g., portal.office.com, microsoft365.com), sign-in page customizations only appear after the user types their email or phone number and select the Next button – at which point Entra ID validates the credentials and applies the tenant’s custom branding. However, you can force the branding to appear immediately by using the tenant’s verified domain name in the URL used to connect to Microsoft 365. The syntax for custom URLs varies across applications; here’s a quick guide for some common locations:
| Location | Example URL |
| Outlook | https://outlook.com/practical365.com |
| Teams | https://teams.microsoft.com/?tenantId=practical365.com |
| SharePoint Online | https://practical365.sharepoint.com |
| My Apps | https://myapps.microsoft.com/?whr=practical365.com |
| Self-Service Password Reset | https://passwordreset.microsoftonline.com/?whr=practical365.com |
To customize your sign-in experience, follow the instructions in Microsoft documentation, or use the Microsoft Graph. Let’s see how to customize the sign-in experience with the Graph SDK.
Customize Company Branding with PowerShell
After confirming that the prerequisites for custom company branding are in place, connect to Microsoft Graph using the PowerShell SDK.
# Set the Tenant ID
$tenantID = “74282c8c-971c-48b1-bce2-a58aff66cf5a”

# Connect to Microsoft Graph
Connect-MgGraph -TenantId $tenantId -Scopes "Organization.ReadWrite.All"
Because default values exist, the string properties used for branding can be updated by running a PATCH command via the Invoke-MgGraphRequest cmdlet. Image properties must be updated one at a time, using PUT commands. You can configure any of the organizationalBranding properties supported for branding. Here’s an example of setting values for string properties and then updating the tenant configuration with Invoke-MgGraphRequest:
# Page background color. Replaces the sign-in page image if it cannot load
$backgroundColor = "#FF99CC"

# Text at the bottom of the sign-in box. For additional info e.g., help desk phone number. Unicode, max 1024 characters
$signInPageText = "Welcome to Contoso. IT Helpdesk: 555-5555 ext. 55."

# Configure layout. “default” = Default layout with centered lightbox. “verticalSplit” = Background on left and full-height lightbox on right
$layoutTemplateType = "verticalSplit"
$isHeaderShown = $false
$isFooterShown = $false

# Configure login page text visibility settings
$hidePrivacyAndCookies = $false
$hideTermsOfUse = $false

# Set to $true to hide all SSPR hyperlinks
$hideAccountResetCredentials = $true

# Individually hide SSPR hyperlinks. hideAccountResetCredentials must be set to $false
$hideCannotAccessYourAccount = $true
$hideForgotMyPassword = $true
$hideResetItNow = $true

# Prepare the request body for non-image properties
$body = @{
    backgroundColor = $backgroundColor
    signInPageText = $signInPageText
    loginPageTextVisibilitySettings = @{
        hideAccountResetCredentials = $hideAccountResetCredentials
        hideCannotAccessYourAccount = $hideCannotAccessYourAccount
        hideForgotMyPassword = $hideForgotMyPassword
        hidePrivacyAndCookies = $hidePrivacyAndCookies
        hideResetItNow = $hideResetItNow
        hideTermsOfUse = $hideTermsOfUse
    }
    loginPageLayoutConfiguration = @{
        layoutTemplateType = $layoutTemplateType
        isHeaderShown = $isHeaderShown
        isFooterShown = $isFooterShown
    }
} | ConvertTo-Json

# Issue request to Graph API
Invoke-MgGraphRequest -Method PATCH -Uri "https://graph.microsoft.com/v1.0/organization/$($tenantID)/branding" -Body $body -ContentType "application/json"
Here’s how to configure the images used for tenant branding:
# Set the content type
$contentType = "image/*"

# Banner company logo. PNG or JPEG image, 36x245px. Recommend transparent image with no padding
$bannerLogoPath = "C:/Users/kariska/Downloads/Image36x245.png"
$bannerLogoEndpoint = “https://graph.microsoft.com/v1.0/organization/$tenantID/branding/localizations/0/bannerLogo”

# Background image of sign-in page. PNG or JPEG image, 1920x1080px, max file size 300KB
$backgroundImagePath = "C:/Users/kariska/Downloads/Image1920x1080.png"
$backgroundImageEndpoint = “https://graph.microsoft.com/v1.0/organization/$tenantID/branding/localizations/0/backgroundImage”

# Favicon. PNG (preferred) or JPEG image, 32x32px, max file size 5KB
$faviconPath = "C:/Users/kariska/Downloads/Image36x36.png"
$faviconEndpoint = “https://graph.microsoft.com/v1.0/organization/$tenantID/branding/localizations/0/favicon”

# Issue requests to Graph API
Invoke-MgGraphRequest -Method PUT -Uri $bannerLogoEndpoint -InputFilePath $bannerLogoPath -ContentType $contentType

Invoke-MgGraphRequest -Method PUT -Uri $backgroundImageEndpoint -InputFilePath $backgroundImagePath -ContentType $contentType

Invoke-MgGraphRequest -Method PUT -Uri $faviconEndpoint -InputFilePath $faviconPath -ContentType $contentType
Don’t forget to disconnect from Graph:
Disconnect-MgGraph
Branding the Microsoft 365 Suite Header
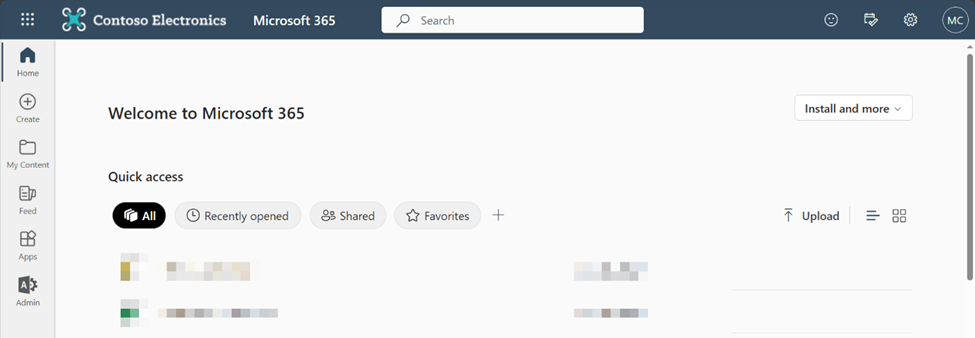
A consistent theme reinforces organizational identity across Microsoft 365. What Microsoft refers to as the “Organization theme” is simply the colors and logo in the Microsoft 365 suite header. This header, pictured below, persists in browser-based apps in Microsoft 365.
Tenants can have multiple organization themes: a default theme that applies to everyone in the org, and up to four additional themes. Additional themes are assigned to one or more Microsoft 365 groups (sorry, no security groups or distribution groups). For acquisitions, consider creating an additional theme for migrated users. Provided you meet the prerequisites, create a dynamic Microsoft 365 group based on properties like companyName.
Microsoft’s documentation provides straightforward instructions on how to customize the default theme and how to create additional themes. At this time, a tenant’s organization theme cannot be configured using scripts.

SharePoint Online Branding
SharePoint sites are central to collaboration and should also reflect a company’s visual identity. We can reinforce that identity in the theme, header, navigation, and footer of SharePoint sites. This blog post covers the basics of changing the look of your site, including adding a site logo; this post teaches you how to create and deploy a custom color theme.
If your migration is an acquisition and the source sites are not already architected in a hub structure, creating a branded hub site for the acquired company with their migrated sites joined to it will help migrated users navigate to their information more easily, and help existing users to determine which data pertains to the migrated company.
These scripts require the SharePoint Online Management Shell and PnP PowerShell.
Export a SharePoint Color Theme from a Source Tenant and Create it in a Target Tenant
This script uses the SharePoint Online Management Shell to get the properties of a theme in a source tenant and then creates a new theme in the target tenant with those properties:
# Admin URLs for source and target
$sourceAdminUrl = “https://skapski-admin.sharepoint.com”
$targetAdminUrl = “https://m365x18891260-admin.sharepoint.com”

# Name of the theme to export
$themeName = “Custom Cyan”

# Connect to source with a SharePoint Administrator account
Connect-SPOService -Url $sourceAdminUrl

# Get theme settings
$Palette = Get-SPOTheme -Name $themeName | Select-Object -ExpandProperty Palette
$IsInverted = Get-SPOTheme -Name $themeName | Select-Object -ExpandProperty IsInverted

# Connect to target with a SharePoint Administrator account
Connect-SPOService -Url $targetAdminUrl

# Add the color theme to the target tenant
Add-SPOTheme -Identity $themeName -Palette $palette -IsInverted $isinverted

Write-Host "Added $themeName theme to target tenant”
Apply a Color Theme to a List of Sites
This script applies a SharePoint color theme to a list of sites using the information contained in a siteURL column in a CSV:
# File path of CSV
$csvPath = "C:/Users/kariska/Documents/Sites.csv"

Import-Csv $csvPath | ForEach-Object {
    $siteURL = $_.SiteURL

    # Apply the theme to the site
    Set-SPOWebTheme -Identity $ThemeName -Web $siteUrl

    Write-Host "Applied $themeName theme to $siteUrl"
}
Designate a Hub Site, Associate Sites to the Hub, and Add Associated Sites to the Hub Site Navigation
Add a column to your CSV and title it “HubStatus”. Choose one site to designate as the hub by writing “Hub” beside it, in the HubStatus column. Leave all the others blank.
# Connect to PnP PowerShell
Connect-PnPOnline tenant.sharepoint.com -Interactive

# File path of CSV
$csvPath = "C:/Users/kariska/Documents/Sites.csv"

# SharePoint Admin user account
$adminUser = “admin@tenant.com”

Import-Csv $csvPath | ForEach-Object {
    $siteUrl = $_.SiteUrl
    $hubStatus = $_.HubStatus
    # Register hub site and grant the SharePoint Admin rights to the hub site
    if ($hubStatus -eq "Hub") {
        $hubSiteURL = $siteURL
        Register-PnPHubSite -Site $hubSiteURL -Principals  $adminUser
        Write-Host "Registered $hubSiteURL as Hub Site"
    }
    # Associate other sites to hub and add them to hub navigation
    elseif ($hubStatus -ne $Hub -and $siteURL -ne $null) {
        Add-PnPHubSiteAssociation -Site $siteURL -HubSite $hubSiteURL
        Connect-PnPOnline -Url $siteURL -Interactive
        $web = Get-PnPWeb
        $siteTitle = Get-PnPProperty -ClientObject $web -Property Title
        Connect-PnPOnline -Url $hubSiteURL -Interactive
        Add-PnPNavigationNode -Title $siteTitle -Url $siteURL -Location "TopNavigationBar"
        Write-Host "Associated $siteURL with Hub Site"
    }
}
Due to caching, you may have to browse to the hub site, click Edit on the hub site navigation, and then click Save to make changes visible.
Add a Custom Tile to the App Launcher
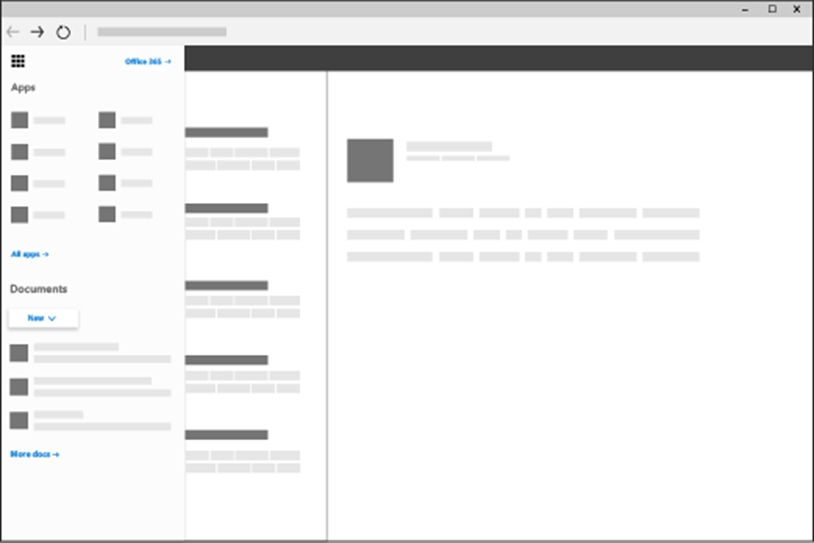
The Microsoft 365 app launcher contains the apps and services that you are licensed for. With a bit of configuration, the app launcher can include custom tiles. These can help users more easily navigate to shared resources – for example, a hub site in SharePoint Online. Below is a simplified image of the app launcher menu:
Add a custom tile to the app launcher by navigating to https://admin.microsoft.com > Settings > Org settings > Organization profile. Click “Custom tiles for apps”, click “Add a custom tile”, and enter the following information:
| Field | Description |
| Tile name | Tile name. Appears in the tile. |
| URL of website | What opens when users click the tile. |
| URL of tile image | The image should be 60×60 pixels and be available to everyone in your organization without requiring authentication. Use HTTPS in the URL. Appears on the My Apps page and the app launcher. |
| Description | Description of the tile. Visible when you select the tile on the My Apps page and select App Details. |
You can make the custom app tile more visible by pinning it for users.
It’s Time to Refresh and Reinforce
Microsoft 365 tenant-to-tenant migration provides an opportunity to reinforce and refresh your brand identity across digital workspaces. By customizing sign-in pages, SharePoint sites, adding custom tiles to the Microsoft 365 app launcher, and maintaining distinct branding for subsidiaries, you create an environment that is welcoming and familiar to your users.
Remember, migration isn’t just about moving data; it’s about creating a space where your team can thrive.


