
Since the dawn of Office 365, synchronization from on-premises Active Directory has been performed by using server software installed on local servers running a trimmed-down version of Microsoft’s identity sync engine, Microsoft Identity Manager (MIM) – or as it was formerly known MIIS and FIM. In the earliest days of Office 365 in Live@EDU, this was called OLSync, before becoming DirSync, then Azure AD Sync and – as it’s known today – Azure AD Connect. Fundamentally this required the installation of a SQL Server instance along with the provisioning engine and extensions, for features like Password Hash Sync and Self-Service Password Reset.
This model has a number of limitations – only a single active Azure AD Connect server can be running against a single Azure AD and Office 365 tenant, and if you are synchronizing multiple directories, then Azure AD Connect needs to be able to connect over the network to domain controllers in each AD forest. This means it’s not got a built-in high-availability model and is less good if you have a diverse, disconnected organization.
Azure AD Connect Cloud Provisioning modernises the synchronization model taking away the heavy lifting from on-premises into the cloud, with one or more agents installed within each Active Directory domain that Azure AD reaches out to using Azure AD Application Proxy to trigger sync jobs.
Not only does this fundamentally move away from the previous model, it provides High Availability and crucially makes it much easier for organizations going through mergers and acquisitions to synchronize to a single Azure AD and Office 365 tenant.
This limitation often meant that organizations with lots of AD forests looked to third-party SSO platforms like Okta to fill the gap. The big question is, will Azure AD Connect Cloud Provisioning help those organizations? From a first look – yes it will.
Before we continue – Azure AD Connect Cloud Provisioning is in preview which means you should not use it in a production environment. But when it is released you will want to be prepared to use it and aware of some of the limitations it has at present.
Fundamentally there are some core limitations that exist with the preview today. These include no support for device objects, no support for pass-through authentication, no support for write-back, limited support for customizations and crucially no support for Exchange Hybrid Configurations. You can read the full list of limitations here.
In this article, we’ll walk through the setup process for multiple forests and explore what happens when we try out some of the common configurations (including what happens if we do try Exchange Hybrid) that might trip you up.
Our example environment for Azure AD Connect
For this article, we’ve built out three lab environments, running the following versions of Exchange Server:
- Lab 01 running Exchange 2010
- Lab 02 running Exchange 2016
- Lab 03 running Exchange 2019
Each of these are published independently to the internet and would be ready for installation and configuration of Azure AD Connect and Exchange Hybrid – all relevant ports to Office 365 services have all been allowed for.
We’ll assume though that in our example environment that each AD and Exchange forest are on separate networks without WAN or LAN connectivity – perhaps they are the result of a three-way merger and as yet have not been able to connect up their networks, but have a goal of using a single identity platform in Azure AD.
Crucially at this point – each Active Directory and Exchange environment contains both unique users and unique domains. We don’t have (for example) user accounts for the same people in each directory. However – we’ll explore later on what happens if we do.
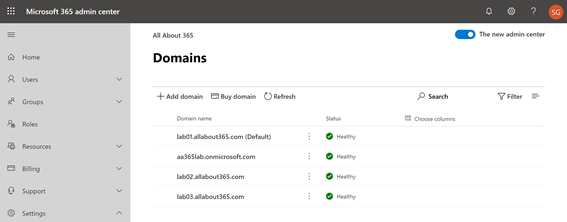
As a core pre-requisite, we’ve setup an Office 365 E3 tenant and registered each environment’s custom domains successfully:
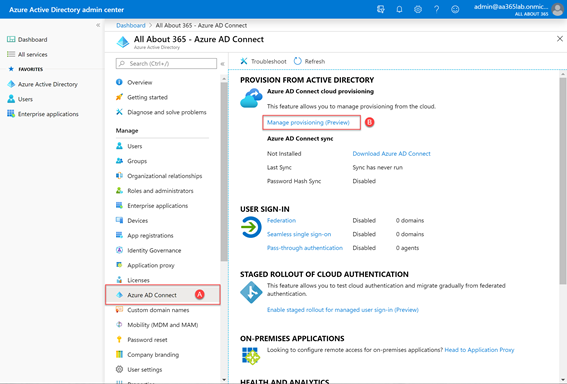
At this point we have no Azure AD Connect installation in place – and without network connectivity between the environments would struggle. Therefore we’ve decided to use Azure AD Connect Cloud Provisioning. To do this, we’ll visit the Azure Active Directory Admin Center and navigate to Azure AD Connect (A)and then choose Manage Provisioning (Preview) (B):
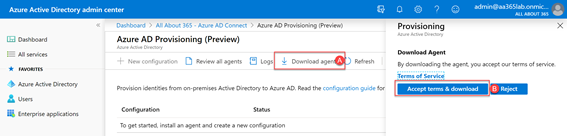
We’ll then be presented with the Azure AD Provisioning page on the portal. This page allows us to create and manage configuration for synchronization jobs, check agent status, view sync logs and download and install the agent. We’ll start by choosing to Download agent (A)and then accept the terms and conditions to download the EXE file (B):
After downloading a copy of the agents to each environment, we’ll need to ensure the pre-requisites for the agent are met. These are detailed here, and in summary include:
- A Windows 2012 R2 or higher server with 4GB RAM – a domain controller is supported.
- The .NET 4.7.1 runtime or higher
- Outbound connectivity to mscrl.microsoft.com, crl.microsoft.com, ocsp.microsoft.com and www.microsoft.com on TCP port 80 for certificate revocation checks
- Outbound connectivity to *.msapproxy.net, *.servicebus.windows.net, login.windows.net and login.microsoftonline.com on TCP port 443 for agent communications and optionally, outbound connectivity on TCP port 8080 for optional health reporting should TCP port 443 become unavailable.
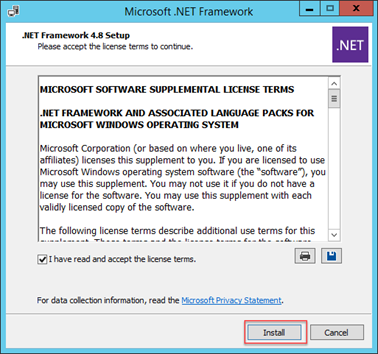
With the correct firewall outbound connectivity enabled, we’ll begin by installing .NET Framework 4.8 on each server that will run the agent:
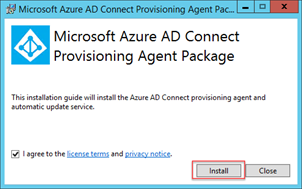
Next, we’ll run the AADConnectProvisioningAgentSetup.exe file to install the agent. You’ll first see the installer run and prompt to accept the licensing terms, before choosing Install:
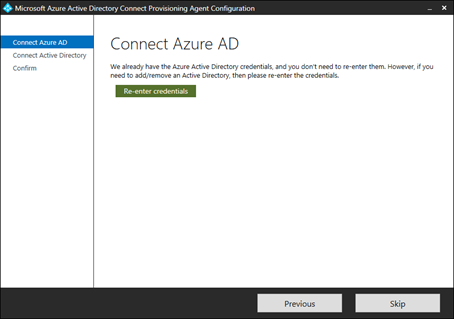
After the initial installation of the agent, the configuration wizard will appear. If you are familiar with Azure AD Connect, this will look quite familiar – but with a big difference – there are very few options available to configure. This is because the agent will connect to Active Directory and to Azure AD – but all subsequent configuration will be performed in the Azure AD portal.
To begin, enter your Azure AD credentials when prompted:
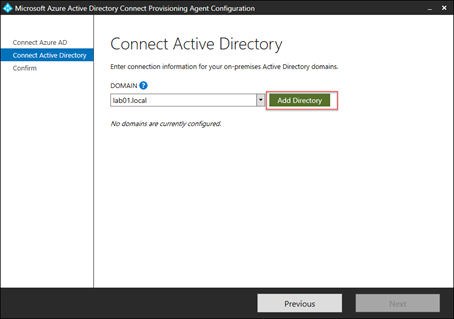
Next, we’ll connect to an on-premises Active Directory environment. In the example below, we’re connecting to Lab 01, our first environment:
After confirming detail, the configuration will be applied – it’s that simple.
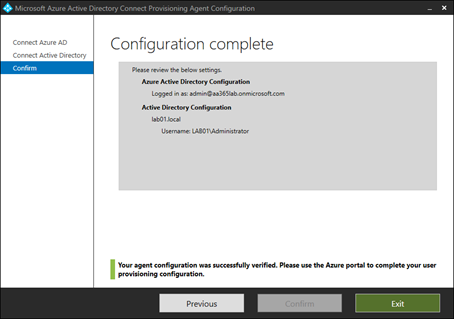
As we have three environments, we’ll perform the same steps in each environment to ensure a connector is available in Lab 01, Lab 02 and Lab 03.
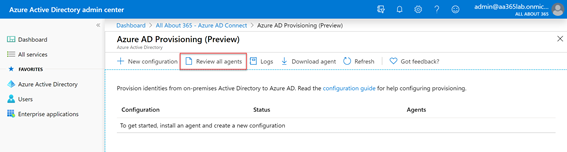
Once all three agents are installed, we’ll revisit the Azure AD admin portal, and navigate back to the Azure AD Provisioning (Preview) page.
Because all the configuration will be performed cloud-side, we won’t see any configuration yet, as we haven’t performed any. What we will need to do is ensure that the agents have connected successfully. To do this, choose Review all agents:
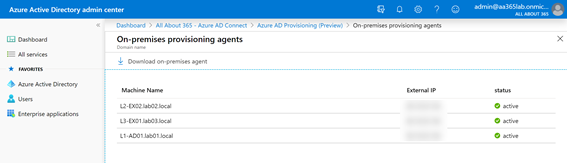
On the On-premises provisioning agents page, we’ll see all three agents have successfully registered with the service and are shown as active:
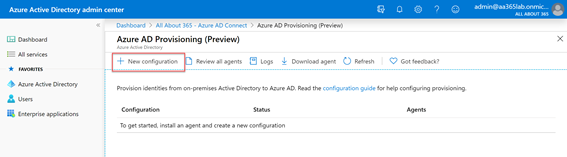
Next, we’ll return to the previous page, where we will begin adding a separate configuration for each source Active Directory environment. We’ll add our first by choosing New Configuration:
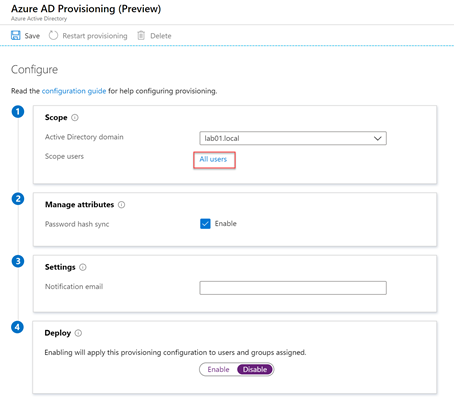
In the New Configuration page, we’ll see a fairly straightforward set of configuration options. We’ll begin by selecting the first Active Directory domain (in this case lab01.local) and refining the scope by selecting All Users:
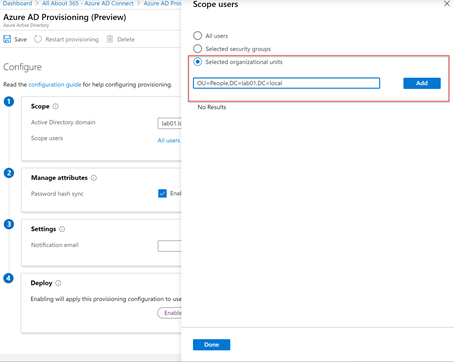
On the Scope users dialog page that shows we can select between All Users, Selected Security Groups or Selected Organizational Units. In our case we’ll choose to add a single OU. This is defined by the DN (Distinguished Name) for the OU. We’ll enter the full DN, and then choose Add:
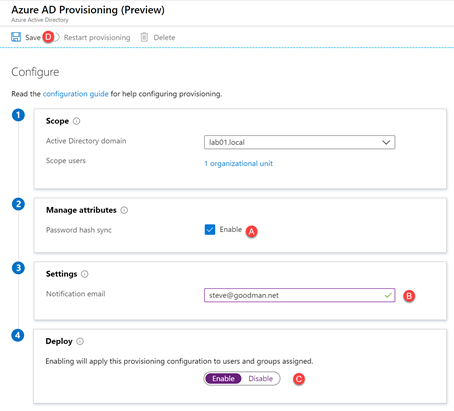
We can then choose whether to enable Password Hash Sync (A), configure a notification email address (B) and choose whether to run the configuration in staging mode (by disabling provisioning) or enabling it to add, update and remove objects by choosing Enable (C).
In our example organization we know that we have an empty Azure AD and three Active Directory forests with unique objects that have already been checked with IDFix and had the UPN values set correctly, therefore we will choose to enable the configuration and then choose Save (D):
As with the agent installation, we’ll repeat the creation of new configuration for each Active Directory forest. Once complete, we’ll therefore have three sets of configuration allowing synchronization jobs to be performed independently from each source AD forest:

After viewing the Logs to ensure that the synchronization jobs have successfully occurred, we can navigate to the Azure AD portal and view All Users to confirm that objects from all three Active Directory source directories have successfully synced:
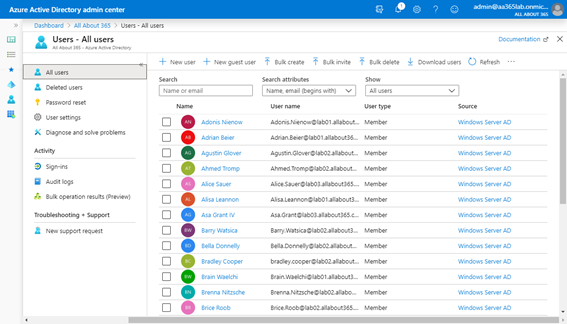
At this point, it’s possible for users from all three source Active Directory environments to login using their normal AD credentials.
Therefore, if you want to, you can choose to licence the users for Office 365 services, including Microsoft Teams, SharePoint Online and so on.
In Part Two
In the next part of this series, we’ll examine the limitations in the Azure AD Connect Provisioning and how to go further under the hood, with a little lab testing to see what happens if we push the boundaries.


very interesting article.
could this solution solve the sso problem in a multitenant environment, where at the moment with adsync only AZUREADSSOACC could exist?
Great article. As you say it’s in preview and is missing some critical components such as password write back. Hopefully this missing pieces will be introduced for GA as we would like to move to it instead of using Azure AD Connect which doesn’t have good HA built in.