It’s Nice to Run Jobs to Process Data and even Nicer to Create Some Output
Different ways exist to distribute information generated by a PowerShell runbook executed by Azure Automation. Sending email is one good way to deliver results to interested parties, including the use of the Exchange Online High-Volume Email (HVE) facility. Updating records in a SharePoint list is another. In this article, I describe how to create SharePoint files containing information generated by a runbook in a SharePoint Online document library. We’ll also update the file metadata.
In the past, I’ve used PnP PowerShell cmdlets to create SharePoint files (here’s an example). The decision to use PnP over the Microsoft Graph PowerShell SDK was probably because the documentation and available examples were better. This time around, we use the Microsoft Graph PowerShell SDK.

The Scenario: Why Create SharePoint Online Files
To create a file, we need some data to report. Earlier this week, I discussed how to use Entra ID protected actions to stop the permanent removal of soft-deleted user accounts unless the person performing the action meets stringent conditions expressed in a conditional access policy. Even if someone is allowed to permanently remove accounts, it’s good to review these actions (just in case).
Hard deletions of user accounts are recorded as events in the Entra ID audit log. Microsoft Purview eventually ingests events from Entra ID into the unified audit log where the events can be retrieved using the Search-UnifiedAuditLog cmdlet or with an AuditLogQuery search job. The unified audit log holds events for at least 180 days compared to the 30-day restriction for the Entra ID audit log but given that Entra ID will remove soft-deleted accounts after 30 days anyway, the shorter retention doesn’t make a practical difference.
This code uses the Get-MgAuditLogDirectoryAudit cmdlet to find audit records for hard-deleted accounts and extracts the details of the timestamp and the user principal name for the accounts that performed the deletions and the deleted accounts.
/[array]$DeletedUserRecords = Get-MgAuditLogDirectoryAudit -Filter "ActivityDisplayName eq 'Hard Delete user'" -All -Sort 'ActivityDateTime'
If (!$DeletedUserRecords) {
        Write-Host "No hard deleted user records found"; break
}
$Report = [System.Collections.Generic.List[Object]]::new()
ForEach ($Record in $DeletedUserRecords) {
  $DataLine = [PSCustomObject][Ordered]@{
    TimeStamp           = (Get-Date $Record.ActivityDateTime -format 'dd-MMM-yyyy HH:mm:ss')
    DeletionInitiatedBy = $Record.InitiatedBy.User.UserPrincipalName
    DeletedUser         = $Record.TargetResources.UserPrincipalName.Substring(32,($Record.TargetResources.UserPrincipalName.length-32))
  }
  $Report.Add($DataLine)
}
$Report | Format-Table TimeStamp, DeletionInitiatedBy, DeletedUser -AutoSize

TimeStamp            DeletionInitiatedBy            DeletedUser
---------            -------------------            -----------
09-Feb-2025 11:06:30 Hans.Smith@office365itpros.com John.Doe@office365itpros.com
08-Jan-2025 16:44:12 Hans.Smith@office365itpros.com Jane.Austin@office365itpros.com
08-Jan-2025 16:44:12 Jane.James@office365itpros.com Scott.Ido@office365itpros.com
An automation account must load the Microsoft.Graph.Reports module to use the Get-MgAuditLogDirectoryAudit cmdlet. To access SharePoint sites, the automation account needs the Microsoft.Graph.Sites module, and to update files, the Microsoft.Graph.Files module is used. The automation account also needs consent for the AuditLog.Read.All application permission. See the earlier articles for details about how to load modules and assign permissions for an automation account.
Uploading to Create SharePoint Files
The output from the audit scan is a PowerShell list object. The next step is to create a file to upload. I like creating Excel worksheets for reports, so the script checks if the ImportExcel module is available to generate a worksheet. If not, the code generates a CSV file.
The Set-MgDriveItemContent cmdlet uploads files to SharePoint Online or OneDrive for Business. The cmdlet requires a drive identifier and the location where it is to upload the source file. The drive identifier is found in the normal way by using the site identifier to find the set of drives (document libraries) and selecting the drive to use. In this case, it’s the default document library.
$Uri = "https://office365itpros.sharepoint.com/sites/Office365Adoption"
$SiteId = $Uri.Split('//')[1].split("/")[0] + ":/sites/" + $Uri.Split('//')[1].split("/")[2]
$Site = Get-MgSite -SiteId $SiteId
If (!$Site) {
    Write-Output ("Unable to connect to site {0} with id {1}" -f $Uri, $SiteId)
    Exit
}
[array]$Drives = Get-MgSiteDrive -SiteId $Site.Id
$DocumentsDrive = $Drives | Where-Object {$_.Name -eq "Documents"}
Before attempting the upload, the script defines the name of the source file and then creates the target location. A typical example of a target location is:
Root:/General/Important Information.xlsx:
The target location represents the General folder under the root of the target drive. The trailing colon is important, and the cmdlet will fail if the colon isn’t present.
$TargetFile = "root:/General/" + $OutputFile + ":"
$NewFile = Set-MgDriveItemContent -DriveId $DocumentsDrive.Id -DriveItemId $TargetFile -InFile $OutputFile
If ($NewFile) {
    Write-Host ("File {0} uploaded to {1}" -f $File, $DocumentsDrive.Name)
}
The code works perfectly when run in an interactive session (using delegated permissions) or in an app-only interactive session (issue #3112 for the SDK). However, it fails in Azure Automation because the Set-MgDriveItemContent cmdlet cannot be found, despite the availability of the Microsoft.Graph.Files module. Debugging runbooks is more difficult than debugging interactive scripts, so the quick fix is to use the underlying Graph API by constructing a URI as a PUT target and then invoking the request with Invoke-MgGraphRequest:
$Uri = ("https://graph.microsoft.com/V1.0/sites/{0}/drive/items/root:/General/{1}:/content" -f $Site.Id, $OutputFile)
$NewFile = Invoke-MgGraphRequest -Uri $Uri -Method PUT -InputFilePath $OutputFile
Both methods support uploading files of up to 250 MB, which is more than enough for a simple worksheet.
Updating Document Metadata
SharePoint Online is an app built on SQL tables with rows and columns (aka lists). When you upload a file to SharePoint, the command updates the list that holds document contents. This action is enough to upload the file and make it available to site users. Populating the document metadata completes the job by adding more detail about the new file. SharePoint stores the document metadata in a separate list, which is not updated automatically for file uploads. A separate transaction is required to update the document metadata. This code shows how to update the Title and Description fields for the item for the new document. Both fields are part of the default metadata properties available for all SharePoint files:
$Uri = ("https://graph.microsoft.com/V1.0/sites/{0}/drive/items/root:/General/{1}:/listItem/fields" -f $Site.Id, $OutputFile)
$Body = @{}
$Body.Add("Title", "Hard Deleted Users Report (Created by Azure Automation)")
$Body.Add("_ExtendedDescription", "This report is generated by an Azure Automation runbook")
$ItemUpdate = Invoke-MgGraphRequest -Uri $Uri -Method PATCH -Body $Body
If ($ItemUpdate) {
    Write-Output ("Updated document metadata for item {0} with title {1}" -f $OutputFile, $Body.Title)
}
After adding the code to the runbook, it should upload the file and update the file metadata (Figure 1).
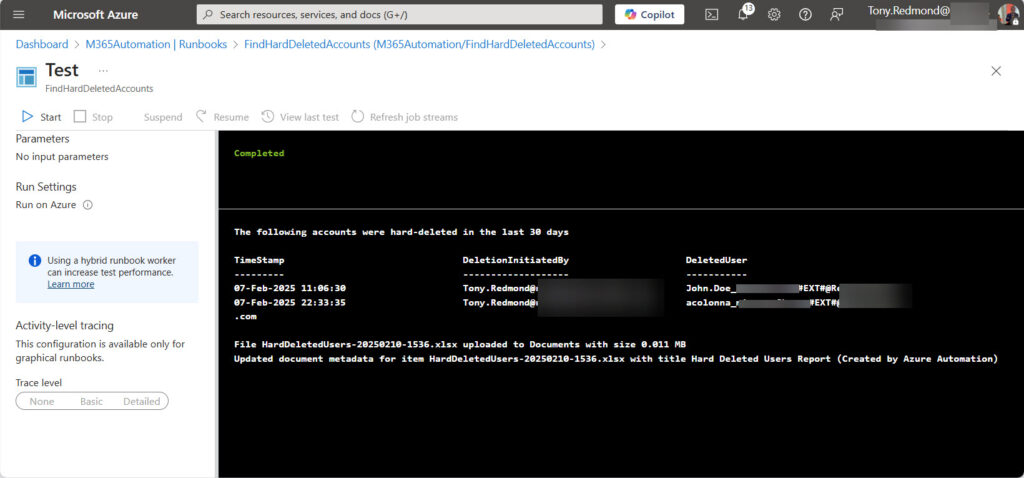
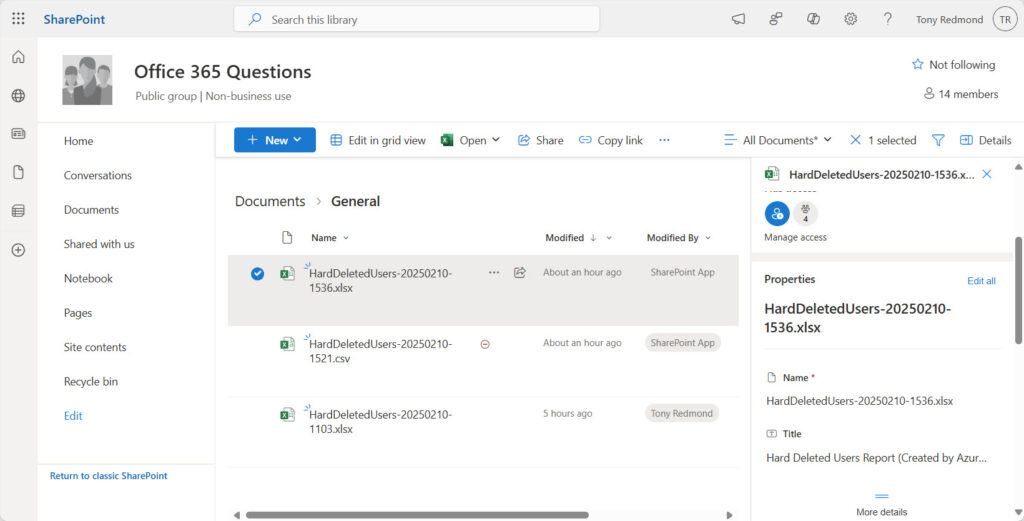
Figure 2 shows how the uploaded files appear in the SharePoint browser interface. If the author of a file is “SharePoint App,” you know that the file was created by a background process such as an automation runbook. Files created with an interactive session show the signed-in account name as the author.

Using Custom Columns to Hold Information
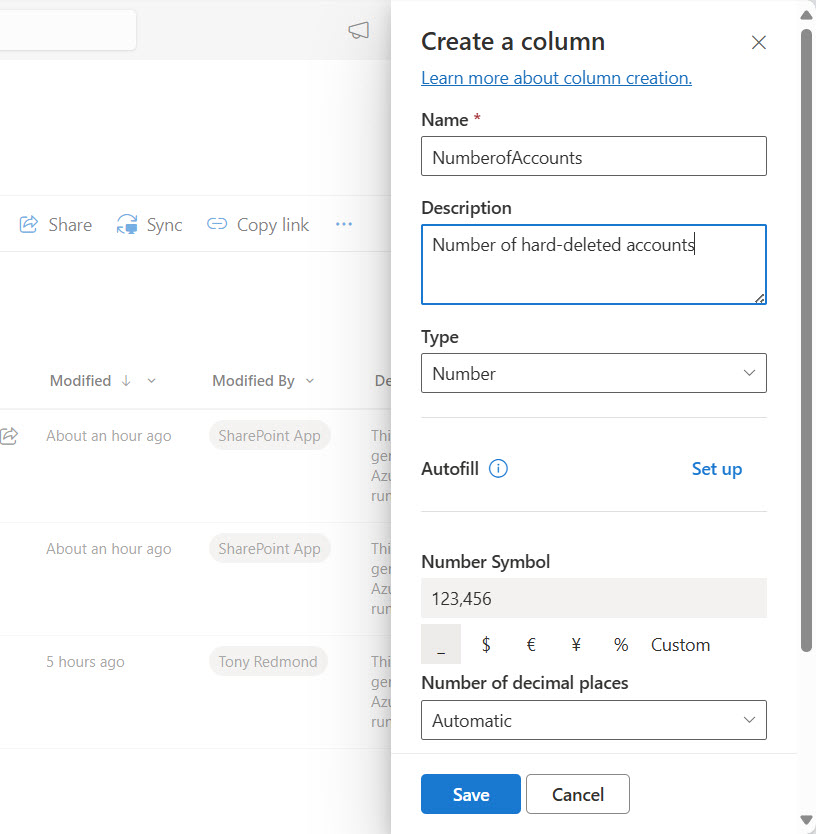
A limited set of fields are available in the default document metadata. If you want to add fields so that the list can store custom metadata for files, use the browser interface to add a column (field). Figure 3 shows how to add a new numeric column called NumberofAccounts, which we’ll use to store the number of hard-deleted accounts recorded in the report. The new column is available only in the site where it is created.
Creating a custom column through the SharePoint browser UI results in a list-specific custom column. You can also create a new site custom column, which means that the new column can be added to any list in the site. To add a new site column.
- Click the cogwheel icon and select Site Information.
- Click View all site settings.
- Click Site columns.
- Click Create and define the settings for the new site column. Add the column to the Custom Columns group.
To add the new custom column to the list, return to the document library and click the cogwheel icon again. This time go to Library settings and use the Add from existing site columns to add the custom column to the list. To complete the job, consider updating the custom column so that SharePoint Search indexes the data held in the column.
If the custom column is important on a tenant-wide basis, you can create a new content type and publish it for use in any site across the tenant.
Updating a Custom Column
To update a custom column, include its name and a suitable value to the hash table used to update the file metadata. SharePoint Online supports a variety of field types. The code example shown below includes two custom fields: one is numeric, the other is text.
$Uri = ("https://graph.microsoft.com/V1.0/sites/{0}/drive/items/root:/General/{1}:/listItem/fields" -f $Site.Id, $OutputFile)
$Body = @{}
$Body.Add("Title", "Hard Deleted Users Report (Created by Azure Automation)")
$Body.Add("_ExtendedDescription", "This report is generated by an Azure Automation runbook")
$Body.Add("MoreInfo", "Report listing hard-deleted Entra ID user accounts")
$Body.Add("NumberofAccounts", $Report.Count)
$ItemUpdate = Invoke-MgGraphRequest -Uri $Uri -Method PATCH -Body $Body
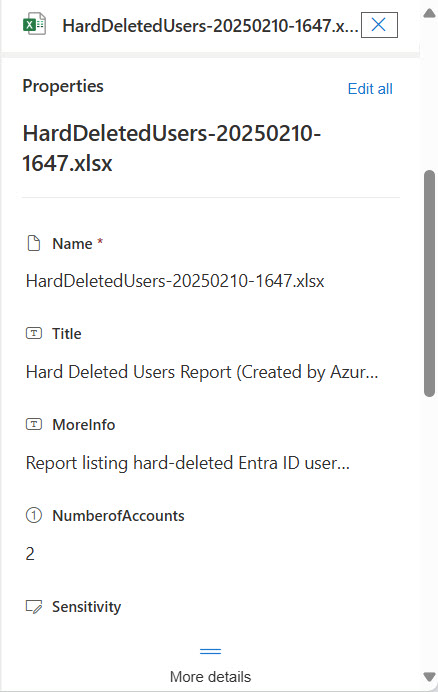
Figure 4 shows that the custom properties are populated.
Custom columns can be indexed, to make it faster for users to apply filters and find specific items. It’s also possible to add the columns to enterprise search to allow people to search using the columns.
Restrict App Access
SharePoint Online supports restricted app access to sites through the Sites.Selected permission. I used this feature to assign write permission to the Azure automation account that executed the runbook to find hard-deleted accounts, upload the report to a SharePoint Online site, and update document metadata. Always apply least privilege when you can!


