Unauthenticated Email Goes to Spam, so Make Sure Receiving Domains Know Your Traffic is Good
Email is still as important as ever, despite the click-bait headlines and numerous communications start-ups claiming that email is dead and <insert fad here> will be the future of office communication. Email is so popular that even Spam Email is still a thing, accounting for 14.5 billion messages a day in 2017 – 45% of all email messages. Luckily companies like Microsoft have become experts at filtering the wheat from the chaff when it comes
Email servers, like those managed by Microsoft for Office 365, rely on a range of open standards and technologies to separate the good emails from the spam such as SPF and DKIM. As an email administrator, it is incredibly important that all the systems that your company uses to send emails are correctly configured to use these standards to ensure that your outgoing emails don’t end up in the recipient’s quarantine or spam folder.
Most email administrators understand that a big proportion of their outgoing emails come from a user’s Outlook or email client and are routed out via Office 365 or their local Exchange email server. However, it is always surprising to learn that these same email administrators have no idea what other systems send
This post will walk you through configuring the two most effective technologies to ensure that your outgoing email is successfully delivered. These technologies are known as Sender Policy Framework (SPF) and DomainKeys Identified Mail (DKIM).

SPF and DKIM
Both the SPK and DKIM technologies require you to add some special records into the DNS zones for the domain names that you are sending email from. The recipient’s email server analyses the headers of each email message and looks up these DNS records to try and match details of the sending email server against what you have configured. If the sending email server passes these tests, it is incredibly unlikely that the message will be marked as spam or suspicious.
Audit your outgoing emails
Before you can get started on configuring these items, you need to make a full list of all the domain names and email servers that your outgoing messages come from. Obviously, there will be your normal email service, such as Office 365 or Exchange, but it’s important to capture the other 3rd parties that may be sending emails from your domain such as:
- CRM systems
- Marketing Automation Systems
- Helpdesk ticketing systems
- Notification and alert services
You will need to configure SPF and DKIM for all these services. Luckily, in 2018 most major providers have great support and documentation for configuring SPF and DKIM.
Implementing SPF for Office 365
Now that you have a documented list of all the places your email gets sent from, you can start by setting up SPF for your Office 365 environment. To get started, log into your DNS provider and create a TXT record for the root of the domain that you are sending email from. You will need to consult your DNS providers documentation for instructions on how to create a TXT record.
In the value area, you will need to add the actual SPF record. For most Office 365 customers, the record will look like this:
v=spf1 include:spf.protection.outlook.com -all
It can be broken down into three components:
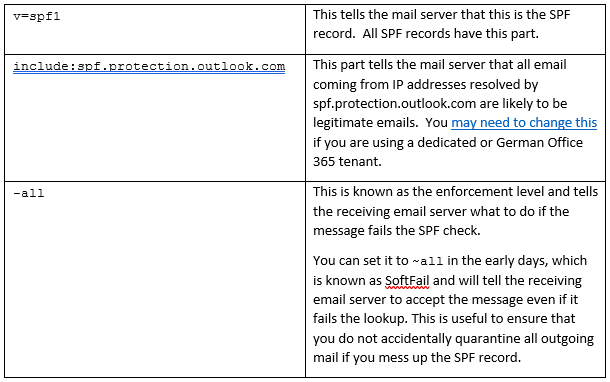
You will need to add
v=spf1 include:spf.protection.outlook.com include:amazonses.com ip4:203.12.45.55 -all
More information about all the options available within the SPF record can be found on the OpenSPF website. You can validate that the record has been correctly applied using
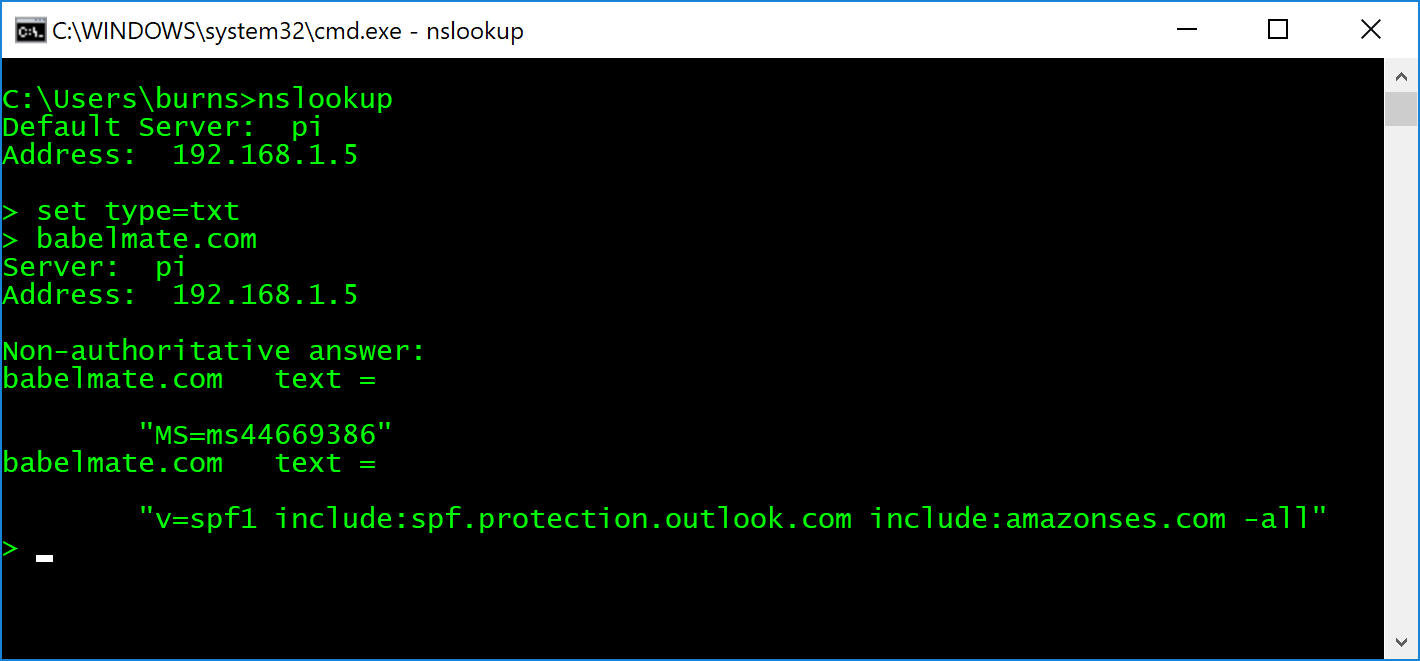
You can check that the syntax of your DNS record is correct by pasting it into any one of the SPF syntax checking services that you can find online. You will need to be aware that the SPF record has limitations in the number of servers or DNS lookups that can be added and there are a few other gotchas that you should look to avoid.
Once you have had your SPF record in place for a few weeks without problems, you can look to switch the ~all SoftFail at the end of the record to a more robust HardFail of -all.
Implementing DKIM for Office 365
Whilst SPF is a great technology for identifying IP addresses of email servers that are allowed to send email on behalf of a domain, it does have several limitations. I recommend that you also implement another technology called DKIM which takes email authentication one step further by signing an email message with a digital signature.
When DKIM is configured for Office 365, each outbound email has a digital signature stamped into the message headers. When an email message is received by the receiving email server, it looks up the DKIM public key from the domains DNS record and uses it to verify the DKIM signature it found. If the signature is verified, the server knows that it was sent from a mail server that is authorised to use that domain and allows it through.
To enable DKIM in Office 365, you will need to create two CNAME DNS records in the hosted zone for your domain. You will need to follow the instructions from your DNS provider to achieve this.
The two records you need to create will look something like this:
Host name:                selector1._domainkey.<domain>
Points to address or value:      selector1-<domainGUID>._domainkey.<initialDomain>
TTL:                             3600

Host name:                selector2._domainkey.<domain>
Points to address or value:      selector2-<domainGUID>._domainkey.<initialDomain>
TTL:                             3600
The two parts you need to complete are:
<domainGUID> |
The domain GUID is the same as the one that is in your MX record,
usually the first part of it. For
example:
babelmate-com.mail.protection.outlook.com
|
<initialDomain> |
The Initial Domain is the domain you used to sign up to Office 365,
and ends in .onmicrosoft.com. For
example:
babelmate.onmicrosoft.com
|
Again, you can verify that you have set the records correctly using
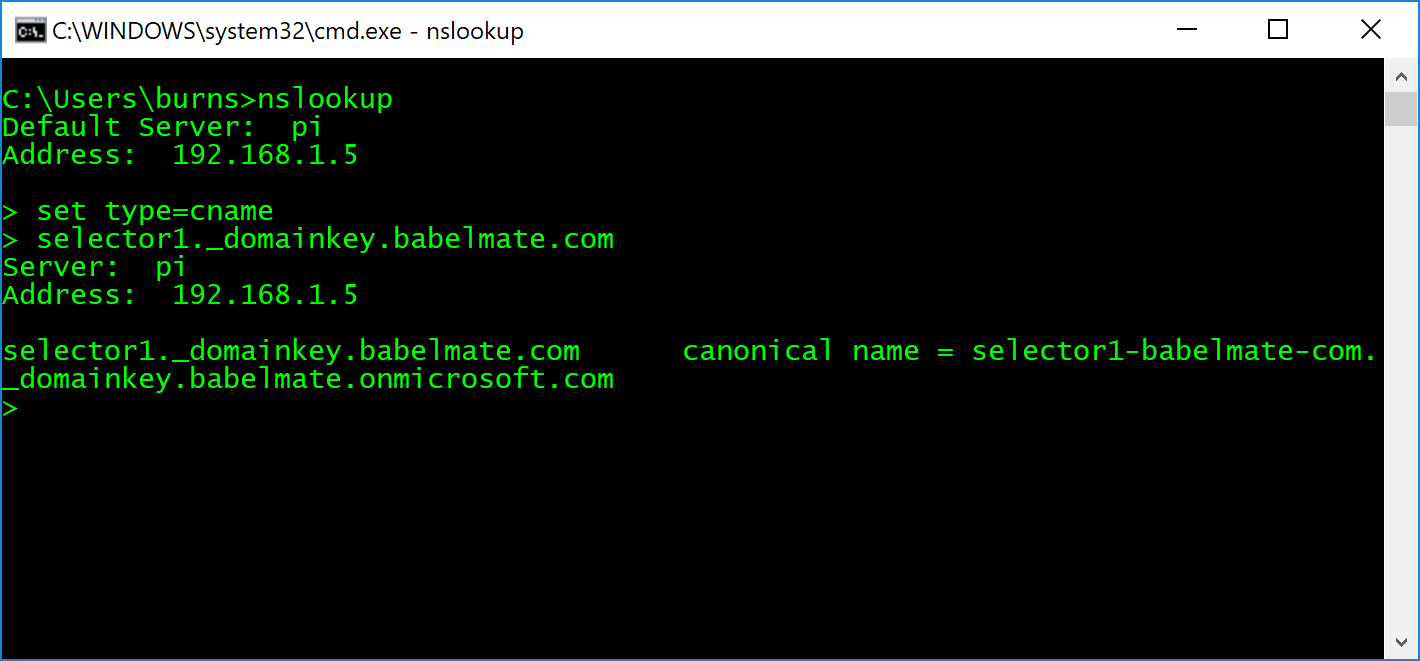
Now that the records are published, you need to enable DKIM for the domain via PowerShell.
New-DkimSigningConfig -DomainName <domain> -Enabled $true
Domain is the name of the custom domain that you want to enable DKIM signing for. For example, for the domain babelmate.com:
New-DkimSigningConfig -DomainName babelmate.com -Enabled $true
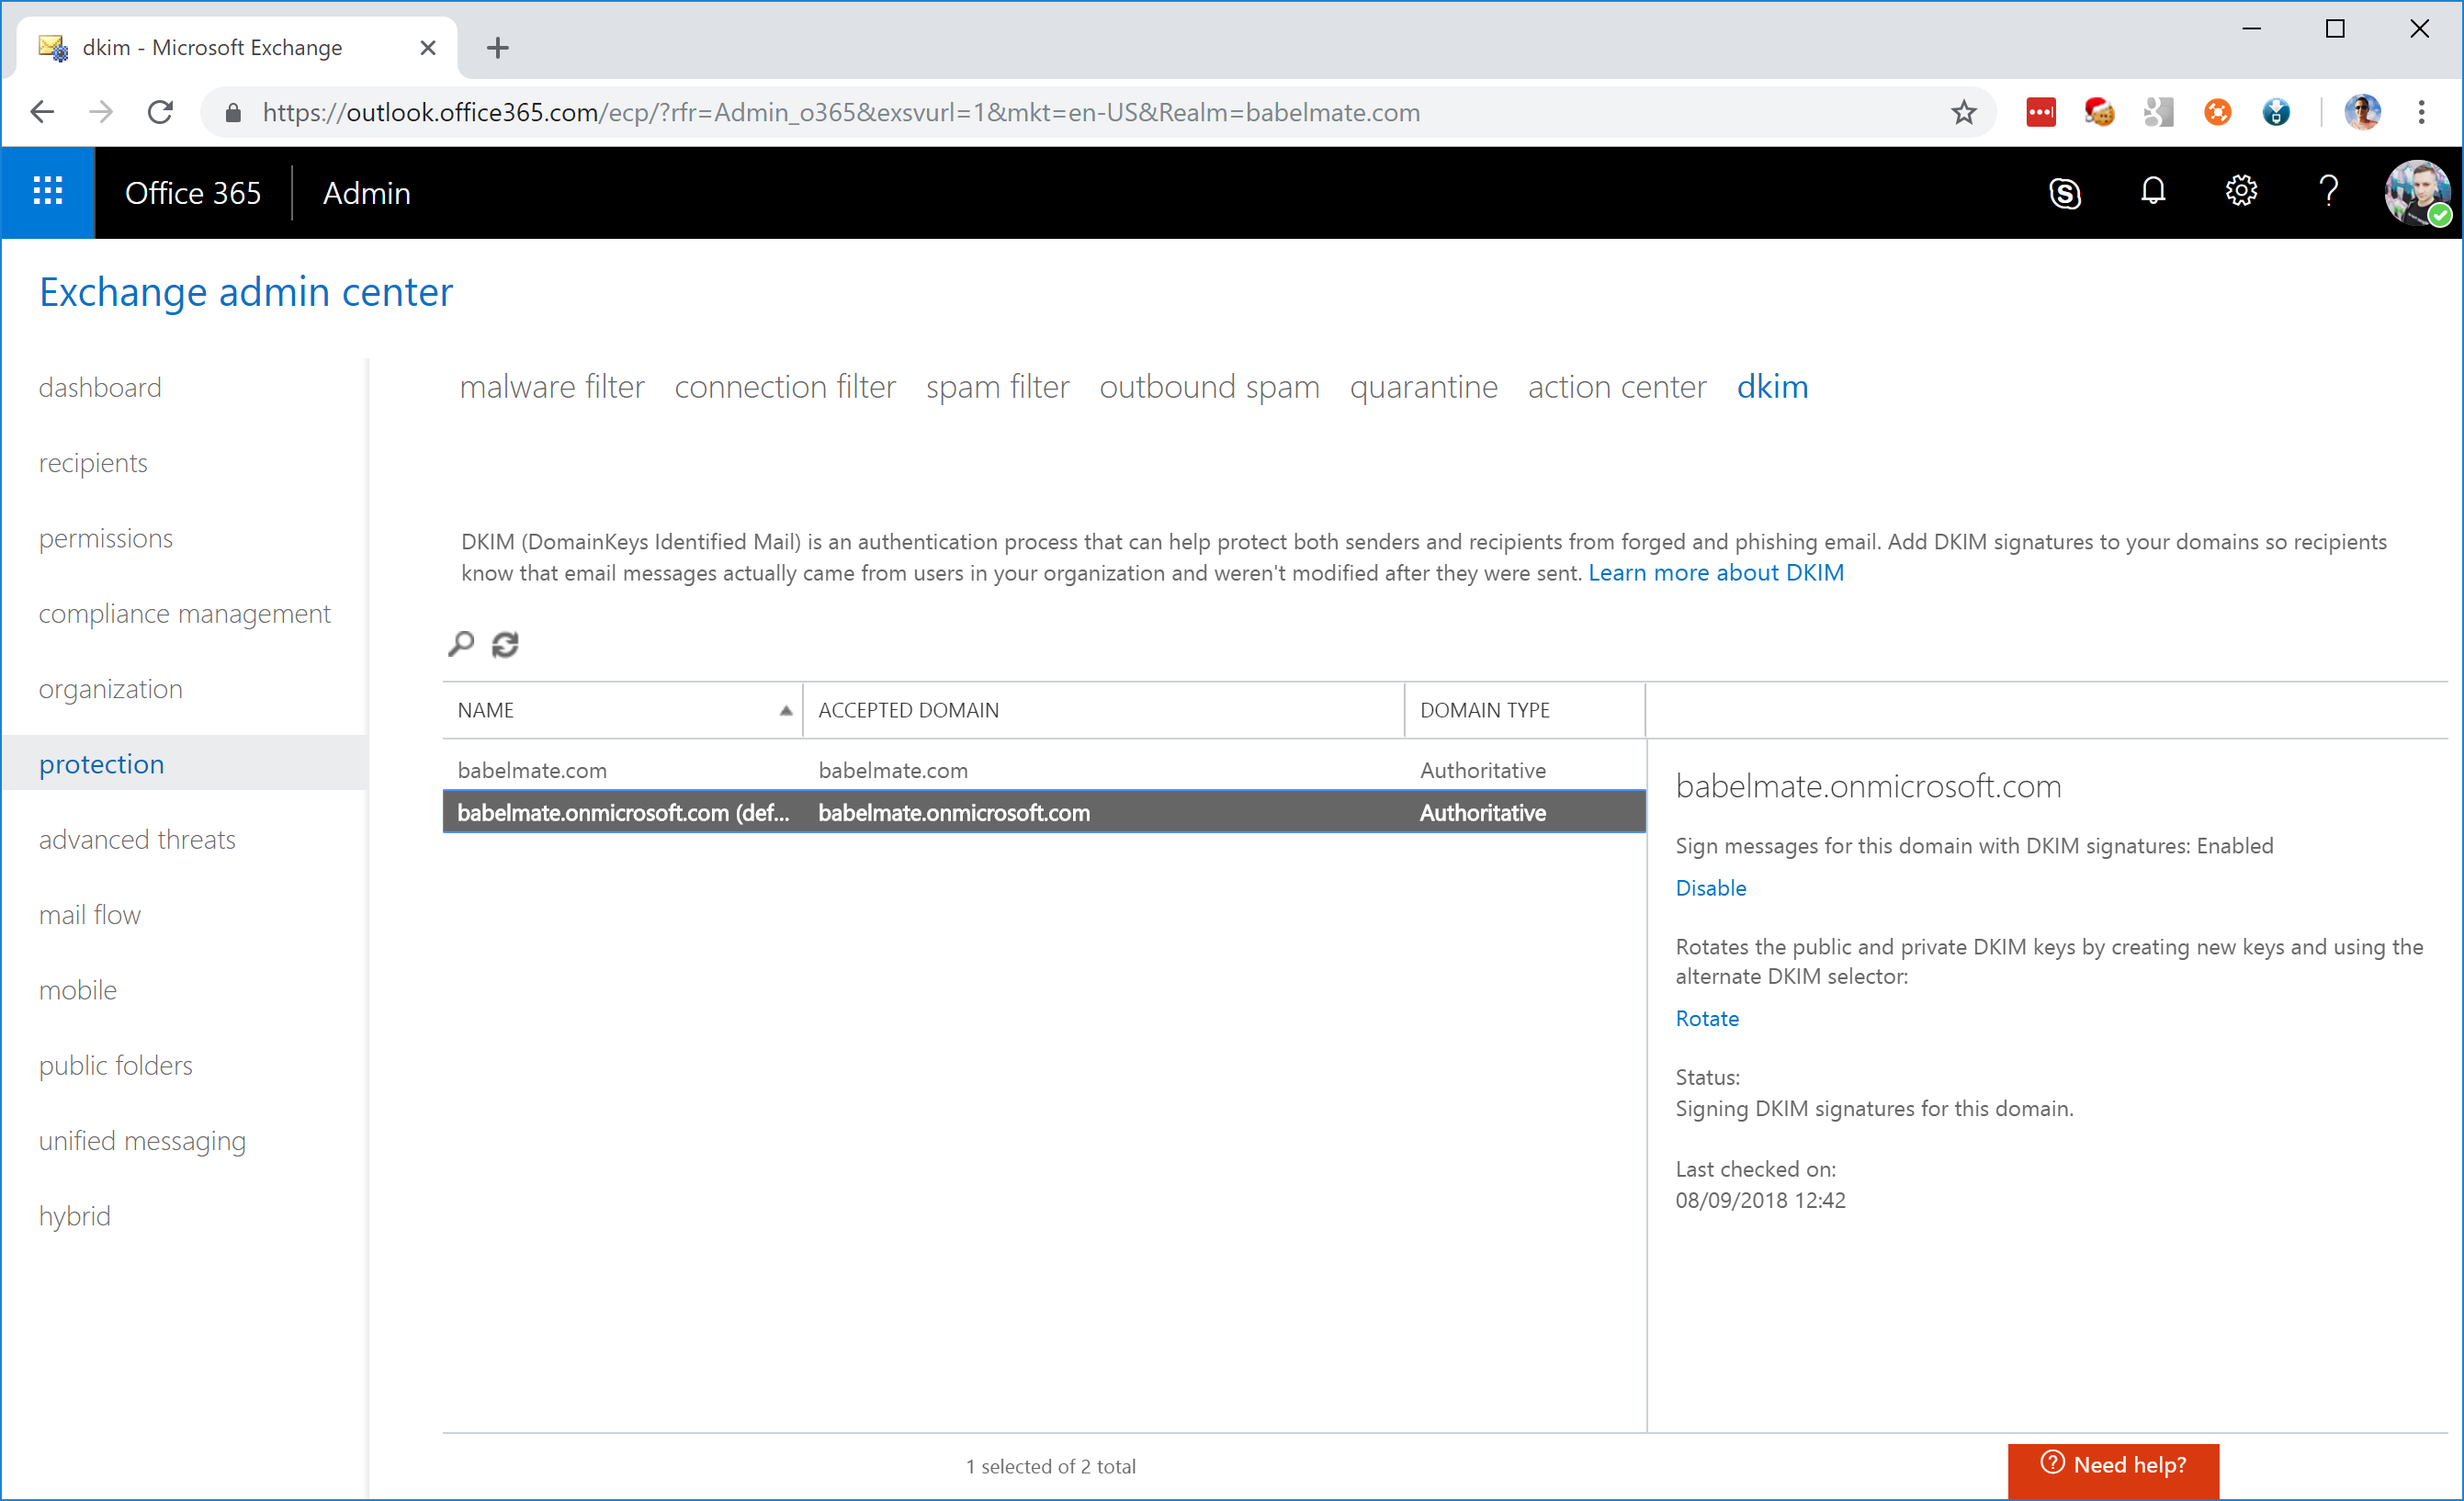
You can validate that this is configured correctly by logging into the Exchange console and clicking on the Protection section.
Now that you have configured DKIM for Office 365, I highly recommend you also do this for all your other third-party mail services that you identified in your audit. Each of these will have their own, but
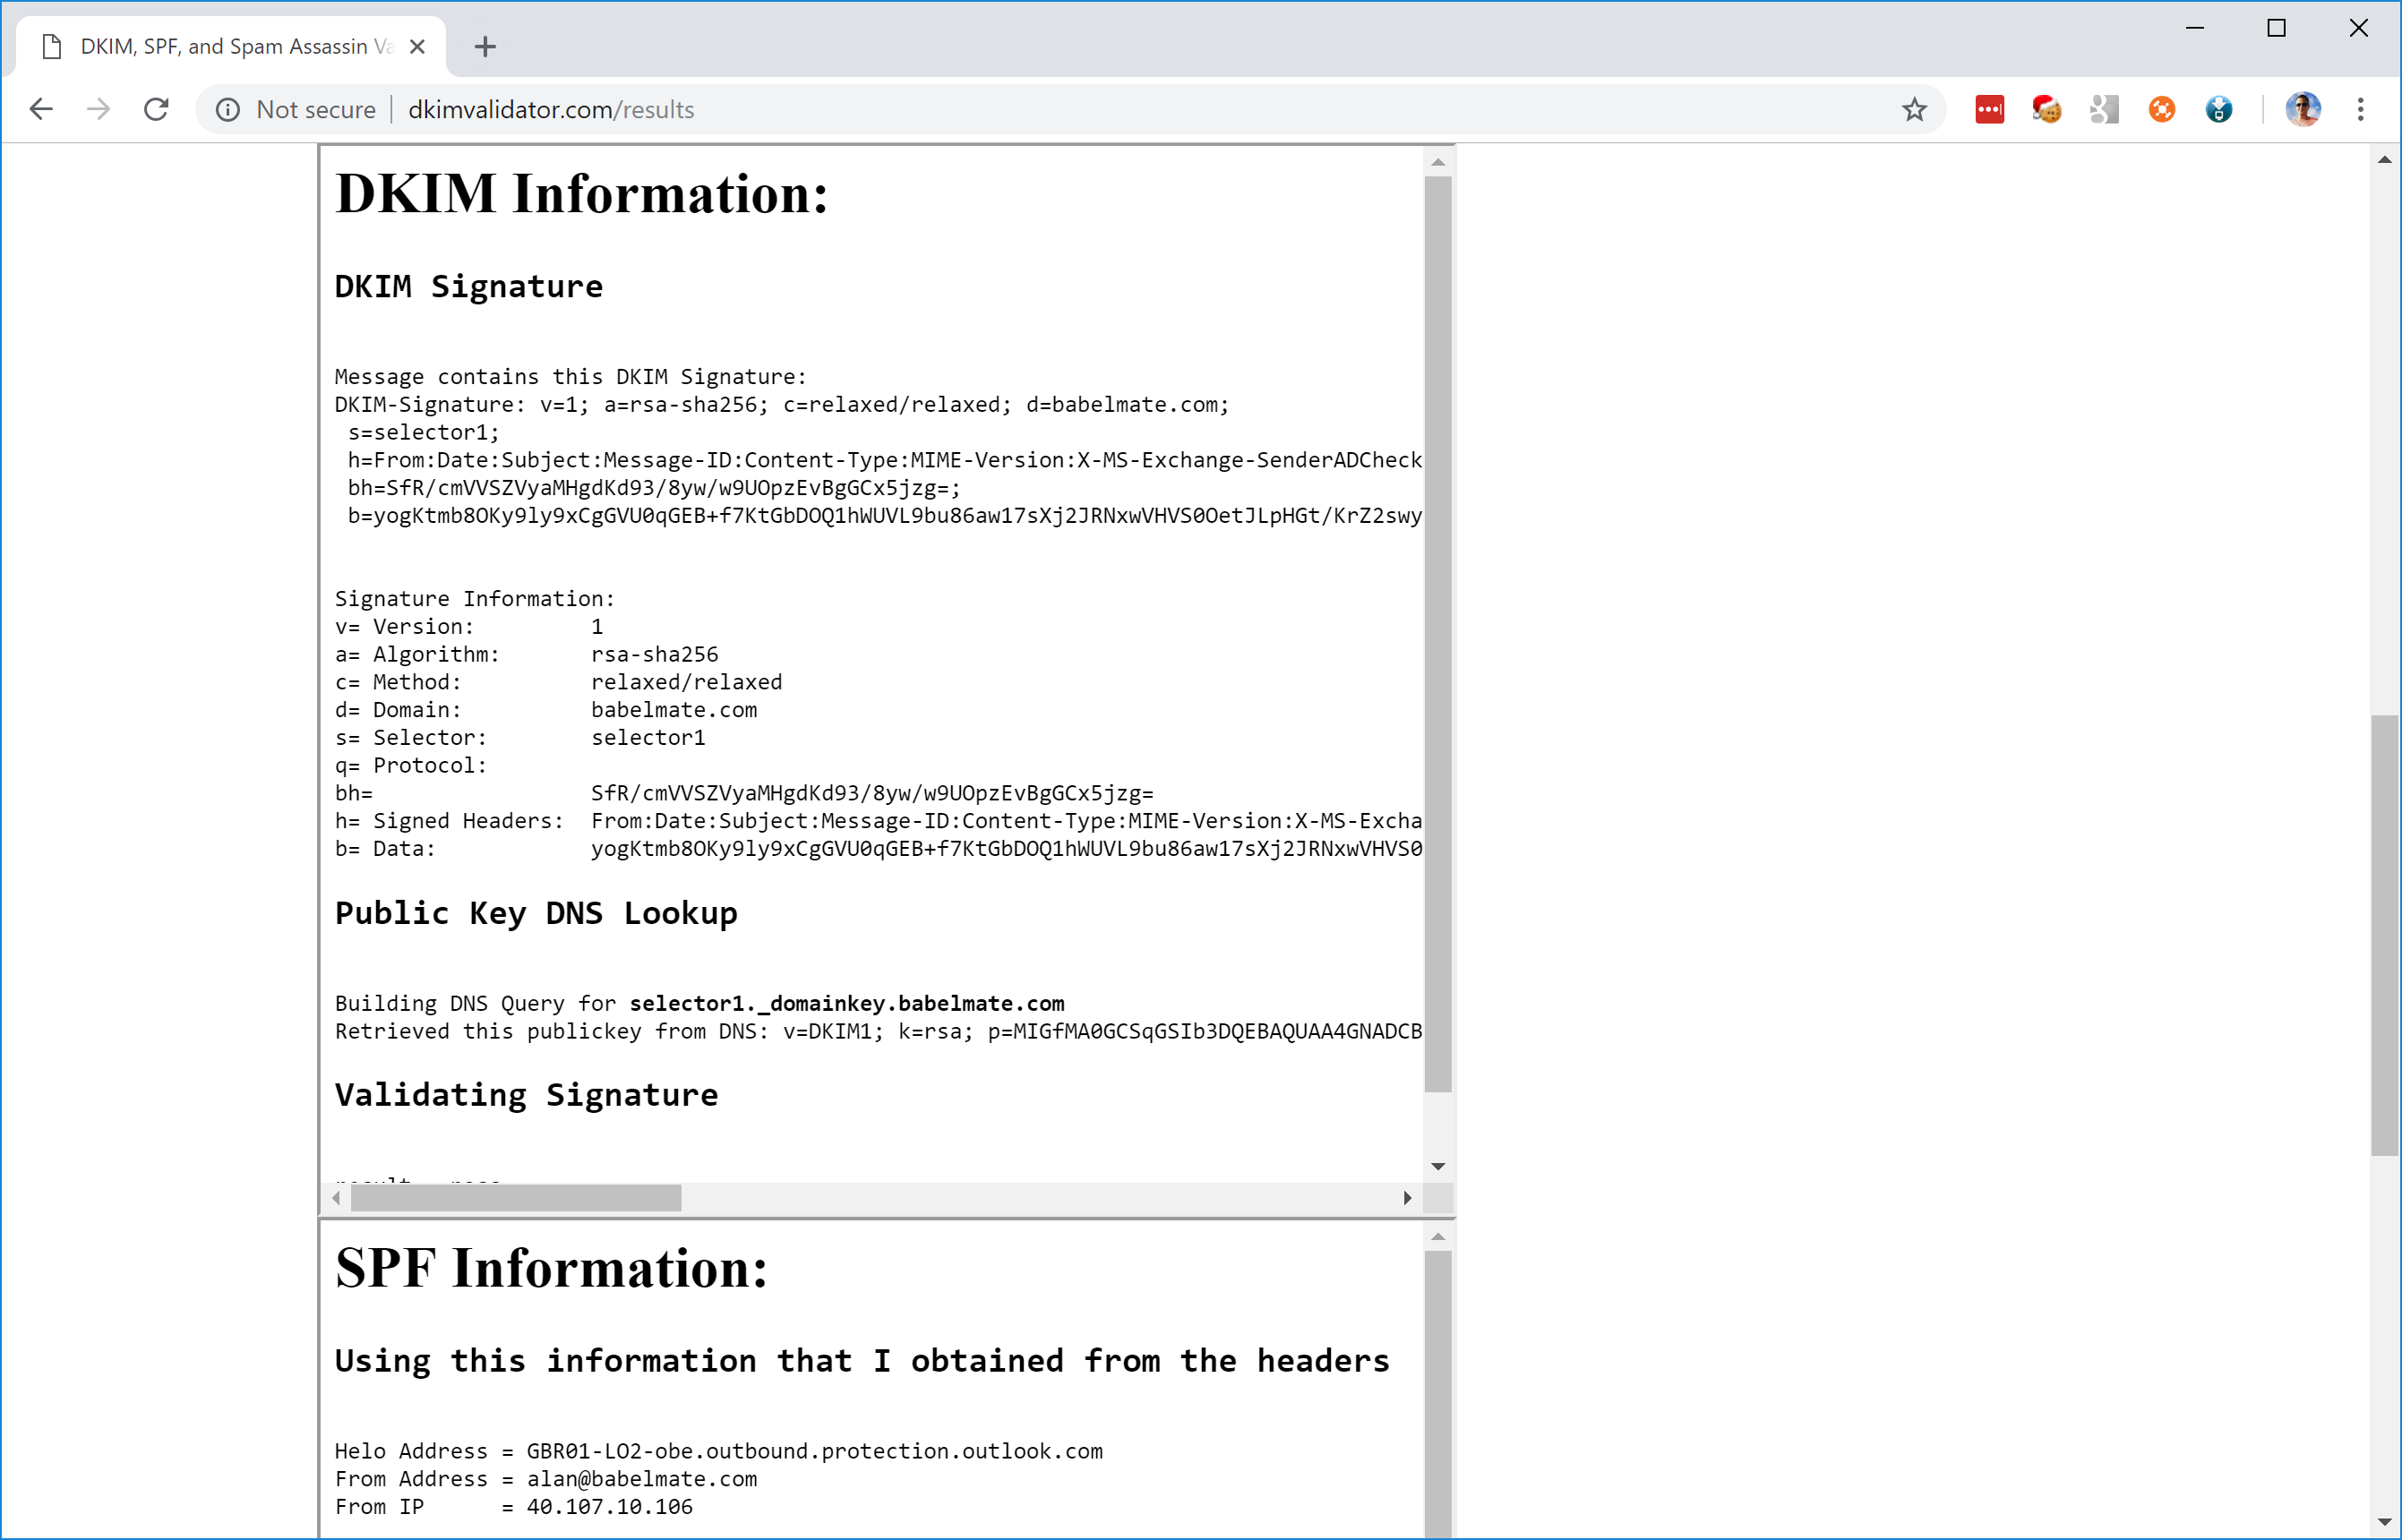
Alternatively, you can send an email from Outlook to an external email address and look at the mail headers. Here you can see the SPF and DKIM headers in an email message I sent to my Gmail address:
Received-SPF: pass (google.com: domain of alan@babelmate.com designates 40.107.11.100 as permitted sender) client-ip=40.107.11.100;</pre>
Authentication-Results: mx.google.com;

dkim=pass header.i=@babelmate.com header.s=selector1 header.b="cst/05/j";
spf=pass (google.com: domain of alan@babelmate.com designates 40.107.11.100 as permitted sender) smtp.mailfrom=alan@babelmate.com;
dmarc=pass (p=NONE sp=NONE dis=NONE) header.from=babelmate.com

DKIM-Signature: v=1; a=rsa-sha256; c=relaxed/relaxed; d=babelmate.com; s=selector1; h=From:Date:Subject:Message-ID:Content-Type:MIME-Version:X-MS-Exchange-SenderADCheck; bh=CK4iL1LPMW2lTFfTZoFjiwQEukVWMQZUQTCNd8K2yoo=; b=cst/05/jsF1rD+usfceT8Q6U2uudA8KFhcnYzkLl5Lz0UBeOK9v8jjZw11xserBvr/5rVwmVBvzi7Xqg4rWxsR+0q2WhrzMad+J0uT7xa/VFLuzIeUh/1g959QllKfxW3a8pCLvmTdYu30iVRSE2f1YEy7z7bBOPZxlc2cgqnxk=
If all your checks have passed, you’re done! Now your messages are incredibly unlikely to be marked as spam, and it will ensure that anyone spoofing your domain from


Powershell and the commands/apps are a nightmare at this point. Best to just do the Powershell changes right in the Office 365 GUI. You literally need nothing from PowerShell to enable DKIM.
I should have said the Microsoft 365 Defender GUI/portal. (Policies & rules -> Threat policies -> Email authentication settings)
Sorry about that. I’m new to this but PowerShell is indeed a mess right now. I’ve used it before to administer our Exchange Server with zero issues. Now that the Graph and all of that crap is in play – I can’t get past it.
I’ve never posted on a blog before, so please forgive the rookie intrusion here, but I’m desperate for a solution. Our domain name is litcreations.com and all emails sent from any email address on this domain go to Junk folders for ONLY Office 365 users. All other people receive our correspondences. I’ve added an SPF record and DKIM record and checked my “spamminess” on https://www.mail-tester.com/ and even tried to correspond with the robot on Microsoft’s website, all to no avail. I wondered at one point if it was because my email was a role-based email (ie. info) but other emails on our domain which are not role-based are also going to Junk with Office 365 users. Any suggestions would be extremely welcome. Thank you so much.
Also the new ATP Feature “Anti Spoofing” should be here in that topic (or in the next one with DMARC).
Nevertheless – great job keep it going!
It is a regrettable fact that we are not talking about DMARC, which makes it possible to complete SPF and DKIM. 😉
Now you’ve given away the surprise for the next blog I’m submitting! 😉
But yes, I 100% agree that DMARC is an incredibly important part of securing your email service. Sadly, at the time of writing, Microsoft have yet to support DMARC aggregate reports in Office 365. But we should all go and vote for them in UserVoice : https://office365.uservoice.com/forums/264636-general/suggestions/11094318-dmarc-aggregate-reports-from-o365-domains