Backup for SharePoint Online, OneDrive for Business, and Exchange Online
As promised at Ignite 2023, the public preview of Microsoft 365 Backup is available. If you’re interested in protecting your SharePoint Online, OneDrive for Business, or Exchange Online data, it is useful to understand how Microsoft 365 Backup works and what the software can and cannot do. In this article, I walk through how to set up and test the preview version.
Disclosure: I work for Keepit, which makes a Microsoft 365 backup product that’s adding support for the Microsoft 365 Backup Storage layer. This article reflects my own opinion and not theirs.

How Microsoft 365 Backup Works
It’s important to understand that the intention behind Microsoft 365 Backup is to provide fast backup and restore of point-in-time copies. This means that the implementation is not a true backup, in that data is always stored within Microsoft 365 datacenters (more on that in a bit); Because a separate copy is not kept in a different location, it’s better to think of Microsoft 365 Backup as a snapshot mechanism. Currently, Microsoft 365 Backup can protect Exchange Online mailboxes, OneDrive for Business accounts, and SharePoint sites, with a few caveats and limitations.
Support in Microsoft 365 Backup for Exchange Online offers the finest granularity for backup and restore. The snapshot mechanism uses a copy-on-write mechanism identical to the one used to preserve items when a mailbox is on litigation hold. Any activity that creates a version that litigation hold captures, including adding, removing, or editing message attachments or deleting items or folders, will be captured by Microsoft 365 Backup. That means some items (such as writes to the Drafts folder) are not captured. It also means that to calculate the “protected” size of a mailbox, you must add the Recoverable Items folder size and the mailbox size. The copy-on-write mechanism reads from Recoverable Items, so using Microsoft 365 Backup won’t affect the size or contents of mailboxes with holds. Copy-on-write allows Exchange Online to capture mailbox changes with a recovery point objective (RPO; the point in time at which changes can be restored) of under 10 seconds, and it supports restoring individual items in a mailbox.
OneDrive and SharePoint use a different mechanism with an RPO of 10 minutes. Snapshots for these workloads are copies of the underlying database tables used to store items and their relationships. In the preview, you can only restore entire OneDrive accounts or SharePoint sites. This fits with Microsoft’s intent of first offering high-speed, large-scale recovery after ransomware attacks but it means the preview isn’t well suited for everyday use for disaster recovery or “oops” prevention.
All data captured by a Microsoft 365 Backup job is retained for exactly 12 months. Exchange Online snapshot data will be retrieved by eDiscovery searches, but OneDrive and SharePoint data is not indexed and won’t appear in those searches. For all workloads, there’s no straightforward way to comply with a GDPR right-to-be-forgotten request.
Microsoft has documented several other limitations for the preview version, which you should read through before proceeding with deployment.
Where Microsoft 365 Backup Stores Data
The Microsoft 365 Backup product sits on top of a storage layer with the somewhat confusing name of “Microsoft 365 Backup Storage.” (I’ll call the storage layer “MBS” in this article.) Microsoft 365 Backup uses MBS but third parties, such as Keepit, CommVault, and AvePoint, can also use MBS in their own products. You cannot have both Microsoft 365 Backup and a third-party MBS-based product active at the same time in your tenant.
Microsoft has not specified exactly where in their network MBS data is held, although they do promise that multiple geographically distributed copies of the MBS data are retained within the geographical region you select. It’s important to understand that snapshots don’t count against mailbox or SharePoint storage quotas (either the primary or litigation/preservation quotas) because they’re stored separately from the source data.
Setting up Microsoft 365 Backup
It’s super important to understand that Microsoft 365 Backup is a paid preview. Microsoft will charge you $0.15/GB for the data you back up, and because that data will be retained for 12 months, unless and until you turn the product off, anything you back up will be billed for at least that long. Be judicious with selecting test data for your backups. Microsoft has a pricing calculator that you can use to estimate your costs. The usage reports in the Microsoft 365 admin center will give you an estimate of mailbox and site sizes to start with.
The first step for deployment is enabling Syntex pay-as-you-go (PAYG) billing. Although Microsoft has dropped the Syntex branding for Microsoft 365 Backup, Syntex is how they handle PAYG billing for services inside Microsoft 365. Billing requires an Azure subscription configured for PAYG, so if you don’t currently have one, you will need to create one and assign a credit card to it for payment. Billing also requires a resource group in the subscription. Once you have those objects in your Entra ID directory, you can accept the Syntex PAYG terms and tell Syntex which resource group to use. These steps allow you to turn on the preview of Microsoft 365 Backup (and Microsoft 365 Archive). In my tests, it can take a few hours for back-end provisioning to complete after enabling Syntex PAYG.
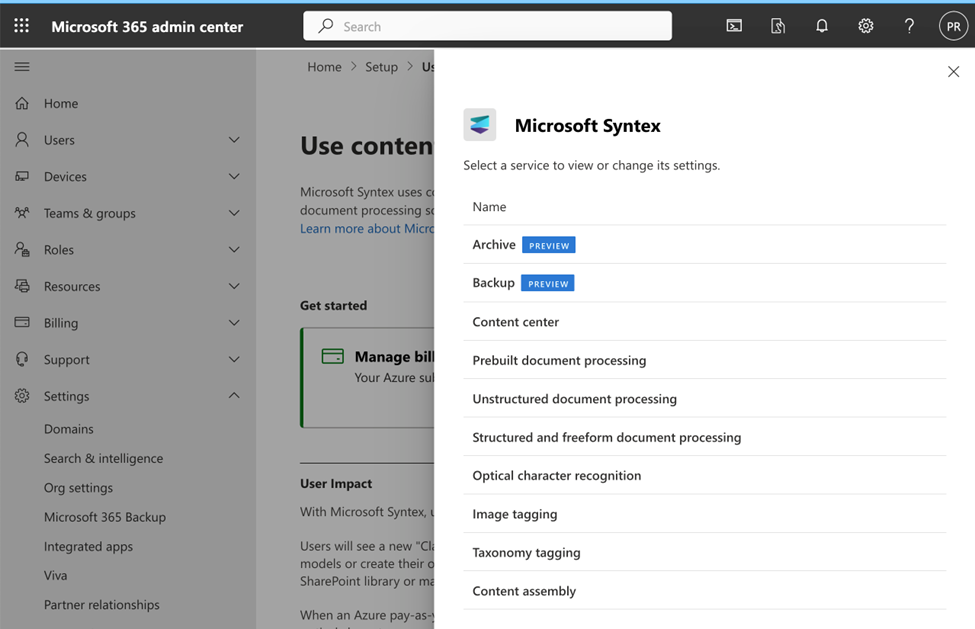
The next step is to enable Microsoft 365 Backup. If you don’t do this, you’ll still see the Microsoft 365 Backup option in the Microsoft 365 admin center, and it will appear to be functional, but any attempt to create a protection policy will fail with a “try again later” message. To enable Microsoft 365 Backup, go to the Setup area of the Microsoft 365 admin center, scroll down until you find the “Files and content” category, and click Use Content AI with Microsoft Syntex. That will take you to a page with a prominent Manage Microsoft Syntex button. Click it and you’ll see a list of available Syntex features (Figure 1). From that list, you can set up Backup by clicking its name and accepting the terms of service.

Creating Backup Policies
After enabling Microsoft 365 Backup, it won’t do anything until you create backup policies for the workloads to protect. During the preview, you can only create one policy for each workload, although you can add as many sites, users, or mailboxes to the workload policy as you like. At first, all 3 workloads show a small icon labeled “Not set up,” accompanied by a Set up policy button. As an example, let’s walk through setting up a policy for Exchange Online; the other policy types are similar.
- Click Set up policy
- An overview page appears, summarizing that restore points are created at 10-minute intervals and that they’ll be retained for one year. There’s a link labeled “cost details” but all it does is take you to the pricing calculator page I mentioned earlier.
- Click Next.
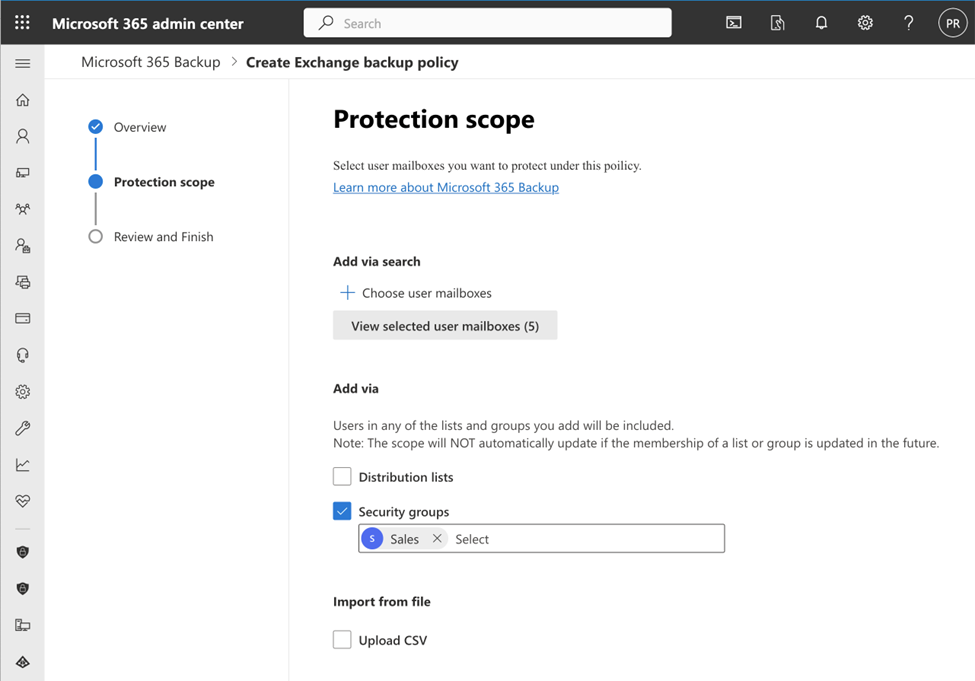
- Select the items you want included in this policy. You can choose specific mailboxes from the standard Microsoft 365 people picker, select one or more distribution or security groups to include, or upload a CSV with a list of items to protect (Figure 2). When you’re happy with the set of selected items, click Next.
- A summary page will appear, reiterating the retention period and snapshot frequency, as well as summarizing which items you’re going to protect. Click Create Policy to finalize the policy or use the Back button (or the included edit links) to change your policy settings.
After creating a policy, Microsoft 365 Backup starts copying data immediately; during the preview, there may be a delay of up to 15 minutes before you see any restore points when a policy changes.
Restoring Data
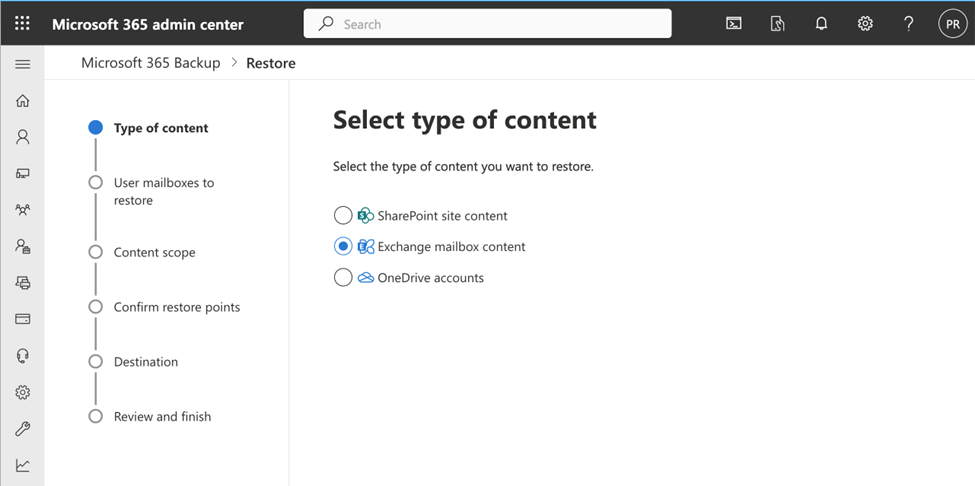
To restore data, use the Restore button shown beneath each workload with an assigned policy. All the buttons display the same interface (Figure 3), which starts with you choosing which data type to restore. Even if you don’t have a policy assigned for a content type, you can still choose it, you just won’t see any data for it.
After choosing the content type, the next step is picking the specific items (mailboxes, OneDrive users, or SharePoint sites) to restore. You can select multiple items for a restore, but only within the selected policy (that is, you can’t restore a user’s mailbox and OneDrive in the same job).
You can select a point in time for the snapshot to be used during the restore, in which case Microsoft 365 Backup uses the closest available snapshot before the selected time. The entire selected item(s) will be restored. For Exchange restores only, you can instead choose to restore all items that match a specified criterion, including sender, recipient, subject keywords, and the presence of attachments. If you use this filtering mechanism, you can restore from preset intervals of 24 hours, 48 hours, 7 days, or 14 days. In this mode, you can see a summary of matching items by clicking Find matching items to confirm your filter settings before starting the restore. After selecting the restore criteria click Next. Microsoft 365 Backup checks that there’s a valid snapshot matching the chosen criteria before proceeding.
The final step involves choosing a destination. You can restore items in place or to an alternate location; Exchange or OneDrive items can optionally be restored to a new folder named “Recovered Items” plus a timestamp, and SharePoint items can be restored to a new copy of the site. After you select a destination, you can start the restore operation, which will take a variable amount of time to finish depending on the workload you’re restoring and how many data items you’ve selected for the restore.
Third-party Integration
You can’t read snapshot contents, set policies, and so on using PowerShell, but there is a REST-based API for creating and managing policies, viewing status, and commanding restores. Several ISVs use this API to integrate Microsoft 365 Backup Storage into their products. Although their implementations vary, all use Microsoft 365 Backup Storage to provide high-speed restores of large data sets while using their own proprietary systems to allow more granular restores of individual files, provide better search, or support other workloads that aren’t yet covered by Microsoft 365 Backup.
What Comes Next
The preview is just that: a preview of the full product. As with any preview, there are some limitations and a few bugs in the user interface. Microsoft will no doubt address these, and they have promised some significant improvements, including adding support for Teams. We’ll have to wait and see whether the product capabilities, weighted against the pricing, lead to product success.


