Create Organizational Contacts Stored in Microsoft Lists in User Mailboxes
In June 2021, I wrote about using PowerShell and Graph API requests to add organizational contacts to user mailboxes. This was a follow-up to an original article by Sean McAvinue. The idea is simple. New people often need a little help to find the right people to communicate with for topics like HR, travel, and the help desk. Adding organizational contacts to their mailbox means that the information is easily at hand, and the implementation allowed any Exchange Online recipient to be an organizational contact.
Three years later, I wrote about using a Microsoft List as the source for organizational contacts. Lists are good at managing tabular data and it’s easier for those who must maintain organizational contacts to use the SharePoint Online GUI to add, update, and remove contacts than to set a value in a custom attribute. Besides, I needed an example to demonstrate how to use Microsoft Graph PowerShell SDK cmdlets to create a new list, add items to the list, and retrieve items for further processing.
The original script uses Exchange Online to find mailboxes created within the last seven days before updating each mailbox with the organizational contacts using Graph API requests. This time round, we’ll use the Microsoft Graph PowerShell SDK for everything. Let’s see how things go.

Unified Contacts
In 2021, personal contacts were Exchange Online objects. Today, contacts are shared between Exchange Online and Teams. If you add a new contact with Outlook (for example), the contact shows up in the Teams Calls app and any phone numbers stored in the contact are usable by Teams.
Unified contacts mean that both apps work against the contact objects stored in Exchange mailboxes. The work is described in message center notification MC695487 (originally published on December 4, 2023, with revised deadlines set several times since). Using current builds, the work seems well-advanced. Updates made to contact objects in Teams show up very quickly in Outlook while the pace is slower for Teams, probably due to the way the Teams clients cache data. As contacts probably don’t change all that often, the delay is acceptable.
Finding Target Mailboxes
The previous article explains how to load items from a Microsoft List into an array ready for processing. The next step is to find the target mailboxes. Because I don’t want to use Exchange Online, a method is needed based on Entra ID user accounts. Here’s my solution:
# Define the service plan IDs for Exchange Online (Plan 1) and Exchange Online (Plan 2)
$ExoServicePlan1 = "9aaf7827-d63c-4b61-89c3-182f06f82e5c"
$ExoServicePlan2 = "efb87545-963c-4e0d-99df-69c6916d9eb0"
# Define the check date to find new mailboxes
$CheckDate = [datetime]::UtcNow.AddDays(-7).ToString("s") + "Z"

# Find users assigned a license that includes the Exchange Online (Plan 1) or Exchange Online (Plan 2) service plans who were created
# since the check date. The check also looks for users with the Exchange Online service plan enabled.
[array]$Users = Get-MgUser -Filter "assignedPlans/any(c:c/servicePlanId eq $ExoServicePlan1 and capabilityStatus eq 'Enabled') or assignedPlans/any(c:c/servicePlanId eq $ExoServicePlan2 and capabilityStatus eq 'Enabled') and (CreatedDateTime ge $CheckDate)" `
 -ConsistencyLevel eventual -CountVariable Test -All -PageSize 999 -Sort ('displayname') `
 -Property Id, displayName, userprincipalName, assignedLicenses, assignedPlans, department, country, CreatedDateTime
It’s reasonable to assume that accounts licensed with an Exchange Online service plan have a mailbox. This code defines the identifiers for the Exchange Online Plan 1 and Plan 2 service plans and a check date to compare accounts against. Here the check date is seven days in the past, but it could be whatever value you want. Note the specific format required for date comparisons in filters with the Get-MgUser cmdlet.
The filter used to find the accounts is a complex or advanced filter because it’s checking against a multi-value property. The meaning of the filter is:
Find any account created in the last seven days with a license that includes an Exchange Online Plan 1 or Plan 2 service plan that’s enabled.
The remaining parameters state what properties to fetch from the Graph and how to sort the returned objects.
It’s important to use server-side filters like this whenever possible. Make the Graph do the work and only return the set of objects a script needs to work with and the properties required for processing. Performance will be much better than fetching all available objects before applying a client-side filter.
Adding Contacts to Mailboxes
The stage is now set to loop through the set of target accounts to add the organizational contacts to their mailboxes. Here’s the loop that I used:
ForEach ($User in $Users) {
    Write-Host ("Processing user {0}" -f $User.displayName)
    # Get the existing contacts so that we can avoid adding duplicates
    [array]$Contacts = Get-MgUserContact -UserId $User.Id -All -PageSize 999 | Select-Object -ExpandProperty $EmailAddresses
    $ContactsHash = @{}
    ForEach ($Contact in $Contacts) {
        $EmailAddress = $Contact.emailAddresses[0].address
        $ContactsHash.Add($EmailAddress,$Contact.displayName)
    }

    ForEach ($Item in $ItemData) {

        $NewContactEmail = @{
            address = $Item.Email
            name = $Item.FullName
        }
        $NewContactEmails = @($NewContactEmail)

        # Build body for new contact
        $NewContact = @{}
        $NewContact.Add("FileAs", $Item.FullName)
        $NewContact.Add("Surname", $Item.LastName)
        $NewContact.Add("GivenName", $Item.FirstName)
        $NewContact.Add("OfficeLocation", $Item.City)
        $NewContact.Add("PersonalNotes", $Item.Description)
        $NewContact.Add("emailAddresses", $NewContactEmails)
        $NewContact.Add("businessPhones", @($Item.PhoneNumber))
        $NewContact.Add("DisplayName", $Item.FullName)

        # Check if the contact already exists and add it if it's not there
If ($null -eq $ContactsHash[$Item.Email]) {
            Write-Host ("Adding contact {0} to {1}" -f $Item.FullName, $User.displayName)
            Try {
                $Contact = New-MgUserContact -UserId $User.Id -BodyParameter $NewContact
            } Catch {
                Write-Host ("Failed to add contact {0} to {1}" -f $Item.FullName, $User.displayName)
            }
            If ($Contact) {
                $ContactAdded++
            }
}
    }
}
For each mailbox, the script fetches the existing contacts using the Get-MgUserContact cmdlet. We don’t want to create duplicate contacts and the best way to check if a contact already exists in a mailbox is to check if a contact with the same email address is present. The script therefore populates a hash table keyed on the email address for existing contacts. Before attempting to add a contact, the script checks the hash table to find if the contact already exists.
The inner loop works through the set of organizational contacts retrieved from the Microsoft list. As is common with many Graph-based cmdlets, before you can add an object, you must prepare a payload or body containing the object content. Often this is done using a hash table, which is what happens here. A contact can have multiple email addresses. Each address is in its own hash table and an array combines the hash tables for inclusion in the payload.
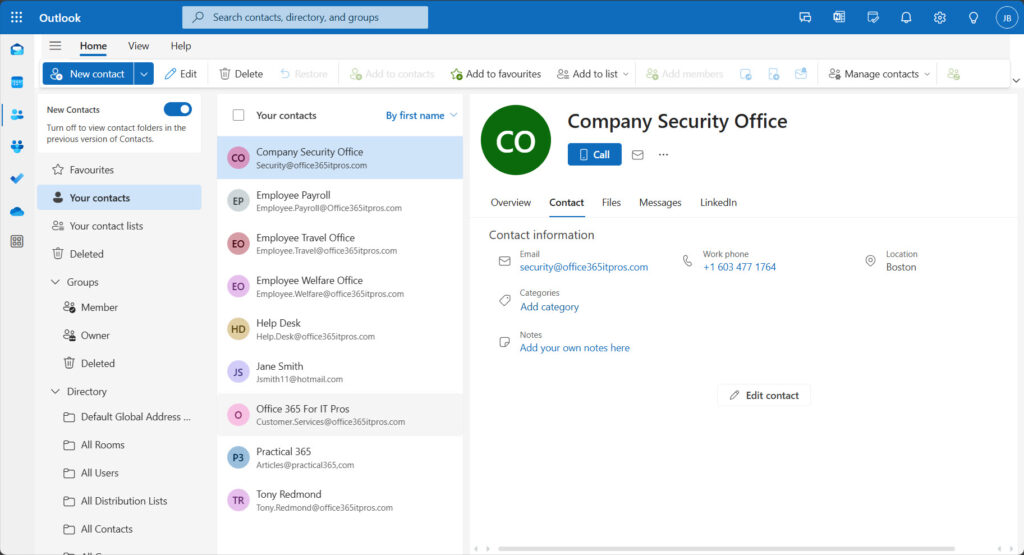
When everything’s ready, the script runs the New-MgUserContact cmdlet to add the contact after first checking that it doesn’t already exist. The error handling is pretty simple, but it works and is in line with what Michel recommends in his article about how to handle PowerShell errors. And if all goes well, the target mailboxes get a set of organizational contacts to browse (Figure 1).

Running the Script to Add Organizational Contacts
You can download the script I used from GitHub. One major point is that application permissions are needed to add contacts to other people’s mailboxes, so if you run an interactive Graph SDK session, you must authenticate using an Entra app with consent with the necessary application permissions. The app I used had these permissions:
- Users.Read.All: Read information about user accounts.
- Contact.ReadWrite: Write new contacts into user mailboxes.
- Sites.Manage.All: Read the information from the Microsoft list stored in a SharePoint Online site. Sites.Read.All would suffice if the app only needs to read information (I used the same app to create and populate the list).
By connecting to the Graph with a command like that shown below, the session receives the permissions defined in the app and can interact with mailboxes.
Connect-MgGraph -NoWelcome -TenantId $TenantId -ClientId $AppId -CertificateThumbprint $CertThumbPrint
The script code includes an example of how to define the values needed to connect.
The technique of using an app to authenticate with the Microsoft Graph PowerShell SDK to use application permissions to interact with tenant-wide data works for both interactive and background sessions. It’s a useful method that can be exploited in many different situations.


