This is the third and final article in a series covering Git-based Source Control for Microsoft 365 Tenant Admins.
The first article introduced source control and how to get started with Git. The second article focused on collaboration with other developers using Git. In this article, you will learn how to leverage tools to streamline your workflow with Git and gain insight into some useful advanced techniques.
Tools
There are dozens, if not hundreds, of tools that can be used with Git. In this section, I highlight three specific tools that I use daily.
Visual Studio Code
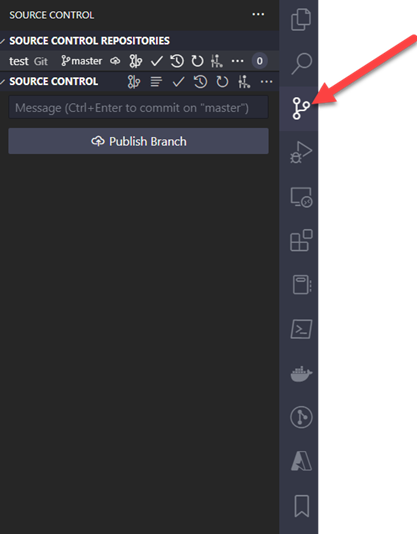
Visual Studio Code is a powerful, free, open-source code editor created by Microsoft. VS Code is a terrific editor for PowerShell. Once you install VS Code, be sure to install the PowerShell extension. VS Code seamlessly integrates with Git as well. When you open a project in VS Code, you see the Source Control icon (Figure 1).
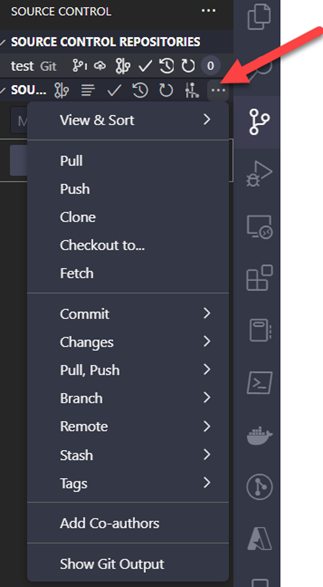
Additionally, by clicking the ellipsis menu, you see many Git commands that should look familiar to you from the first two articles in this series, such as Commit, Pull, Push, Branch, and a few new ones, including Stash and Tags (Figure 2).
VS Code is great, and I highly recommend using it. You should be aware that sometimes tools like VS Code add extra functionality that looks like native functionality. As an example, VS Code has a command called Sync, as seen below in Figure 3.
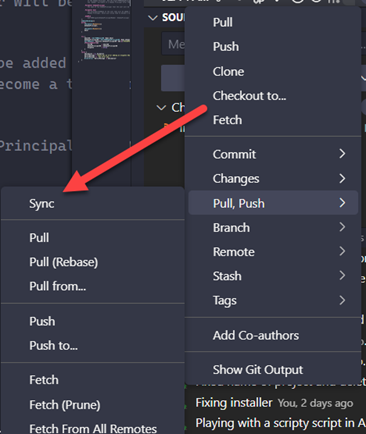
There is no equivalent “git sync” command. The VS Code command is really doing a “git pull” followed up by an immediate “git push.” This is helpful for daily use, but it’s important to know what the command does in case something goes awry and you need to troubleshoot.
I encourage you to use VS Code as much as possible and continue to learn and use the Git command line. Occasionally, you will need to do something that VS Code may abstract away. It’s always good to understand what your productivity tools are doing.
Microsoft Platform Migration Planning and Consolidation
Simplify migration planning, overcome migration challenges, and finish projects faster while minimizing the costs, risks and disruptions to users.
Posh-git
Posh-git is another great tool if you write PowerShell code and use source control. Posh-git is a PowerShell module that integrates Git and PowerShell by providing a Git status summary directly in the PowerShell prompt. The PowerShell prompt is a PowerShell function, and because it is a function, you can do whatever you want with it. Keith Dahlby, and a number of other contributors, used the power of the customizable PowerShell prompt to build Posh-git. You can install the tool directly from the PowerShell Gallery:
Install-Module posh-git
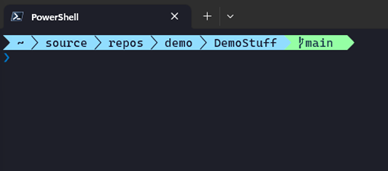
Posh-Git tells you what branch you are on and statistics about staged and committed files, as seen in Figure 4. Red output means files need to be staged or added to a commit. Green means files are staged and ready to be committed. Posh-Git gives you a quick update of your git repository using the prompt.

Posh-git is extremely lightweight and easy to deploy from the PowerShell gallery. I use it regularly for my development and build servers.
Oh-My-Posh
Oh-My-Posh is another tool that integrates the PowerShell prompt with Git status, as well as a number of other options, such as your battery on your computer or if you are currently connected to an Azure subscription. Oh-My-Posh uses a plugin model (figure 5). If you can code it, you can add it
The name Oh-My-Posh is a play on the name Oh My Zsh, a popular framework for managing Zsh configurations on Mac and Linux machines. Scott Hanselman, who works in Open Source on .NET and the Azure Cloud for Microsoft, has a great blog article on configuring Oh-My-Posh and using it with PowerShell and Windows Terminal.
I use Oh-My-Posh on my main laptop. Oh-My-Posh can work in the Windows Console app (that hosts PowerShell and Cmd.exe), but it really shines when it is used in conjunction with Windows Terminal because of its modern UI capabilities.

Advanced Git Techniques
Now that you know about some of the useful tools for Git, let’s dive into some advanced techniques that you might not need every day, but come in handy from time to time.
Git Stash
Git stash is useful when you need to save some changes but don’t want to commit them to a branch. Every once in a while, I will pull the main branch and start to edit code. After making three or four changes, I realize I am still on the main branch, and I should have created a feature branch for these changes. I can use “git stash” to temporarily save my changes. When I do a “git stash,” the main branch returns to the state it was in before I started editing. I can create a new feature branch and then apply the stash to that branch using “git stash apply.” This process is shown in Figure 6.

Git Rebase
Rebase comes into play when working on a codebase with other people. For example, I create FeatureBranch1 (F1 branch). The next day, another engineer creates FeatureBranch2 ( F2 branch). She completes FeatureBranch2 and merges it into the main branch. Now I have a situation where FeatureBranch1 is based on an older commit on the main branch. I can use rebase to change the base commit of FeatureBranch1.
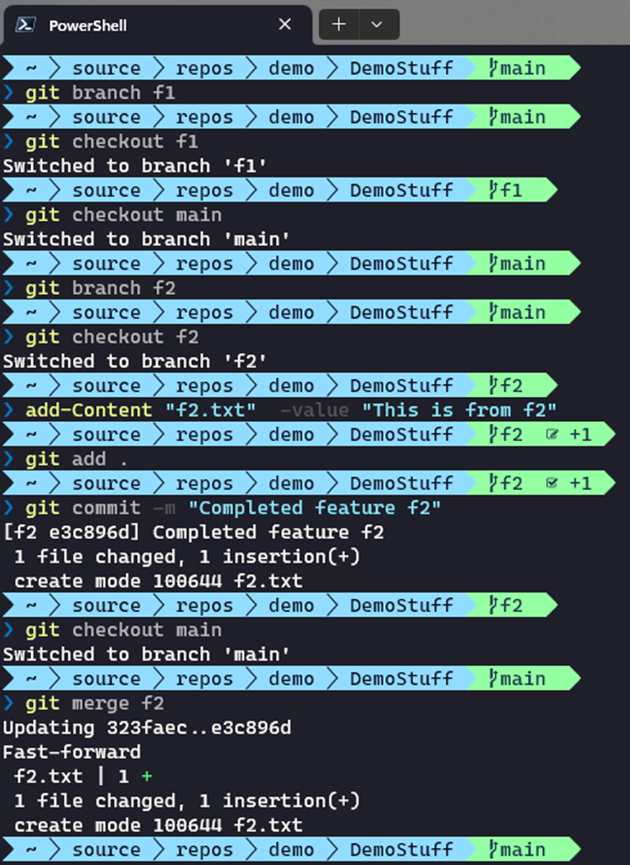
Figure 7 shows how the first branch can still exist after the f2 branch has been merged into the main.
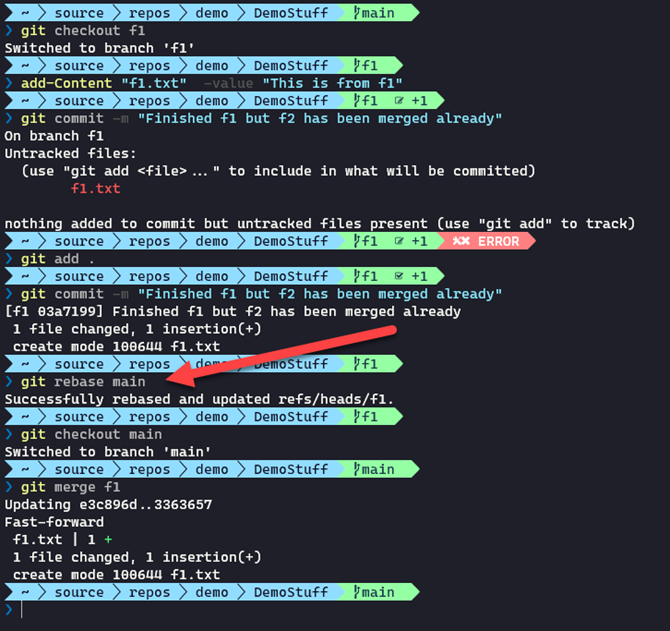
You then want to make sure that the F1 branch accounts for all the changes that have been made to the main branch since you created the F1 branch. Figure 8 shows how to rebase the F1 branch to the latest commit of the main branch.
Git Merge
A Git merge is used to merge changes from one branch into another. When a contributor submits a pull request and is approved by an owner on GitHub or Azure DevOps, Git merges the code from a feature branch into the main branch. You can merge changes locally as well, as demonstrated in Figure 7, where the f2 branch is merged into the main branch. In the example, git was smart enough to complete the merge automatically. This doesn’t happen all the time. Occasionally, developers have merge conflicts. This occurs when two different branches attempt to change the same file. See Figure 9 as an example.
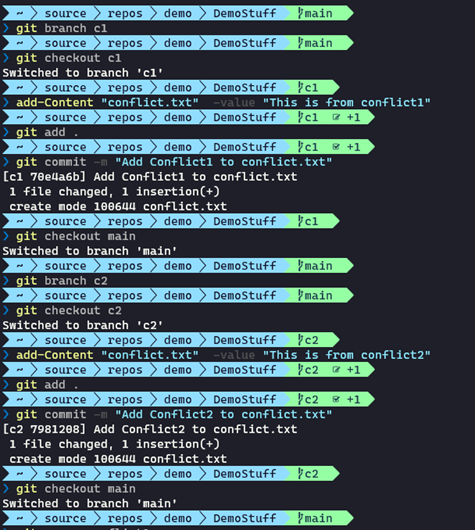
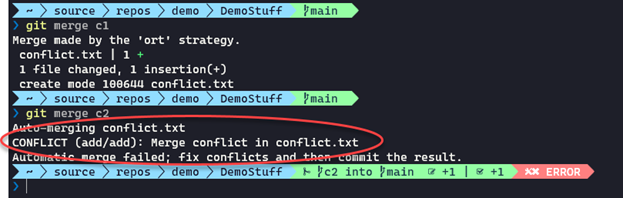
The c1 branch can be merged into the main branch successfully. However, when we try to merge c2, Git signals a conflict (figure 10).
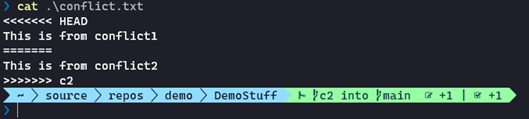
When a merge conflict occurs, Git annotates the file with the conflict, as seen in Figure 11.
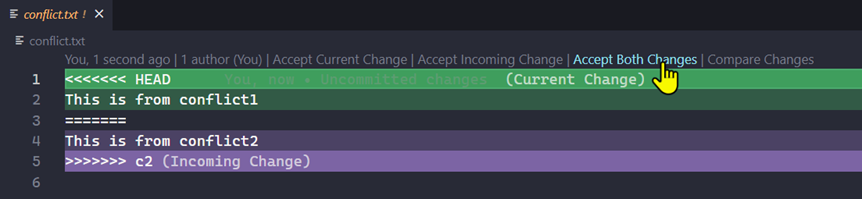
It is possible to use a text editor to resolve these conflicts, but VS Code makes it really nice. If you open up a file with merge conflicts, VS Code highlights each conflict and presents options for which changes to keep. In this case, I accept both changes (figure 12).
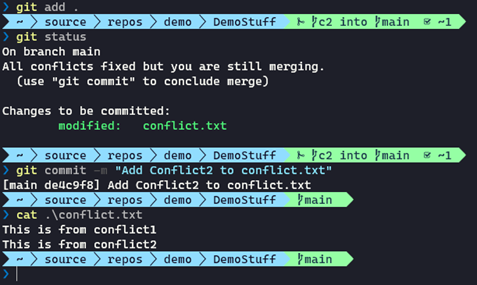
It is now possible to stage and commit the change. The cat command, an alias for Get-Content, shows both changes are added to conflict.txt in the main branch (figure 13).
Remember… It’s a Journey
As I mentioned in my first article, code is a significant part of our work as Microsoft 365 Tenant Admins. Your investment in learning and understanding how Git works can become a great asset for your career.
Remember to start simple. You will learn new techniques and features of Git when you need them. It’s a journey. I hope this article informs you about some great productivity tools for managing code and helps you dive into some useful advanced techniques as well.
The Microsoft 365 Kill Chain and Attack Path Management
An effective cybersecurity strategy requires a clear and comprehensive understanding of how attacks unfold. Read this whitepaper to get the expert insight you need to defend your organization!


