Choosing Between Modules
A new version of the Microsoft Teams PowerShell module usually generates hundreds of thousands of downloads from the PowerShell Gallery. While the number of downloads is not an indication of usage, it’s reasonable to assume that most who download the module use it to manage Teams. The Microsoft Graph PowerShell SDK also includes cmdlets to work with Teams, like Get-MgTeam, Get-MgTeamChannel, and so on, many of which duplicate cmdlets are found in the Microsoft Teams module. Given the duplication, which route should administrators take to automate Teams operations?
The answer isn’t straightforward because it depends on what you’re trying to do. Here are some points to remember:
- Both modules have links to the Microsoft Graph. Many of the cmdlets in the Microsoft Teams module are based on Graph APIs and all the cmdlets in the Microsoft Graph PowerShell SDK are derived from Graph APIs.
- The Microsoft Teams module includes other cmdlets that are not based on Graph APIs. Most are policy management cmdlets that originally came from the Skype for Business connector.
- The Microsoft Graph PowerShell SDK includes cmdlets to interact with other Microsoft 365 workloads and Entra ID.
- The Microsoft Teams module is designed to automate management operations. When used by an account holding the global administrator or Teams administrator role, the cmdlets can manage all teams in an organization.
- The Microsoft Graph PowerShell SDK includes cmdlets that can interact with user content, such as posting new chats. Different permissions are needed to interact with different Teams data. Developers also need to remember the difference between delegated permissions and application permissions when it comes to accessing data.
In most cases, it’s easier to use the Microsoft Teams module for general automation and introduce the Microsoft Graph PowerShell SDK when it’s necessary to interact with user data, like posting or removing chats, which is what we want to do here.
The remainder of this article covers the basics of Teams messaging and explains how to post messages to one-to-one and group chats and channel conversations using the Microsoft Graph PowerShell SDK. The process of removing messages from channels is covered in a different article.

A Note on Permissions
As you probably know, the permissions model used for Graph API requests is a least privilege basis. In most cases, application permissions are available to allow apps that use Graph requests to run as background processes such as a scheduled Azure Automation job.
No application permissions are available for Graph requests like posting messages to chats or channel conversations, so delegated permissions must be used. The app needs the ChannelMessage.Send permission to post messages to channels and the Chat.Create permission to post to a chat. Further permissions (like Chat.ReadWrite) are required to fetch messages.
Because of the lack of application permissions, the signed-in account must be a member of a chat or team to post messages and a team owner to remove channel messages. Azure Automation managed identities cannot be used because these identities cannot be members of a team or chat.
The usual workaround is to sign into Teams using a utility account that’s a team member and post to channels that way. In the past I’ve done this using the Submit-PnPTeamsChannelMessage cmdlet PnP module using credentials stored in Azure Key Vault. The same technique works with the cmdlets covered here.
Chat Payloads
Teams supports one-on-one and group chats. The first example creates a new one-on-one chat between two tenant accounts. The Microsoft documentation includes several good examples of how to post messages to chats. However, I think the method used to construct the JSON payload to post to Teams is overly complicated and doesn’t lend itself to programmatic manipulation.
I therefore take a different approach to define and pop the arrays and hash tables that form the payload. It’s the same approach as used to build parameters to post Planner tasks to a plan. Use the approach taken in the documentation examples if you like. They work and are good examples, but I think my method is better for production scripts.
Creating and Posting to a One-to-One Chat
First, we define an array holding the account identifiers for the chat participants and the hash table holding the payload (aka the request body) used to create the chat. The code also adds a parameter to identify the chat as one-to-one. You must use the exact format (onOnOne) to identify the chat type.
[array]$MemberstoAdd = "eff4cd58-1bb8-4899-94de-795f656b4a18", "cad05ccf-a359-4ac7-89e0-1e33bf37579e"
$OneOnOneChatBody = @{}
$OneOnOneChatBody.Add("chattype", "oneOnOne")
The remaining parts of the payload define the chat participants. This data is passed in an array composed of two hash tables. Each hash table holds information about a chat participant, one of which must be the signed-in user. As you can see, the code accommodates adding a guest account as a chat participant.
$Members = @()
ForEach ($Member in $MemberstoAdd) {
    $User = Get-MgUser -UserId $Member -Property id, displayName, userType, userprincipalName
    $MemberId = ("https://graph.microsoft.com/v1.0/users('{0}')" -f $Member)
    $MemberDetails = @{}
    [array]$MemberRole = "owner"
    If ($User.userType -eq "Guest") {
        [array]$MemberRole = "guest"
    }
    $MemberDetails.Add("roles", $MemberRole.trim())
    $MemberDetails.Add("@odata.type", "#microsoft.graph.aadUserConversationMember")
    $MemberDetails.Add("user@odata.bind", $MemberId.trim())
    $Members += $MemberDetails
}
$OneOnOneChatBody.Add("members", $Members)
The complete payload looks like this:
$OneOnOneChatBody

Name                           Value
----                           -----
chattype                       oneOnOne
members                        {System.Collections.Hashtable, System.Collections.Hashtable}
We can now run the New-MgChat cmdlet to create a chat. If a chat already exists for the two participants, Teams returns the chat identifier for that chat. If not, Teams creates a new chat and returns that identifier, which has a value like 19:949d2f6c2b1f4f50b42714ddb2be4a36@thread.v2.
$NewChat = New-MgChat -BodyParameter $OneOnOneChatBody
If ($NewChat) {
    Write-Host ("New chat {0} created" -f $NewChat.id)
} Else {
    Write-Host "Failed to create chat"
}
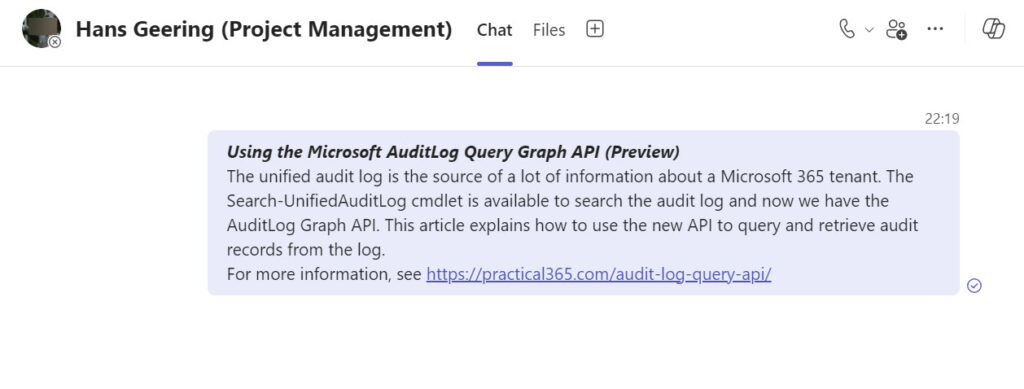
Knowing the chat identifier allows us to run the New-MgChatMessage cmdlet to post a message to the chat. This code creates some HTML content and posts it to the chat.
$Content = "<b><i>Using the Microsoft AuditLog Query Graph API (Preview)</b></i><p>"
$Content = $Content + "The unified audit log is the source of a lot of information about a Microsoft 365 tenant. The Search-UnifiedAuditLog cmdlet is available to search the audit log and now we have the AuditLog Graph API. This article explains how to use the new API to query and retrieve audit records from the log."
$Content = $Content + "<p>For more information, see <a href='https://practical365.com/audit-log-query-api/'>https://practical365.com/audit-log-query-api/</a>"

$ChatMessageBody = @{}
$ChatMessageBody.Add("contentType", "html")
$ChatMessageBody.Add("content", $Content)
$ChatMessage = New-MgChatMessage -ChatId $NewChat.Id -Body $ChatMessageBody
Figure 1 shows the message posted to the chat.

Creating and Posting to a Group Chat
A group chat has between two and 250 participants. It can also have a topic (title). To demonstrate adding large numbers of participants to a new group chat, this code finds a team using af filter for a specific display name and extracts its membership roster into an array of user account identifiers. It also creates the hash table for the payload to create the new chat and populates the chat type and topic:
$Members = @()
$Team = Get-MgTeam -Filter "displayName eq 'Information Quality and Accuracy'"
If ($Team) {
[array]$TeamMembers = (Get-MgGroupMember -GroupId $Team.Id).Id
}
# Create a new group chat
$GroupChatBody = @{}
$GroupChatBody.Add("chattype", "group")
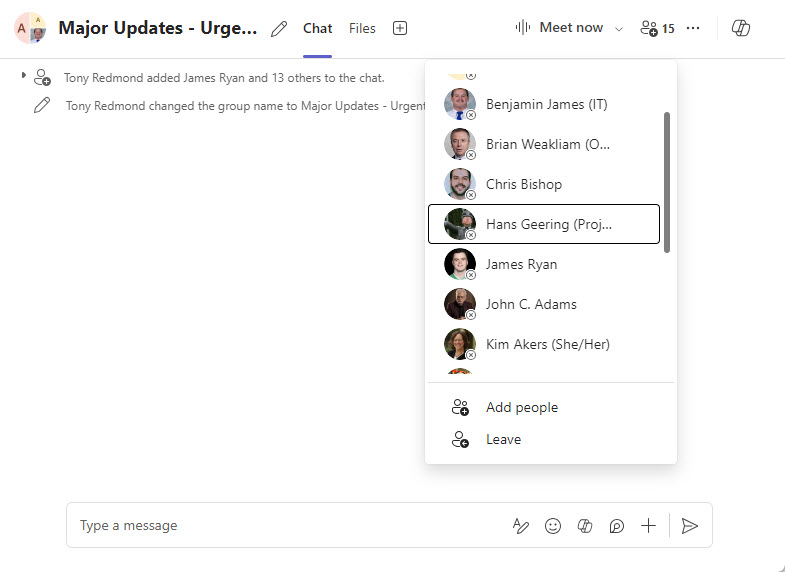
$GroupChatBody.Add("topic", "Major Updates - Urgent News")
The next step creates a set of hash tables to define each member to add to the group chat. Just like with a one-to-one chat, one of the participants for a group chat must be the signed-in user. Because it’s a preview feature, the code excludes the accounts for team members synchronized from a multi-tenant organization. Finally, the New-MgChat cmdlet creates the new chat.
ForEach ($Member in $TeamMembers) {
   $User = Get-MgUser -UserId $Member -Property id, displayName, userType, userprincipalName
   # Exclude MTO accounts
   If (($User.userprincipalName -notlike "*#EXT#*" -and $User.userType -eq "Member") -or $User.userType -eq "Guest") {
        Write-Host ("Processing member {0}" -f $User.DisplayName)
        $MemberId = ("https://graph.microsoft.com/v1.0/users('{0}')" -f $Member)
        $MemberDetails = @{}
        [array]$MemberRole = "owner"
        If ($User.userType -eq "Guest") {
            [array]$MemberRole = "guest"
        }
        $MemberDetails.Add("roles", $MemberRole.trim())
        $MemberDetails.Add("@odata.type", "#microsoft.graph.aadUserConversationMember")
        $MemberDetails.Add("user@odata.bind", $MemberId.trim())
        $Members += $MemberDetails
  }
}
# Add the membership information to the parameter body
$GroupChatBody.Add("members", $Members)
$NewGroupChat = New-MgChat -BodyParameter $GroupChatBody
Figure 2 shows the membership of the group chat created by the code above.
The same New-MgChatMessage command used to post a message to a one-to-one chat will post a message to the group chat.
Multiple Group Chats
While Teams reuses a one-to-one chat when one exists, it’s possible to create multiple group chats with identical topics. Like the customizable chat photo, Teams clients use the topic for display purposes to help users find chats in the list of chats. The chat identifier is how to reference specific chats. This means that code must be careful about which chat it targets when posting messages. For instance, if you run the Get-MgChat cmdlet to retrieve details of group chats, you might see something like this:
$GroupChats = Get-MgChat -filter "ChatType eq 'group'"
$GroupChats | Format-Table Topic, Id

Topic                             Id
-----                             --
Major Updates - Urgent News       19:1741422a23464620a6e71f363db2d51a@thread.v2
Major Updates - Urgent News       19:949d2f6c2b1f4f50b52714ddb2be4a36@thread.v2
Major Updates - Urgent News       19:5f6deae375f84b3396a9648722ba62b8@thread.v2
Warnings                          19:b2db6ce5bfb348709dccd9b8f959dfae@thread.v2
To distinguish between the chats with the same topic, you must check other details such as the chat members (Get-MgChatMembers) or the timestamp for the last update.
Posting Base Notes and Replies to a Channel
Teams organizes the messages that compose channel conversations (threads) into base notes and replies. This code finds the identifier for the General channel of the team we used previously and uses the New-MgTeamChannelMessage cmdlet to post a message as a new base note (conversation).
Like all channel conversations should have, the base note has a subject to tell users what topic the conversation covers. The code also marks the message (an optional step). If the message post is successful, the code fetches details of the note with the Get-MgTeamChannelMessage cmdlet and reports details of who posted the message and the post date.
[array]$TeamChannel = Get-MgTeamChannel -TeamId $Team.Id -Filter "displayName eq 'General'"
$ChatMessageBody = @{}
$ChatMessageBody.Add("contentType", "html")
$ChatMessageBody.Add("content", $Content)
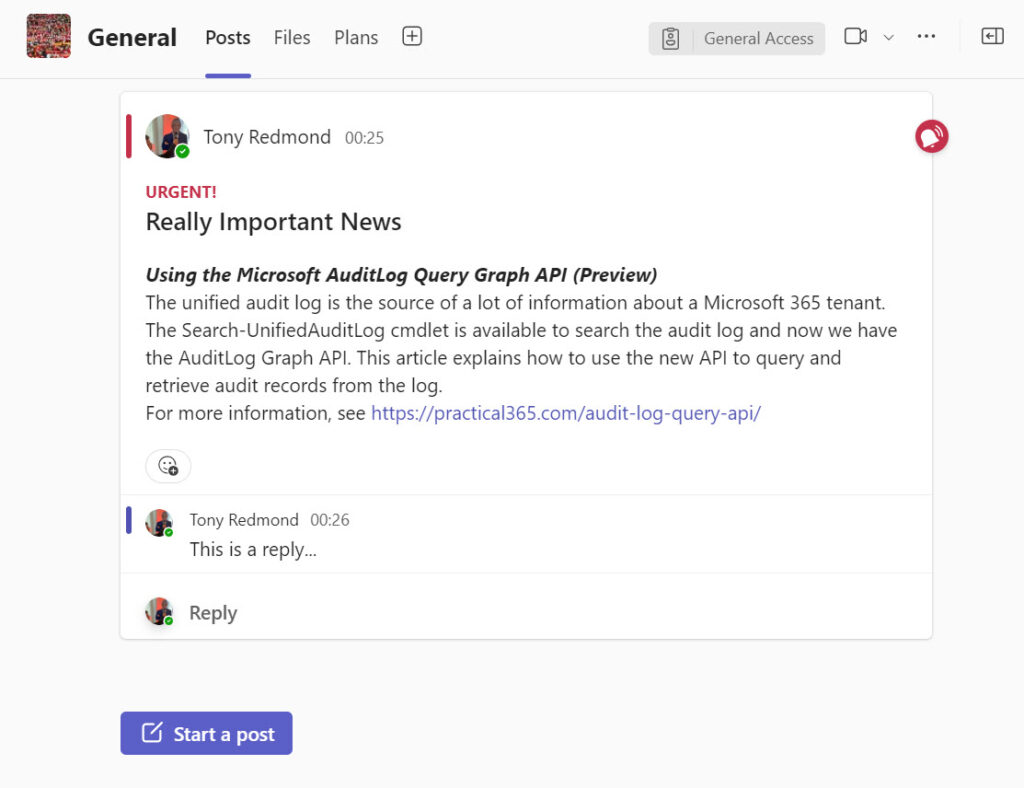
$ChannelMessage = New-MgTeamChannelMessage -TeamId $Team.Id -ChannelId $TeamChannel.Id -Body $ChatMessageBody -Subject "Really Important News" -Importance "urgent"
$MessageContents = Get-MgTeamChannelMessage -TeamId $Team.Id -ChannelId $TeamChannel.Id -ChatMessageId $ChannelMessage.Id
If ($MessageContents) {
Write-Host ("Channel message posted by {0} at {1}" -f $MessageContents.from.user.displayName, $MessageContents.createdDateTime)
}
To add a reply to the conversation, run New-MgTeamChannelMessageReply cmdlet and pass the identifier of the base note.
$ReplyMessageBody = @{}
$ReplyMessageBody.Add("contentType", "html")
$ReplyMessageBody.Add("content", "This is a reply...")
$ReplyMessage = New-MgTeamChannelMessageReply -TeamId $Team.Id -ChannelId $TeamChannel.Id -ChatMessageId $ChannelMessage.Id -Body $ReplyMessageBody
If ($ReplyMessage) {
    Write-Host ("Reply posted by {0} at {1}" -f $ReplyMessage.from.user.displayName, $ReplyMessage.createdDateTime)
}
Figure 3 shows the result of posting the base note and a reply to the General channel.
More Teams Messaging Options to Cover
Hopefully, these examples provide some insight into how the Teams messaging cmdlets in the Microsoft Graph PowerShell SDK work. Other possibilities exist, such as including attachments or mentions in messages. The Microsoft documentation will help you explore the necessary parameters or maybe I’ll get to them in a future article.


